
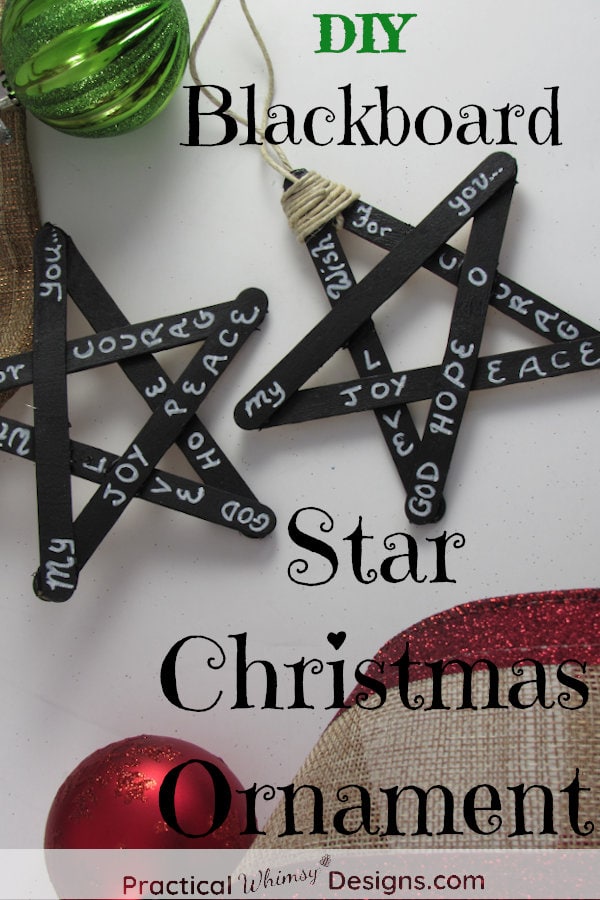
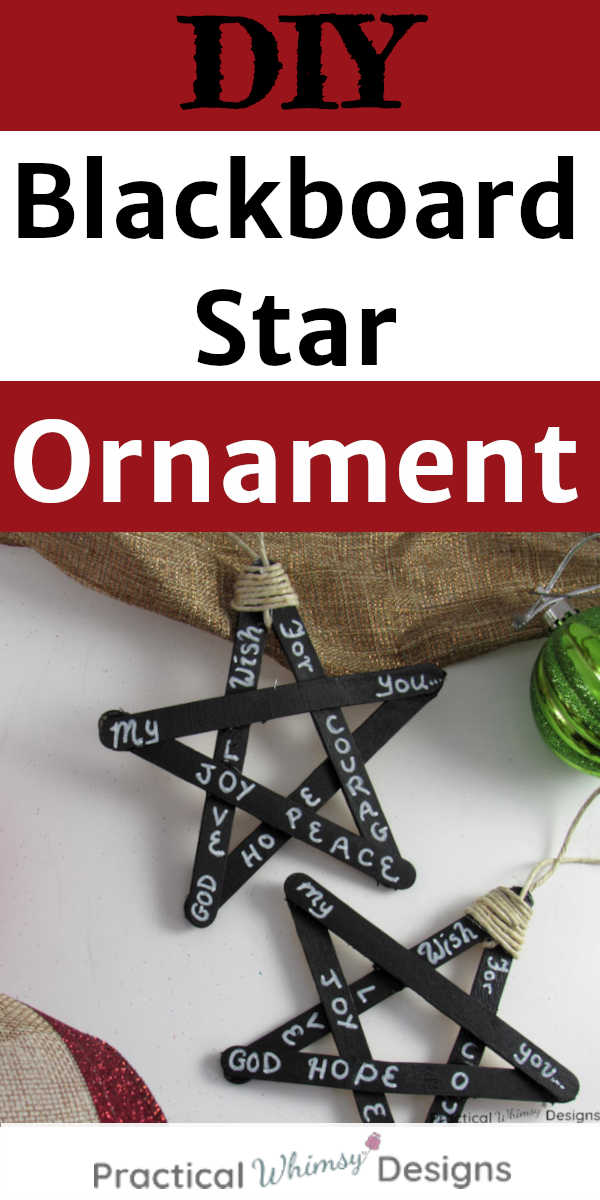
Make this easy Blackboard Star Christmas Ornament to add some beauty to your Christmas tree this year. It is a simple DIY and so fun to make.
This year has been crazy!
We have already gotten snow multiple times and we are only two weeks into November!
The only benefit (the only one I can see anyway) is that it makes me more excited for Christmas to come! Something about the snow and cold makes my mind drift to creating crafts and projects for the holidays.
What better way is there to celebrate the cold than making ornaments for our tree? (No. We haven’t decorated yet, but I am really starting to want to!)
Each year my husband and I buy our kids an ornament. I write the date on the ornament so the kids know which year they received it. They love putting their ornaments on the tree each year. And hopefully, by the time they graduate, they will have 18 ornaments to start decorating their own tree.
This year, instead of buying the ornaments, I decided to make them. And I am showing you first, in case you want to make some too. (So don’t go spoiling it. No telling them what they are getting for Christmas. 😉 )
This post contains some affiliate links for your convenience (which means if you click a link and make a purchase I will earn a small commission at no extra cost to you). Please see my disclaimer page for more information.
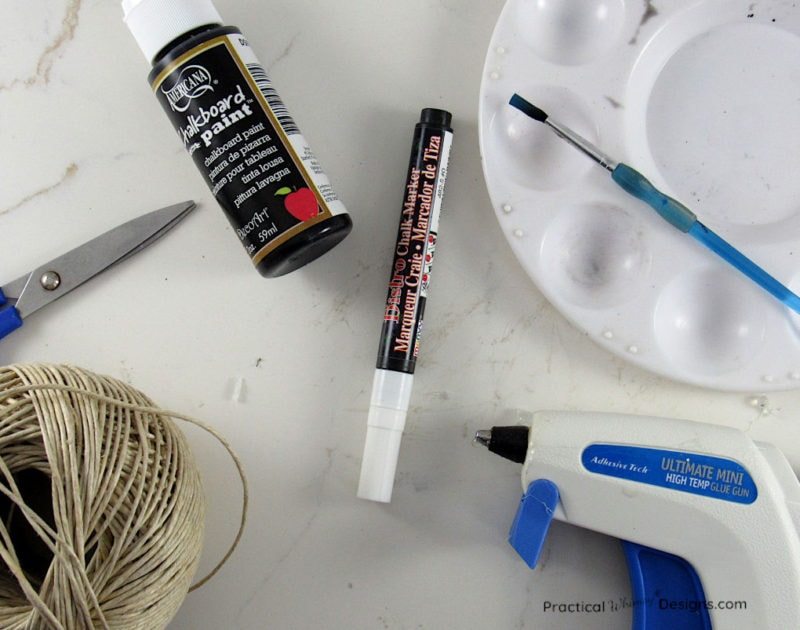
Materials You Need:
- Popsicle/craft sticks
- Hot glue gun
- Blackboard paint
- Paint brush
- Hemp, twine, yarn, or ribbon
- Scissors
- Chalk Marker
Steps to Make Blackboard Star Christmas Ornament
Step 1: Glue the Star
Use the hot glue gun to glue the craft sticks together to make a star. You will need a total of 5 sticks.
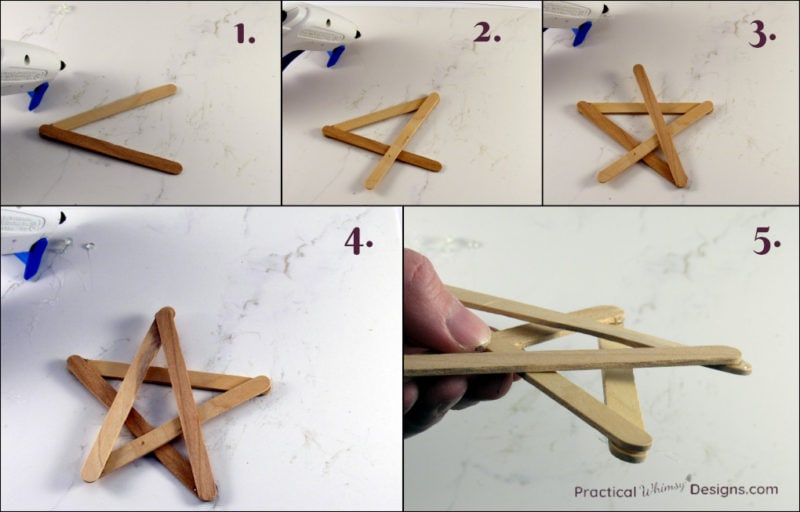
- Start by gluing two sticks together at one end. It should look like an open sideways triangle.
- Then glue another stick onto the top open end of the triangle, crossing it over the bottom open end. It will look kind of like a manger with the ‘feet’ crossing in an x at the bottom.
- Glue another stick to the right ‘foot’ of the manger, crossing up and over the stick you just glued at an angle towards the left. This will be the top point of the star so make sure it is angled towards the middle center of the top.
- Now add your last craft stick. Glue it to the last two open ends of the remaining craft sticks to finish the star. (If you work fast enough you should be able to wiggle the star around to make sure each point is fairly even before the glue sets too hard.)
- Glue any areas that the sticks overlap to make the star stronger and help it hold its position.
Step 2: Paint Blackboard Paint on the Star
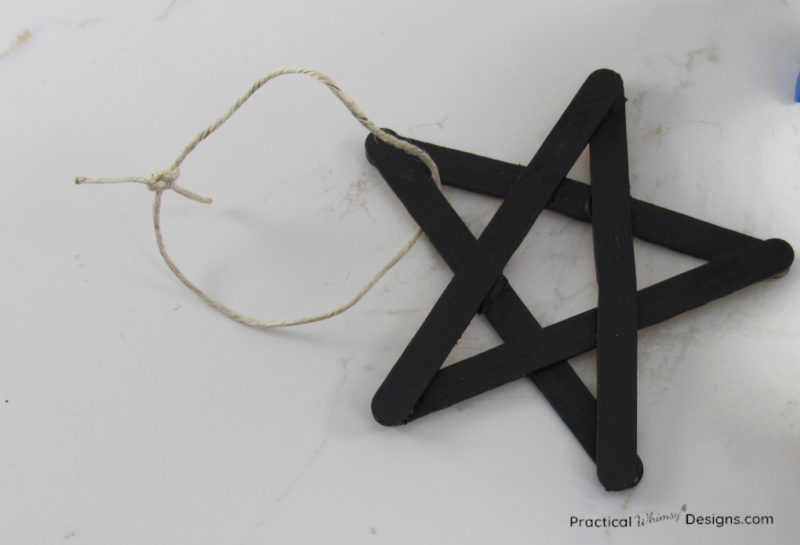
Paint one side of the star with blackboard paint. I chose to paint the edges too because I think it looks better.
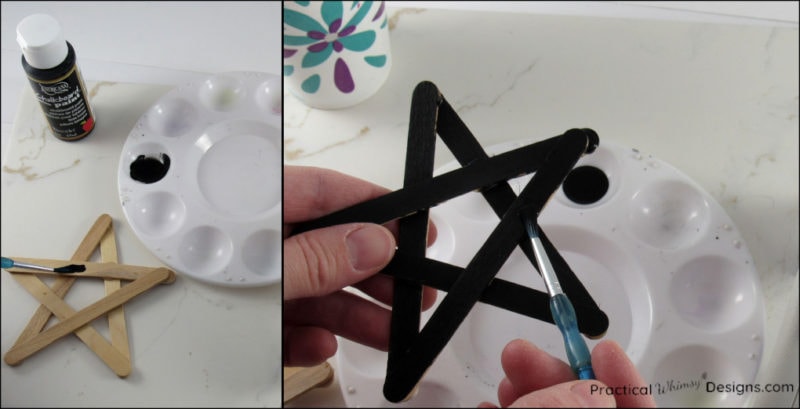
Follow the instructions on your blackboard paint. Mine said to paint in one direction, let the paint dry an hour, and paint a second coat in the opposite direction.
Step 3: Add the String
I used necklace hemp to create the string to hang the ornament and wrap the top. I think it would be pretty with yarn or ribbon too. However, I wanted a more rustic looking star so I went with hemp.
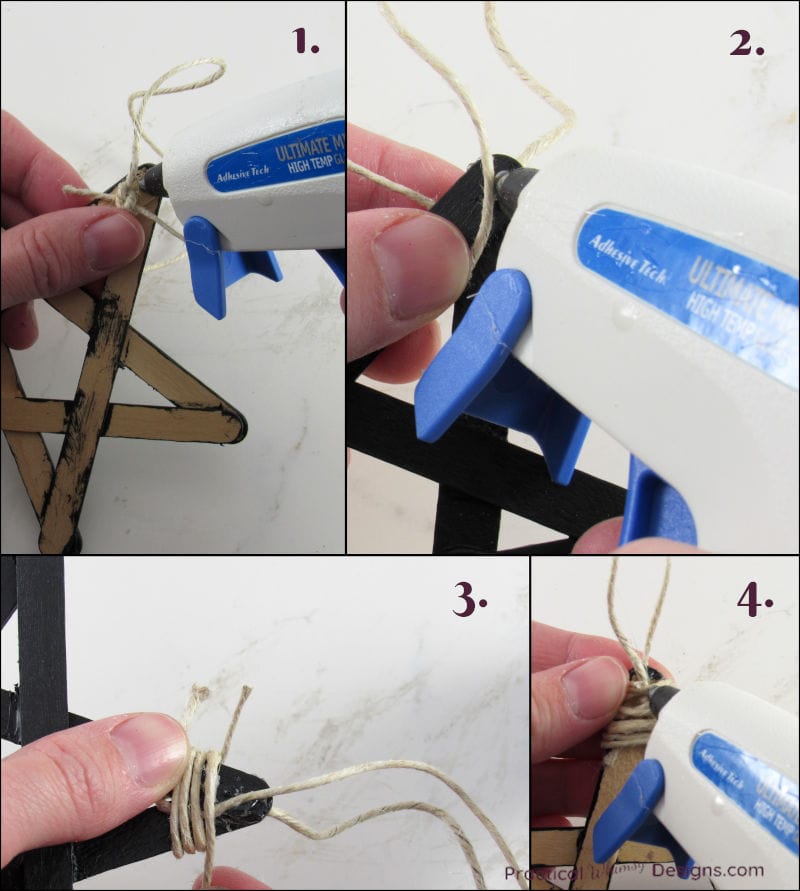
Start by tying a loop around the top point of your star. I used an 8″ length of hemp cord to make the loop.
- Glue the knot to the back of your star.
- Next, glue the front of the string to the front of your star to keep it from sliding around and becoming crooked.
- Wrap another piece of hemp around the top of the star, covering the bottom of the loop you just glued. Make sure you start the loose end at the back of the star so the smooth, more finished look is at the front. Keep wrapping it around until, you cover the bottom of the loop. Add enough glue on the front and back to hold the hemp in place. Note: I used a long piece and cut it after I had wrapped the top. This gave me the flexibility to wrap as much as I needed.
- Glue the loose ends to the back of the star. Add glue to secure everything in place.
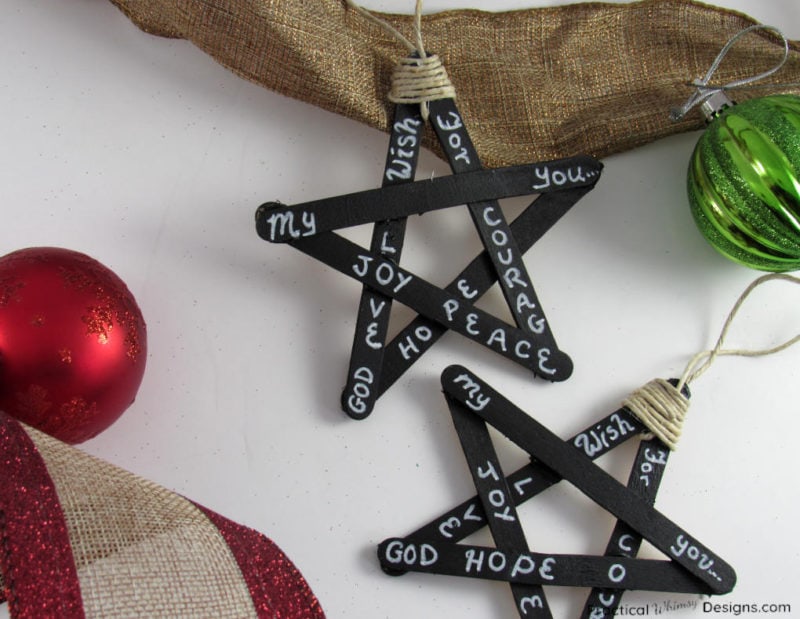
Step 4: Add Words to Your Blackboard Star Ornament
Since I was making these ornaments I wanted to add something meaningful. I kept thinking “My wish for you….” in my head.
But what was my wish for my kids? What were the things that I want them to get out of Christmas and out of life? What is the most important things to remember about Christmas?
I wrote my thoughts and wishes for them with a chalk marker on the bottom of the star.
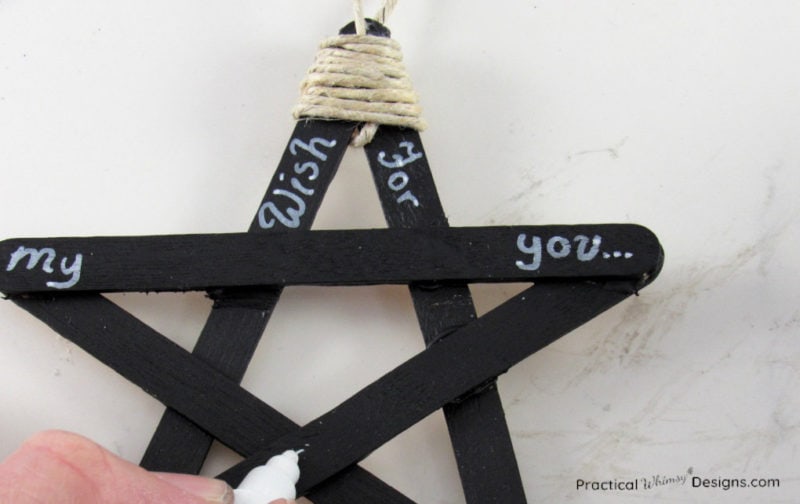
And here’s the result.
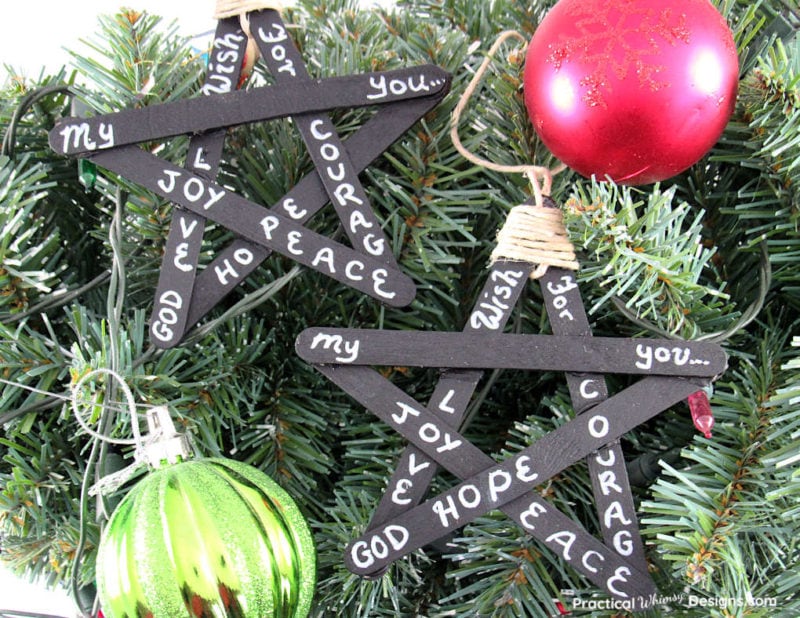
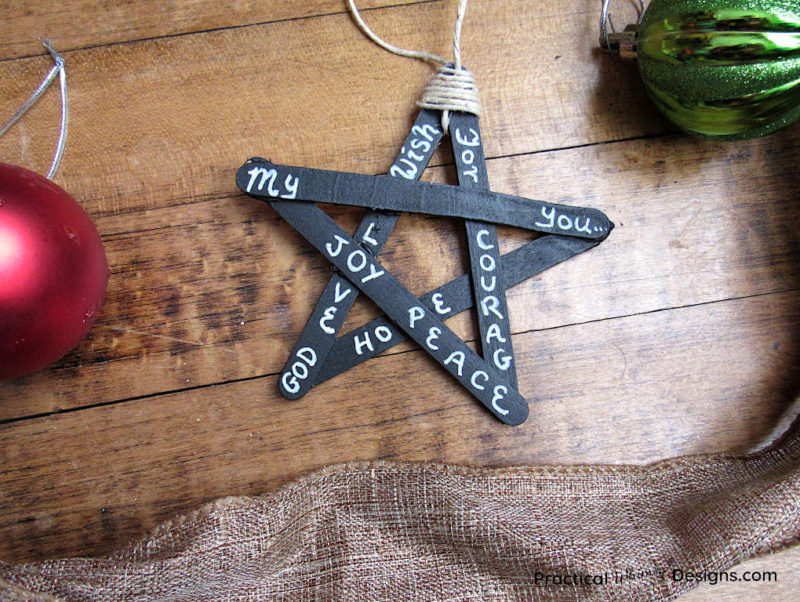
I love that this star is so customizable. You can write anything you want on it and make each one unique and special.
What about you? Are there important sayings or words that you would add to your blackboard star Christmas ornament? What traditions do you celebrate at Christmas time?
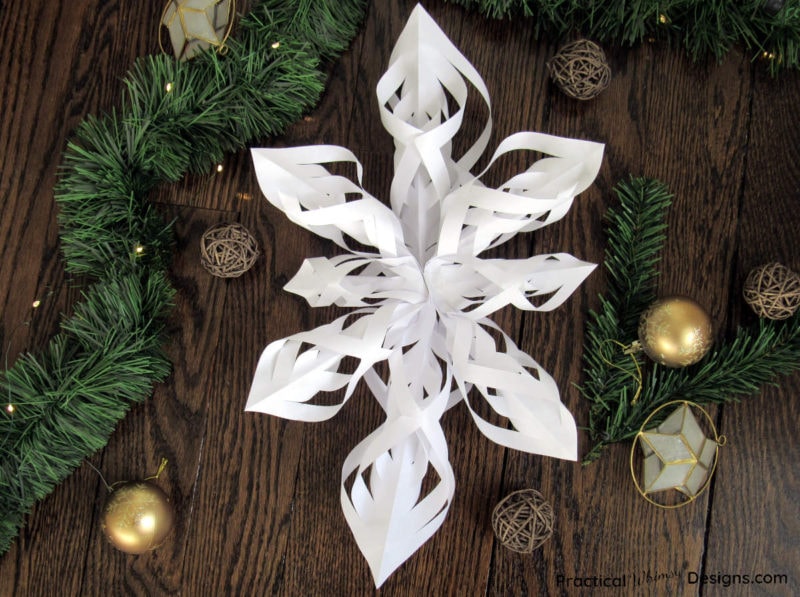
Need another ornament idea? Check out these DIY ornament gift tags.
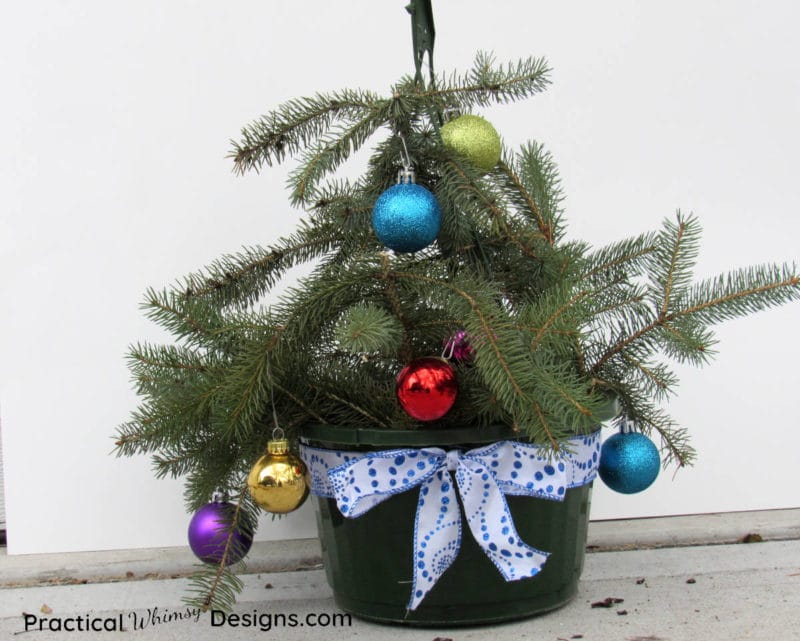
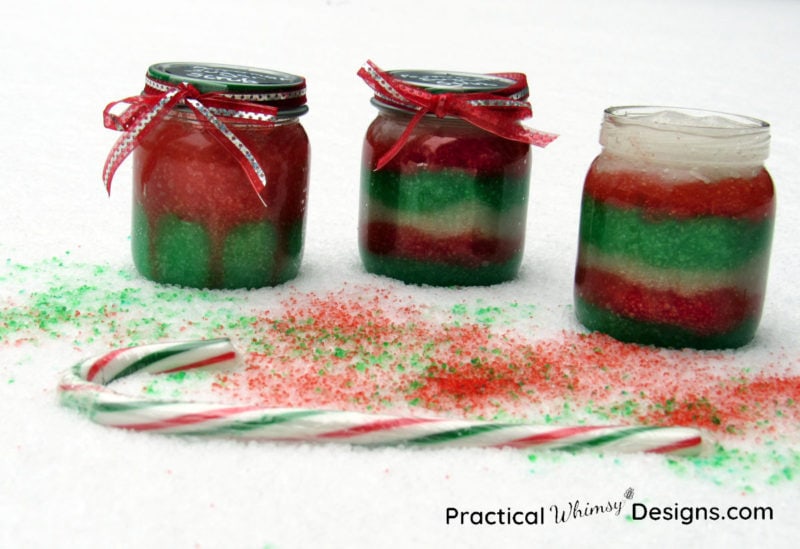
Looking for some more easy DIY Christmas decorations? You might like these cardboard Christmas trees or easy DIY Christmas pine basket. Or, if you are looking for an easy DIY Christmas gift, try these peppermint sugar scrubs.
Want More Great Ideas? You Might Like These..

Want to remember this tutorial? Save it to your favorite DIY Christmas board on Pinterest.


Are we friends on Instagram?
Follow @PracticalWhimsyDesigns to see more
behind the scenes projects