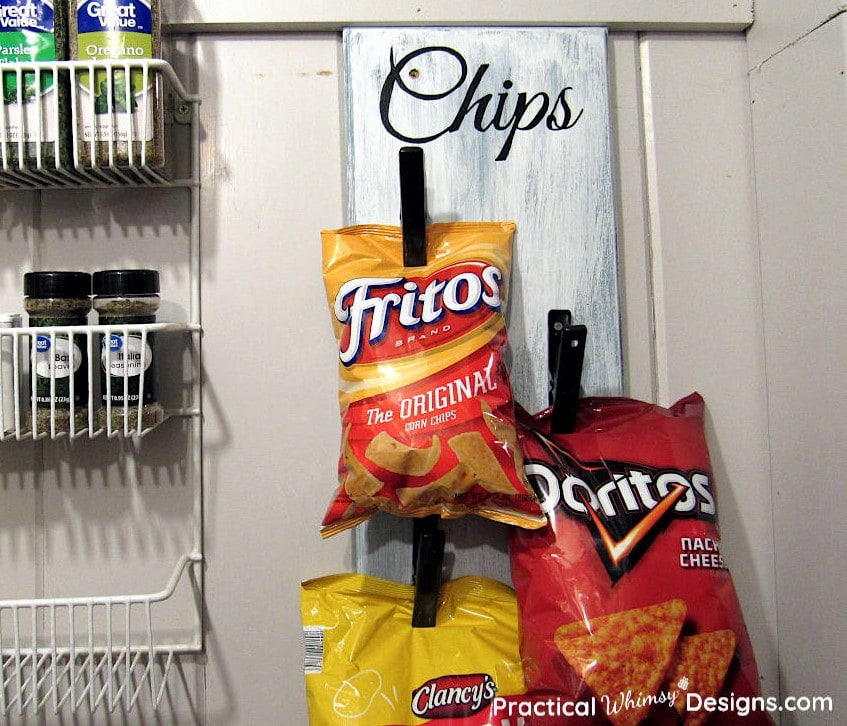
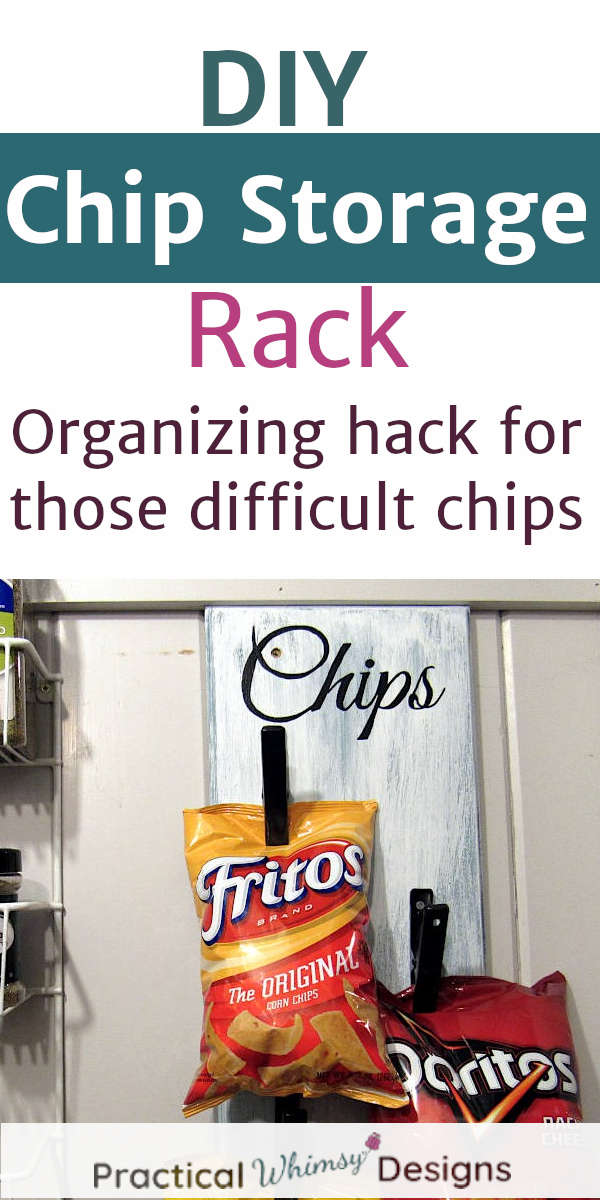
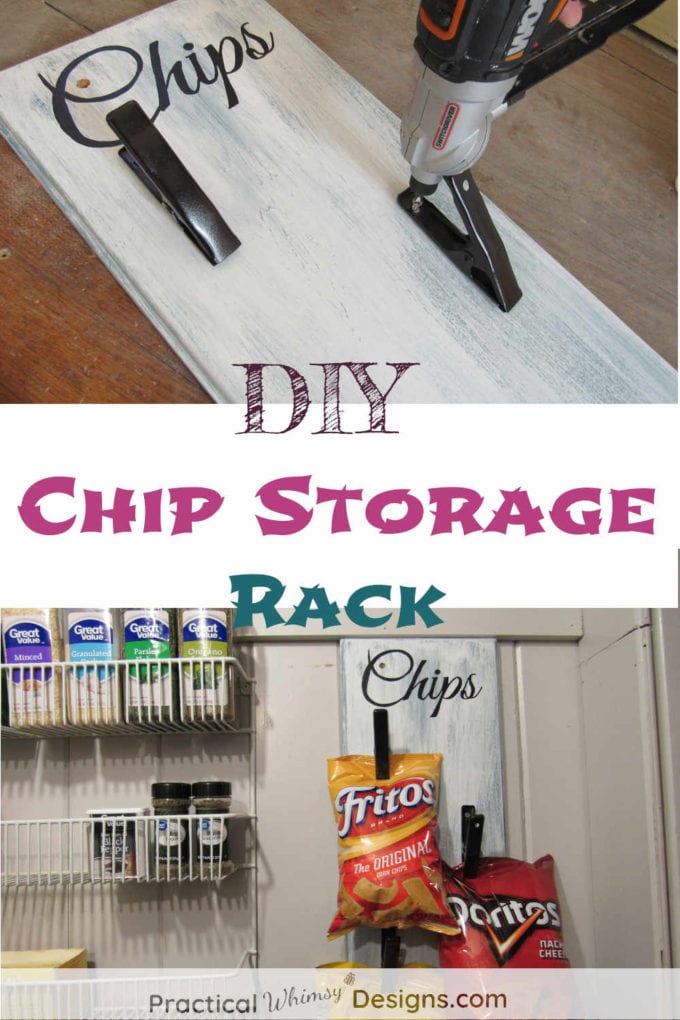
Tired of your chips falling off your shelf and onto the floor? Make this DIY chip storage rack to take back control of your pantry with vertical storage.
Here’s the million dollar question of the day. (Ok. Maybe it’s not worth a million dollars, but….close.)
What is the biggest problem item to organize in a pantry?
And the answer…… CHIPS!!!
Big bags of potato chips, cheetos, doritos, fritos, and any other ‘tos’ you can think of.
These bad boys are constantly taking up shelf space, falling on the floor, and causing a general nuisance of themselves.
But, don’t worry. I have created a solution to this predicament.
A DIY Chip Storage rack to put those chips in their place.
Hey! Before you go further, I would love for you to connect with me! Please follow me on Facebook, Pinterest, and subscribe to my newsletter to stay informed on my latest posts and news.
This post contains some affiliate links for your convenience (which means if you click a link and make a purchase I will earn a small commission at no extra cost to you). Please see my disclaimer page for more information.
Materials You Need:
- Board (We used a 1×10″ that was 54″ tall)
- Sander (I couldn’t find ours for sale anymore, but this is a good brand of sander too) or sandpaper
- Primer and Paint (Any color you want)
- Paint brush
- Rag (opt. depending on the painting technique you use)
- Clips (We used a 1″ spring clamp,)These spring clamps are similar and have a 3/4-1 inch opening.
- Spray paint (I used this color) and primer -optional depending on the look you want
- Drill
- Screws
- Pencil, chalk, and paint marker
Steps to Make a DIY Chip Storage Rack
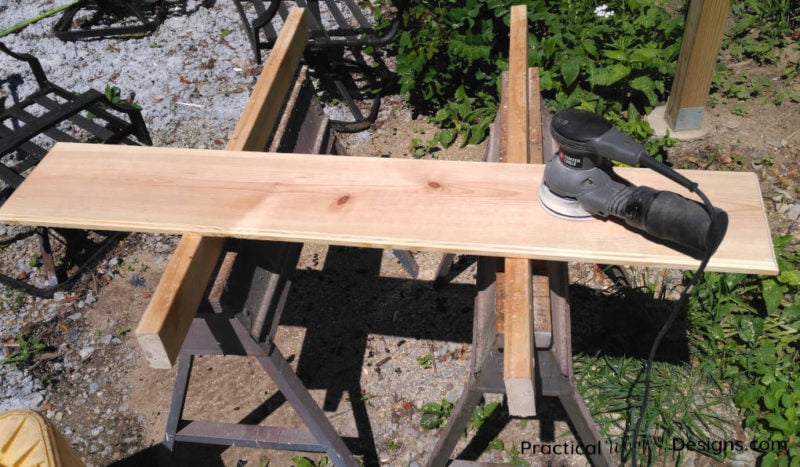
Step 1: Prep the Board
Measure the space where you are planning on hanging your chip storage rack and decide on the size of board you want to use. Either purchase or cut a board to the size you need.
If you want to get fancy, you can router the edges to add some dimension to the board, (which is what my husband did) but it is entirely unnecessary. The chips won’t care.
Take your sander or sandpaper and sand any rough edges.
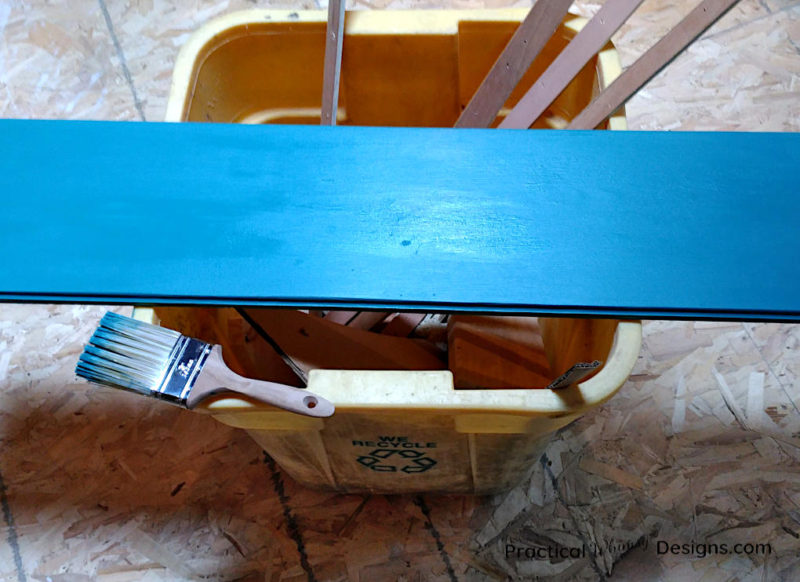
Step 2: Paint the Board
Now, you get to paint the board the color you want. I only painted the front and the sides. No one will see the back since it will be against a wall.
If you like the look of this chip storage rack, here’s what I did.
First, I primed the board and let it dry.
Then, I painted the board a dark peacock blue and let that dry. I wanted a dark base coat so I could paint a lighter color over the top for a more weathered, rustic look.
Finally, I came back over the blue with a white paint. To get the weathered look, brush a small amount of white paint on the board.
Then, rub it in with a rag to blend it. Make some areas thicker and use less white in other areas. This gives the impression of wear and adds to the rustic look of the board.
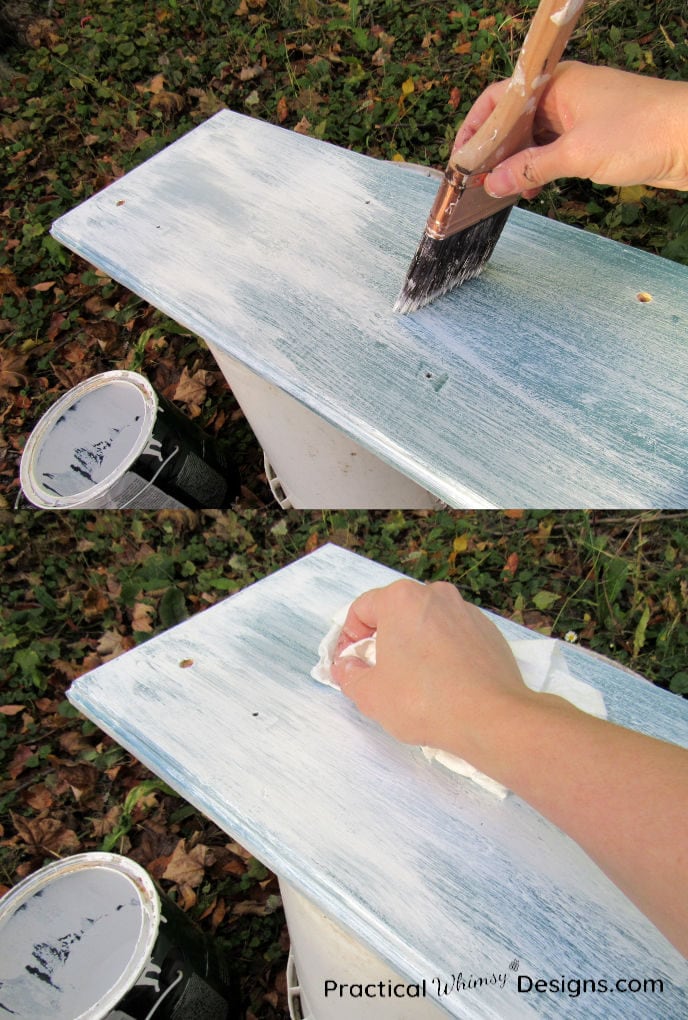
Since edges of items tend to wear the most, I left spots of blue on the sides and only painted some areas white.
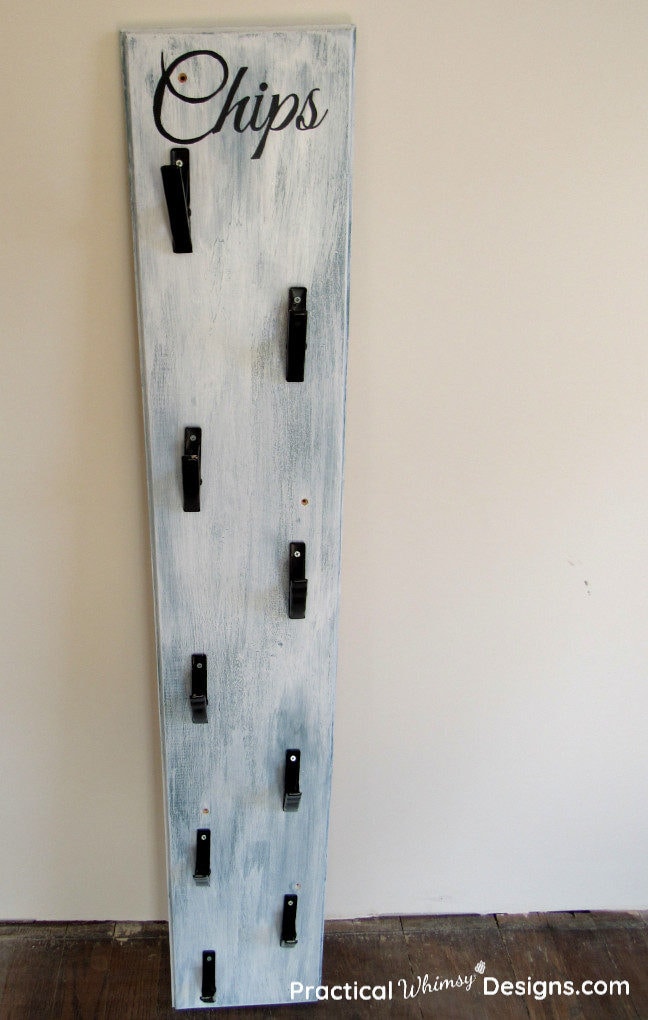
Step 3: Prep the Clips
First, decide how many clips you want on your board. Will you stagger them? Hang two straight rows? One row? etc. Once you know the number you need, it’s time to get them ready.
The clips that we purchased were silver with red rubber protectors on them. I removed them and also peeled off the stickers.
I don’t know why this was the case, but half of our clips already had holes drilled in the top of the handle and half didn’t. If possible, look for ones with pre-drilled holes. If you can’t find these you can drill a hole in the top with a drill bit and drill. (But it’s a lot easier if you don’t have to!)
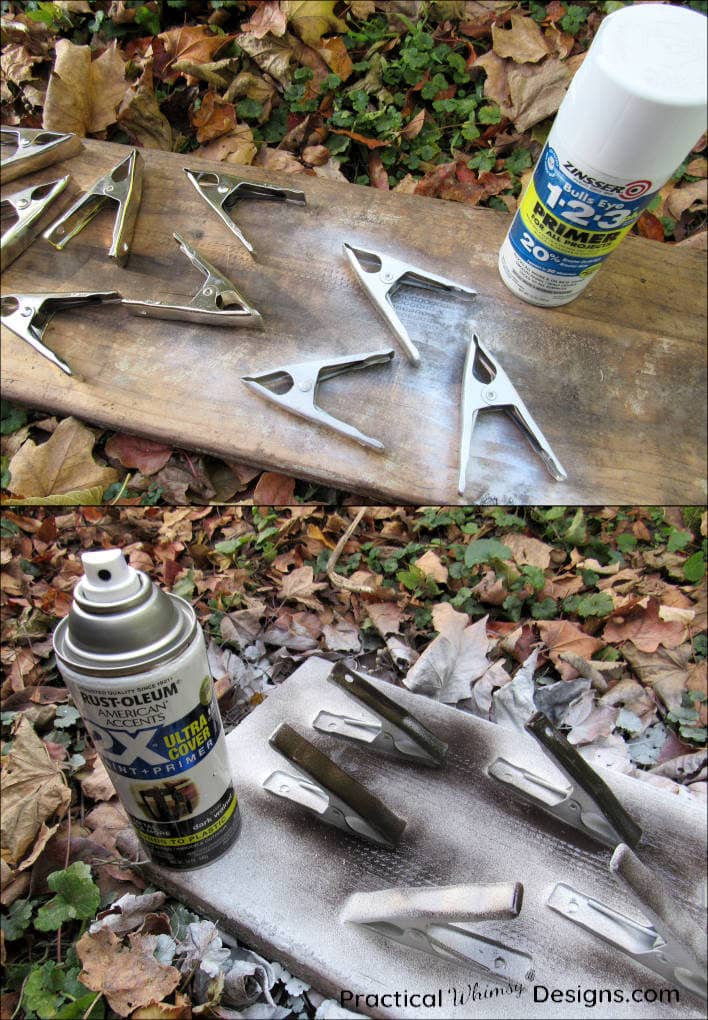
Step 4: (Optional) Paint the Clips
At this point you have the option of spray painting the clips. I chose a dark walnut spray paint for ours.
If you are going to paint the clips, make sure they are clean and free of rust.
Spray them with primer.
Then paint them. It is always best to use multiple thin coats when using spray paint. Read the directions on the can for drying times.
Step 5: (Also Optional) Paint the Word “Chips” on the Chip Storage Rack
This step is also optional, but I think it makes it look elegant.
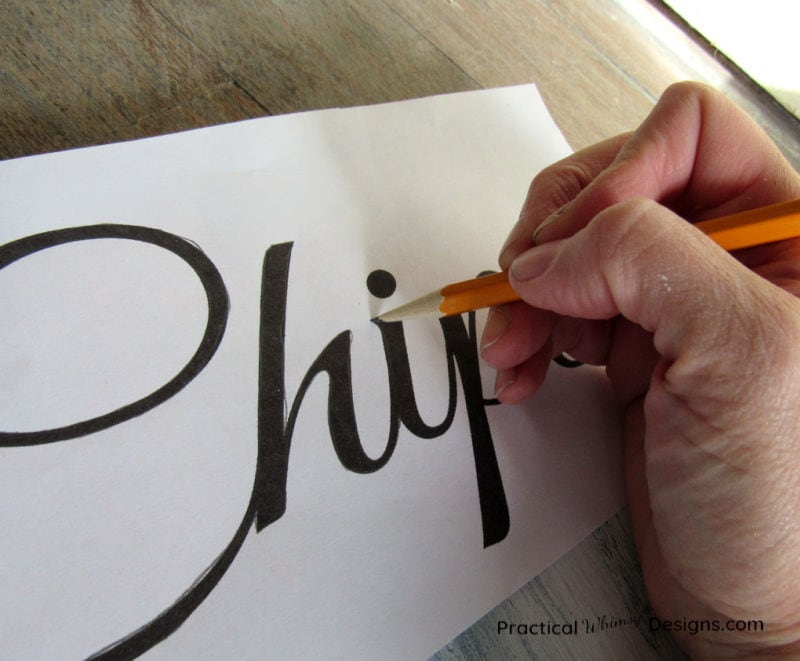
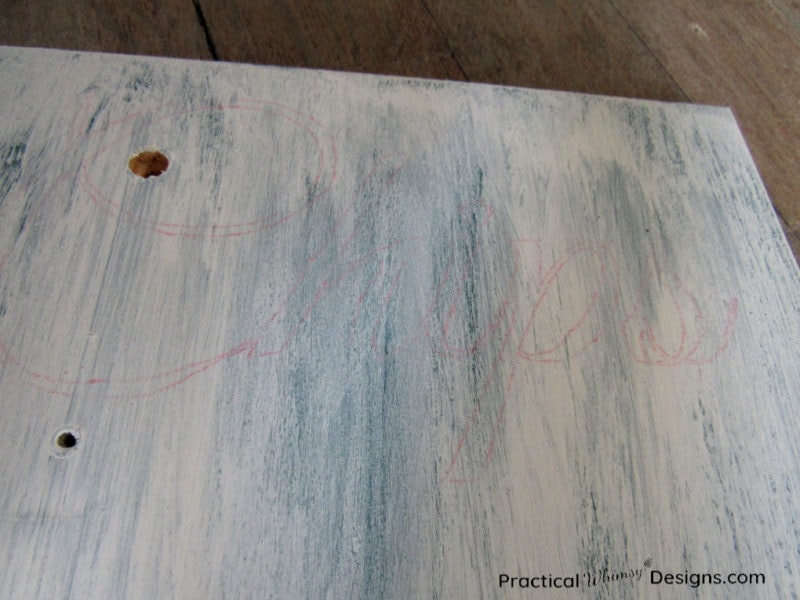
Find a stencil or print out the word “Chips” using your favorite font on your computer.
If you have a stencil, trace the word onto the top of your board.
OR If you have a printed font, transfer it to your board using your favorite method.

I used the chalk method.
Color chalk on the back of your paper.
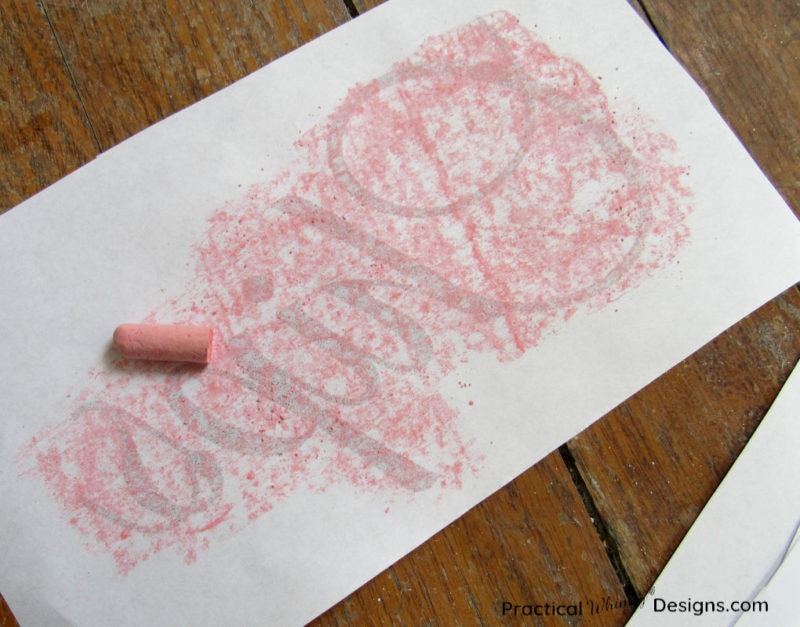
Gently place the word on the board.
Trace the outline of the word onto the board with a pencil.
If you did it right, you should see a thin chalk outline of your word.
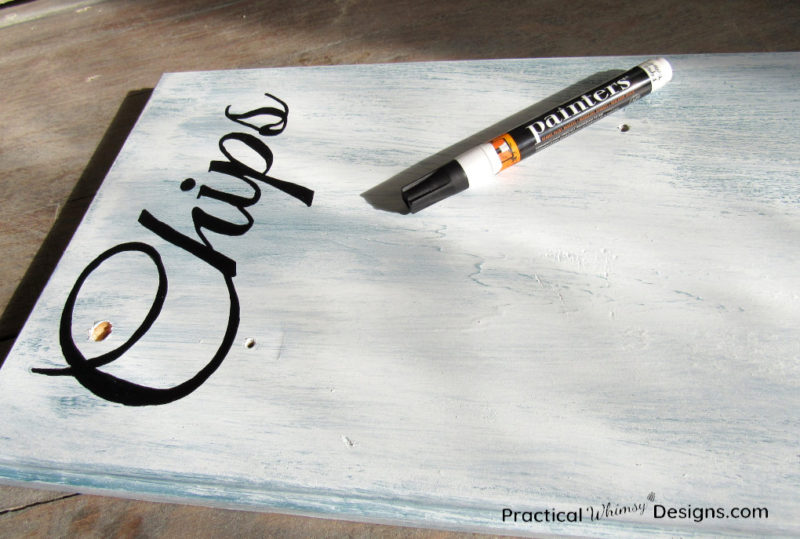
Now paint the word onto your board and let it dry. (I used a black paint marker)
Step 6: Attach the Clips to Your Board
Since you already figured out how many clips you wanted to use in step 3, this next step should be easy.
Measure your board and do some math to space your clips out evenly. Mark where your clips are going and then screw them in with a drill and small screw.

Step 7: Attach Your DIY Chip Storage Rack to the Wall or Door
Now that you have made this beautiful storage rack, you need to store things on it. Things like chips.
We used screws to hang our rack on the wood paneled walls of our pantry. Remember to use a hanging method that works for your space. Screw into studs or wood for a more secure and safe hang.
Note: If you are using screws it is helpful to pre-drill holes into your board to give your screws a straight path. This provides a much easier screwing experience.
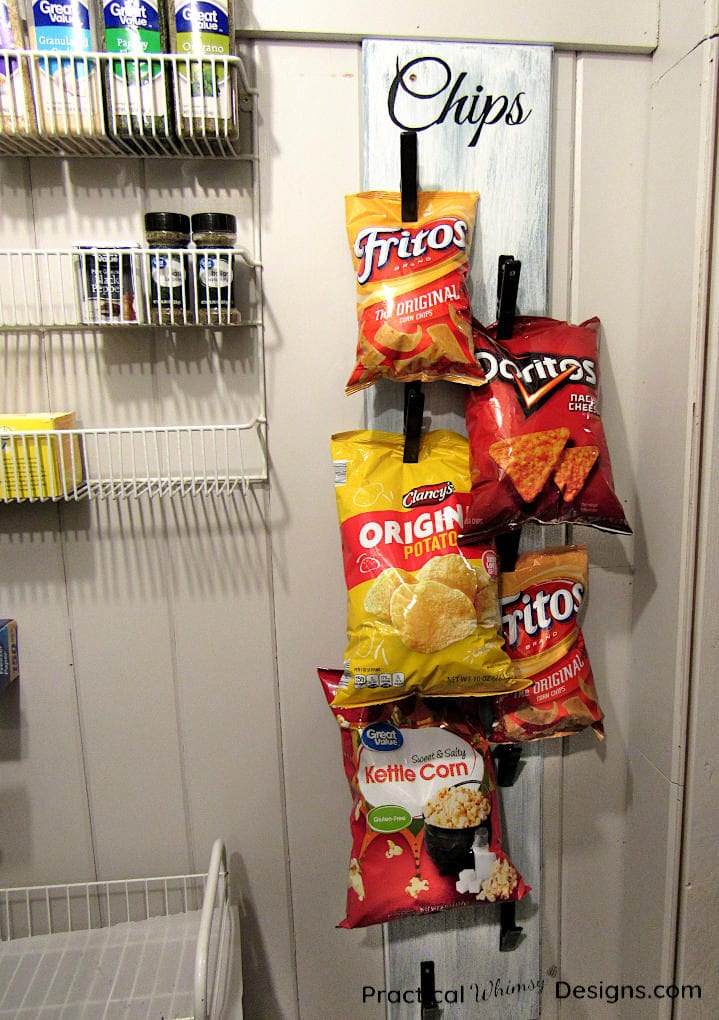
Finally, you can reclaim your pantry shelves and floor and keep those chips clipped where they belong.
Need a couple of other organization ideas? Check out these posts on 5 steps to organize the junk drawer in your life or an easy way to fold bags to keep them from taking over your pantry.
Want to remember this for later? Save this to your favorite organization board on Pinterest.
I would love to know. What other items in your pantry are taking over and need some organization?


The clips (clamps) you have linked to Amazon have red silicone grips on them. Did you remove these? Is the hole to screw the clips to the board under this silicone?
Also, did you use the 1” clamps (of which there are 5 in the package) or the 3/4” clamps (of which there are 15). If you used the 1”, you must have purchased two packages to get the number of clamps you have on the board?
Thanks for the good ideas.
Yes. I removed the silicone grips and the holes were underneath.
Thank you for bringing up the confusion on the product I linked to. Either option would work. I had used a bunch of random 1 inch clips my husband had laying around, but the 3/4 inch should also work just fine. The ones I linked to were very similar, but since I had worked with multiple types it was hard to find the exact clamp I used.
I did link to a different product on Amazon now that appears to have the pre-drilled hole in the clamp.
I hope that that helps and I’m so glad that you like the chip clip idea.
Thank you – I appreciate the quick response!
Very clever idea! You could hang a couple of these inside the pantry door – love it!
Thank you! I love how much space they free up.