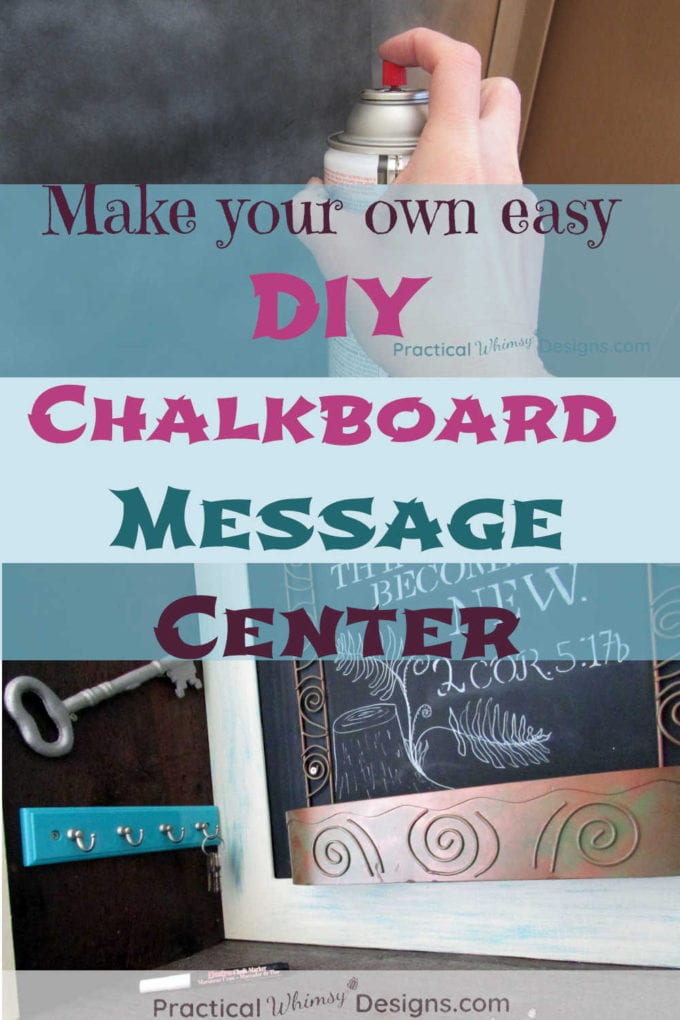
Wishing you had a space to leave notes or jot down your favorite inspirational saying? It is easier than you think to make a DIY chalkboard message center that keeps you organized and inspired.
Chalkboard message centers.
What is it about these black pieces of board that cause our hearts to quicken and our hands to reach for that white piece of chalk? Maybe it is that deep desire in each one of us to create pictures and messages that can easily be wiped off when we feel like changing them. Or maybe it’s because black and white goes with anything?

I’m not sure. But what I do know, is that our mud room was in desperate need of one.
Well…it needed a place to stash our keys when we came in. And it needed some wall art.
The solution: Make a DIY chalkboard message center, of course.
Now, I know that there are many beautiful ones for sale and if that is more along the lines of what you have time for, I stuck a few ideas at the bottom of this post. But a chalkboard message center is actually relatively easy to make and very versatile. Most of the material we used (besides the paint) were scraps left over from other projects or things we found at garage sales.
Materials You Need:
This post contains some affiliate links for your convenience (which means if you click a link and make a purchase I will earn a small commission at no extra cost to you). Please see my disclaimer page for more information.
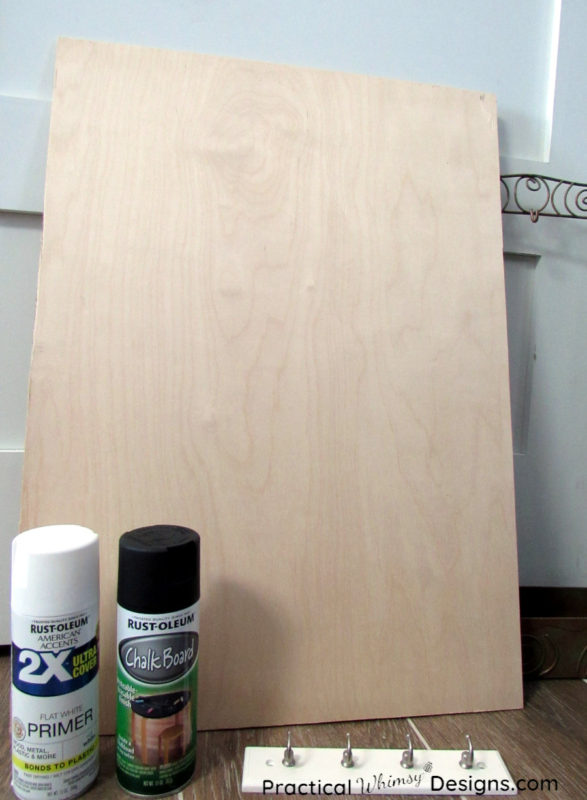
- Chalkboard paint (chalkboard spray paint works great)
- Primer (if you are painting unpainted wood or metal)
- A piece of thin plywood or picture frame backing
- Sander or sandpaper (opt. if your backing isn’t smooth)
- Frame
- Glue
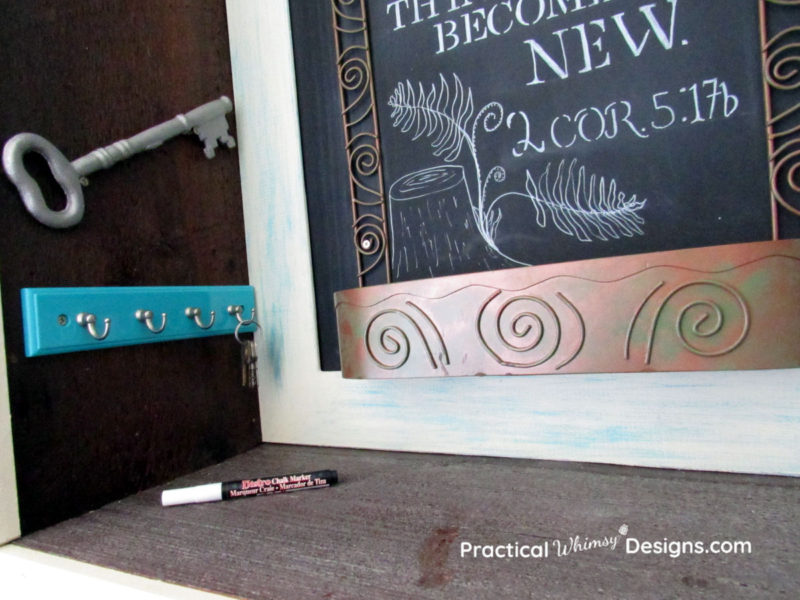
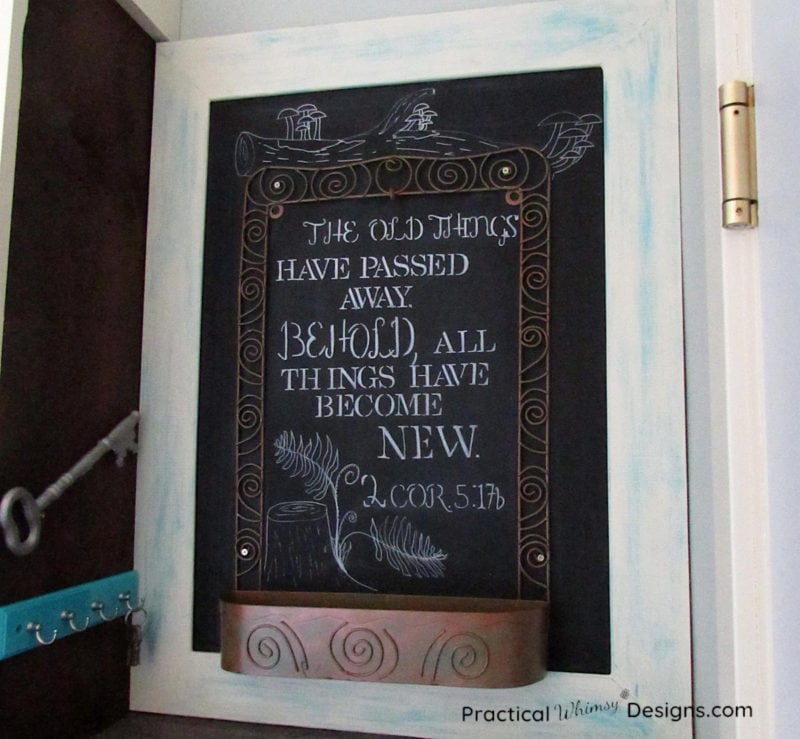
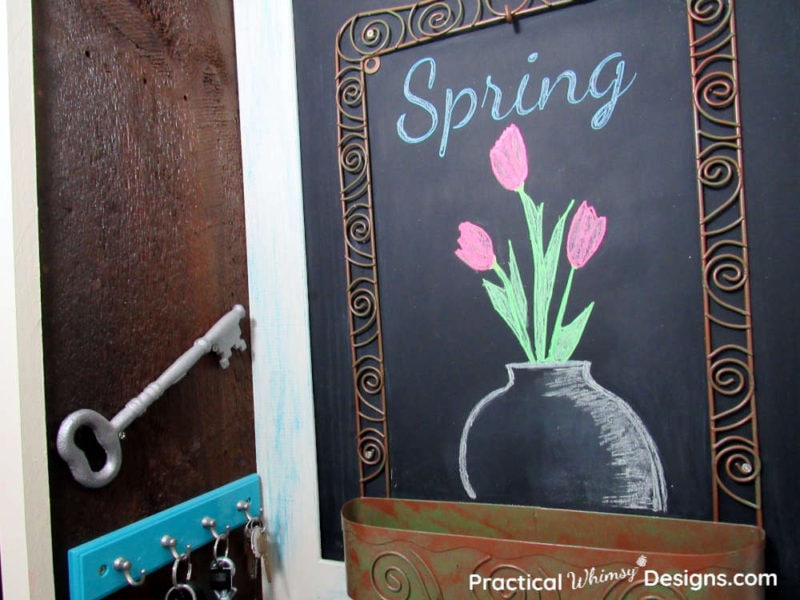
- Accessories (we used a metal frame we found at a garage sale to hold paper and pen and hung a small key holder next to our board for our keys) You can take a look at a few cute key holder ideas below if you need a few options.
How to make a DIY Chalkboard Message Center
Step 1: Prep your stuff
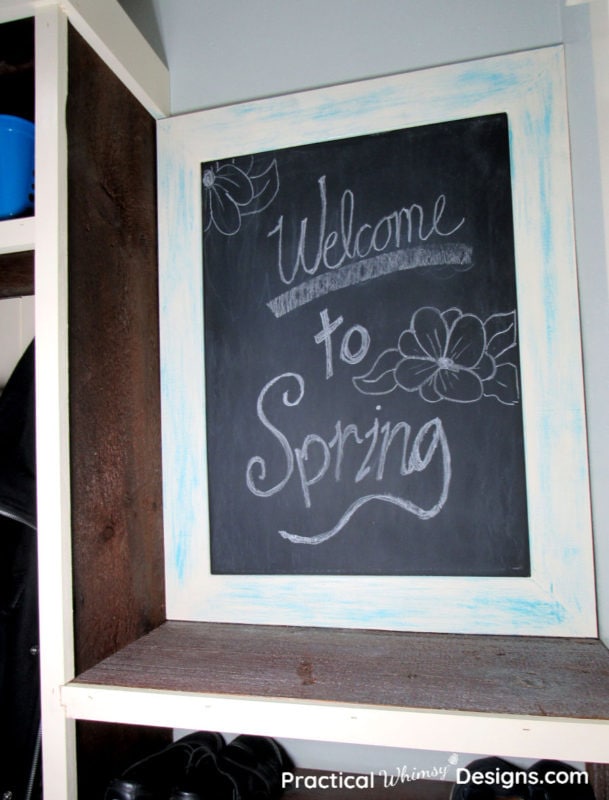
First, decide what you will use for your chalkboard surface. We had a piece of 1/4 inch plywood leftover from another project. Ours randomly happened to be 19 1/4″ x 26 3/4″ which looks great where we want to hang it. The size should be based on the location you want to hang it and the size of the frame you have for it.
Since we didn’t have a frame, my husband made one out of scraps of wood from another project. The easiest thing to do, however, is find a frame you love and create your chalkboard based on that frame size.
My biggest tip: Make sure that your chalkboard surface is smooth.
I was pretty halfhearted when I sanded the surface of my plywood the first time. After I had primed and painted, there were rough areas that still appeared on my board. I had to re-sand with an electric sander and paint the board again.
Whatever you use for a backing, take the time to check it’s smoothness because the paint won’t change the texture for you.
The form you have selected does not exist.
Step 2: Paint
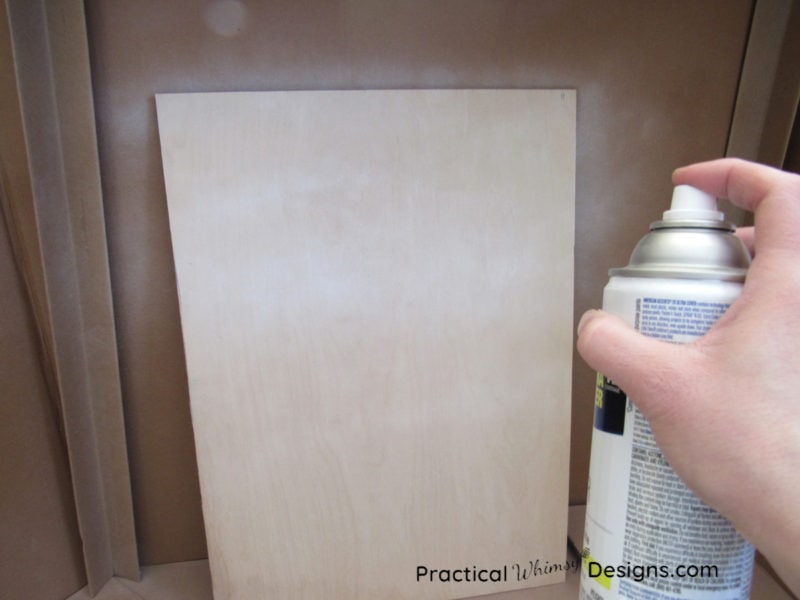
If you are painting unfinished wood or metal, prime it before using chalkboard paint on it. I used primer in a spray can.
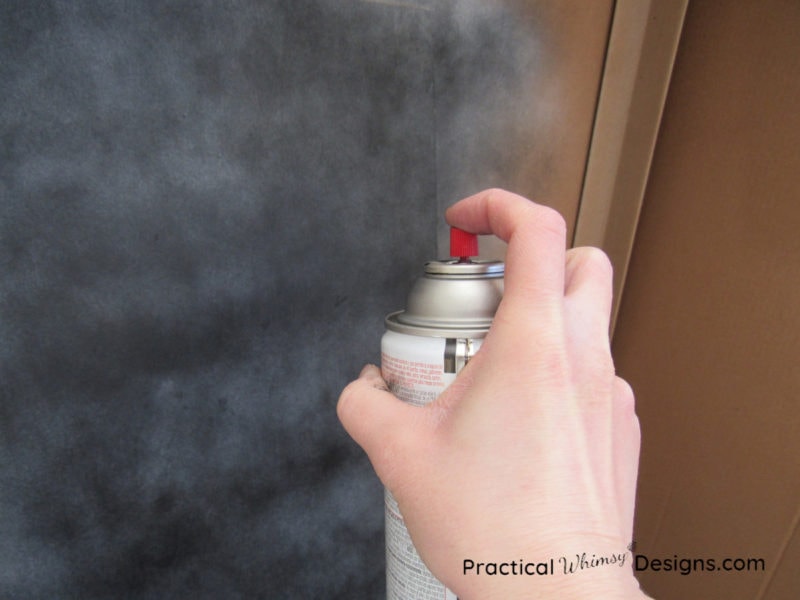
There are a couple of different methods to apply chalkboard paint. I used a brush to paint on my removable blackboard labels. However, the surface of a chalkboard sign is generally much larger. I also didn’t want any brush strokes to be evident.
Luckily, they have chalkboard spray paint!
If you choose to use spray paint, make sure to work in a ventilated area with protection set up against over spray. Multiple thin coats of paint are always better than trying to cake the paint on, so allow for applying and drying time.
This is also the time you would want to paint your frame if you are going that route. I used this technique on my frame if you are looking to add subtle color through distressing.
Step 3: Attach the Frame
If your frame and chalkboard are separate pieces, you will need to attach them to each other so that they stay together when you hang your chalkboard on a wall.
We made our own frame, so we hot glued the chalkboard onto our frame.
Step 4: Prime Your New Chalkboard
The chalkboard paint that I used said to prime the chalkboard before drawing on it. To do this, take a piece of chalk and rub it across the chalkboard until it is white. I usually use the side of the chalk so I can cover more ground.
Then wipe it off.
Now it is primed and ready to go.
Step 5: Hang your DIY Chalkboard Message Center and Attach Accessories
That is it! Your message center is ready to go!
Easy, right?
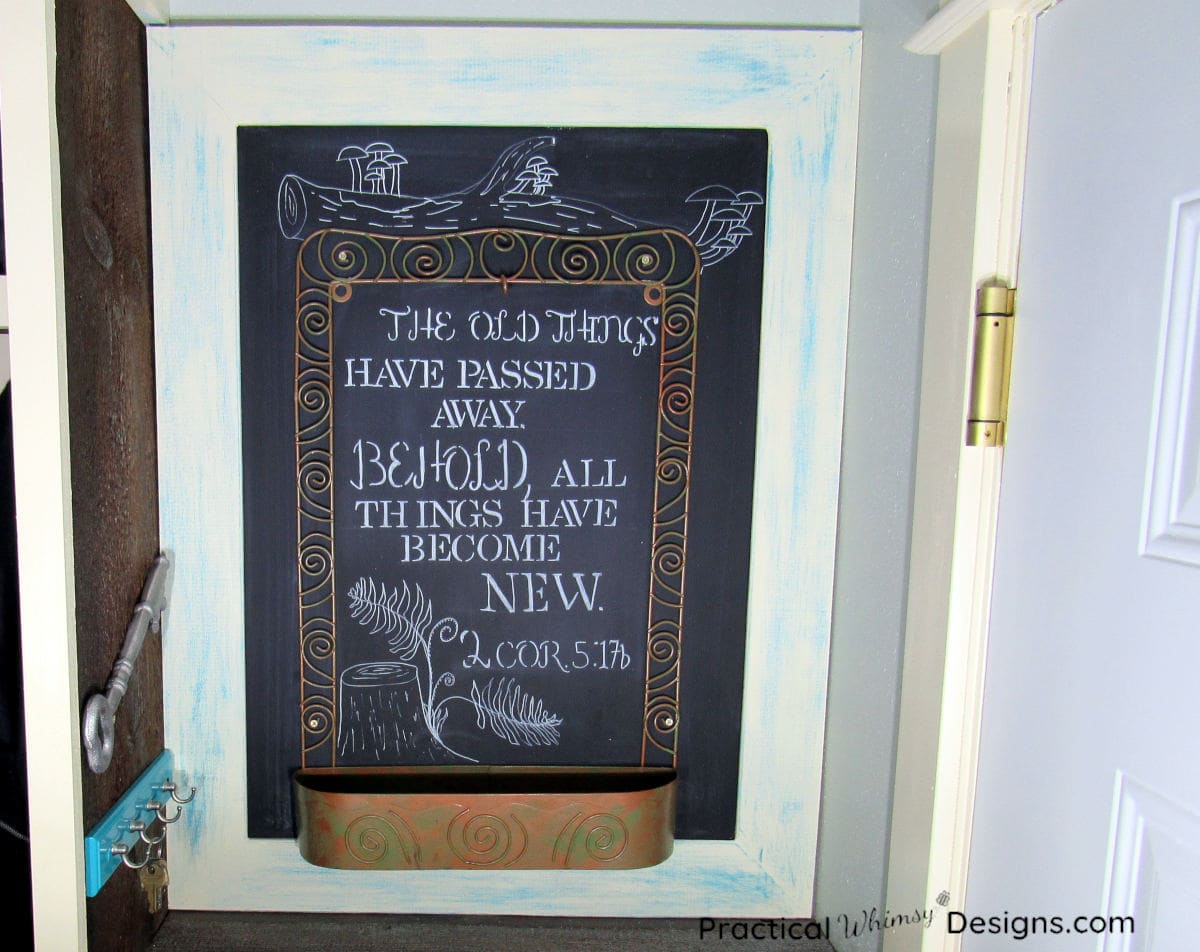
Hang any accessories on it to help you stay organized. We used ours in a little nook next to our garage door. It is a great place to drop off keys and leave any messages that need leaving.
Now comes the hard part; writing your chalkboard message.
BUT, don’t worry!
You can always erase it, if you don’t like it or find a new inspiration. That is the fun of a chalkboard!
You can either use regular chalk like this:
Or use chalk markers.
I like the look of chalk markers better, but they are harder to get off. The best way I have found to remove them when you are ready to change your art, is to wet a small piece of a magic eraser and rub the marker off with that.
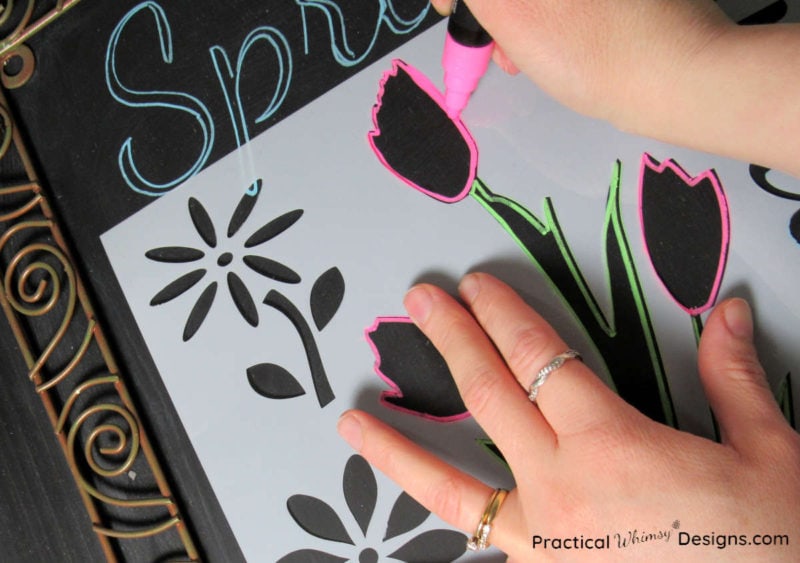
Using stencils to decorate your chalkboard can be another great way to make beautiful chalkboard art for your message center.
Making a DIY chalkboard message center is so much fun because it truly gives you the freedom to use whatever material you love and create something that is truly unique. So, keep your eyes open at garage sales and second hand stores or search your garage for scrap wood to make a complete DIY version and see what you can find that inspires you and fits your personality and character.
Now, go forth and chalk.
Don’t Have Time to Make a Chalkboard?
Scroll through and click on the images below for a few fun options you can purchase instead.

Want to remember this DIY chalkboard tutorial? Save it to your favorite DIY board on Pinterest.
Want More Great Ideas? You Might Like These..


Are we friends on Instagram?
Follow @PracticalWhimsyDesigns to see more
behind the scenes projects
I didn’t know they made a chalkboard spray! Turned turned out awesome!
Yes! The chalkboard spray makes it so much easier to do quick projects. Thank you so much for reading.