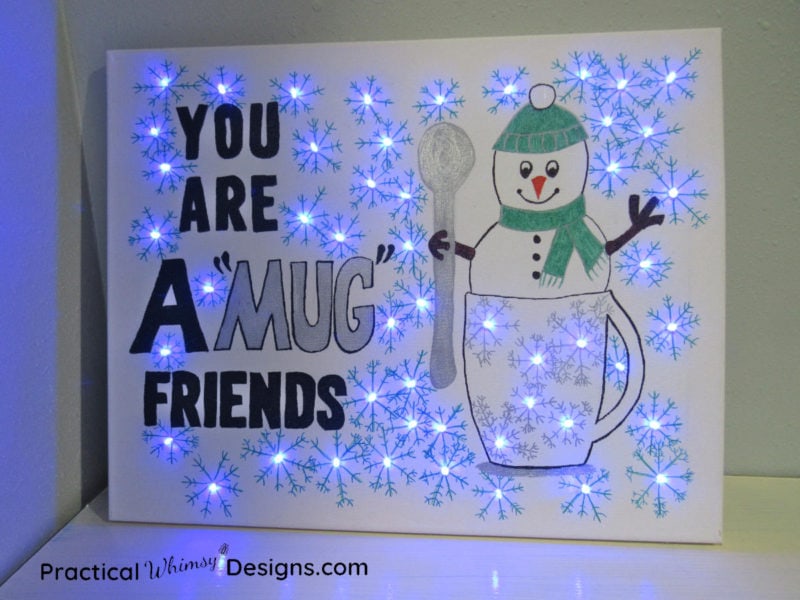
Lighted canvas pictures can add a beautiful glow to any room. Use these steps to create your own DIY Snowman lighted canvas to celebrate all that is fun about winter.
Snow.
Who knew one word could instill so much emotion?
Regardless of what side you stand on the cold white stuff, there is one thing that I think makes snow better all around.
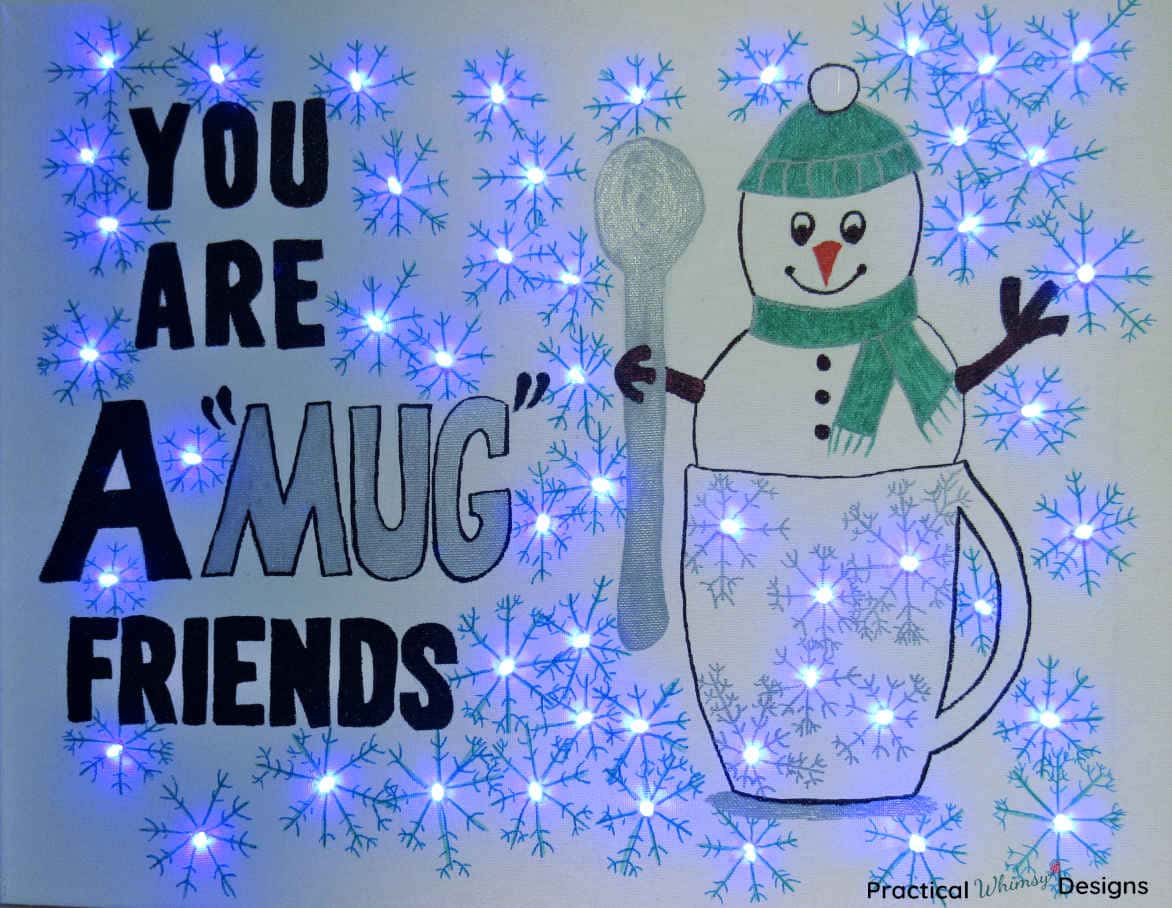
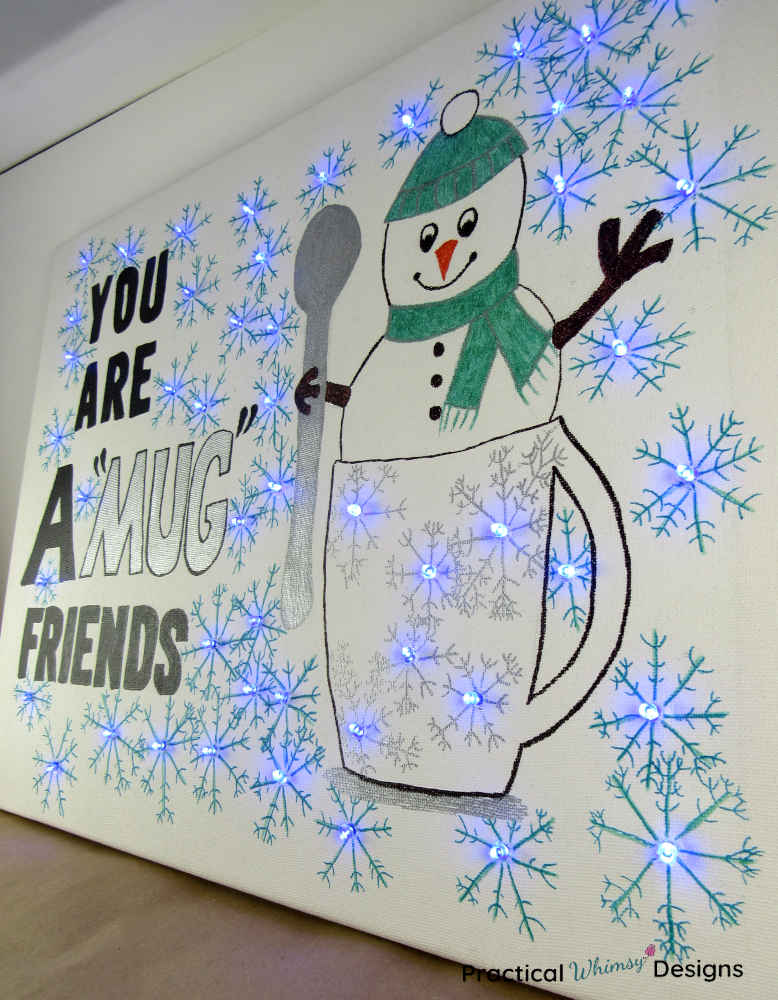
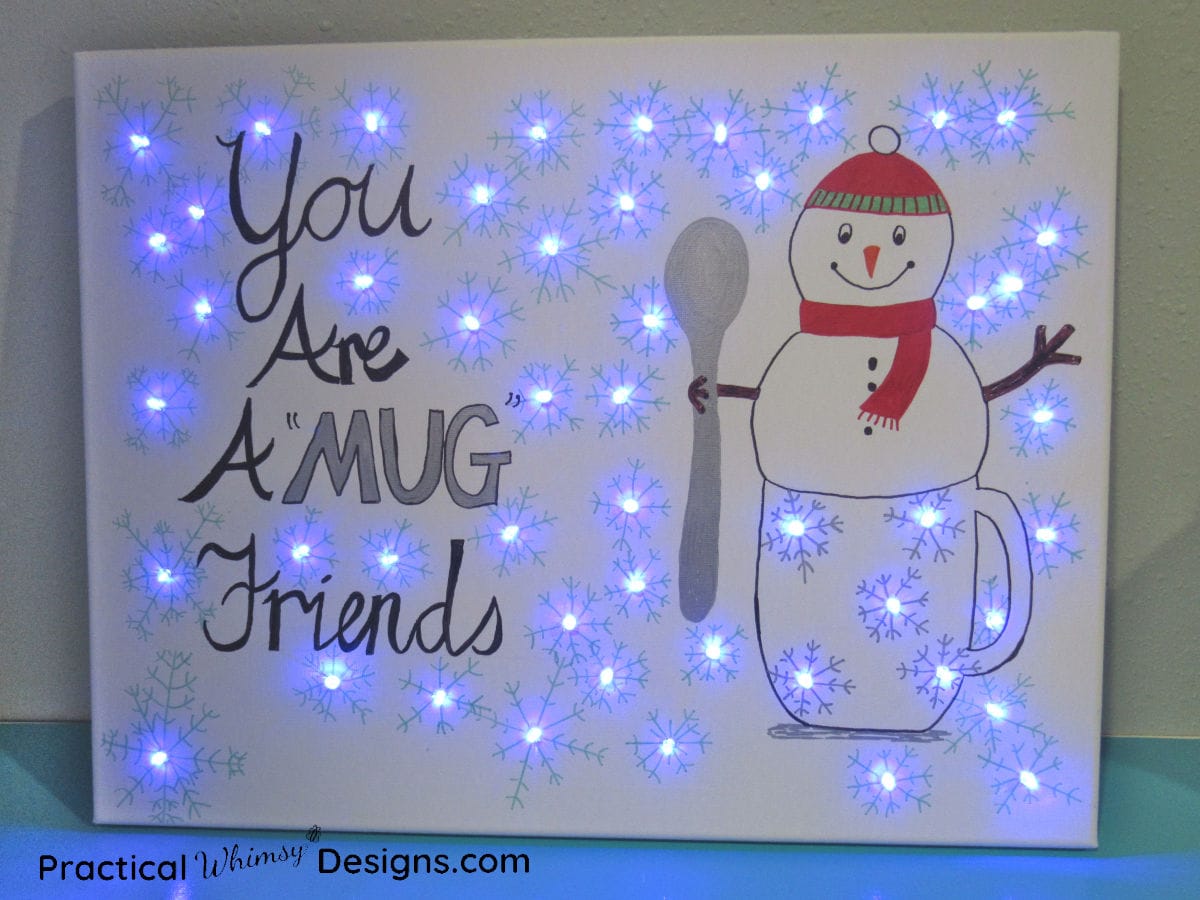
Cute DIY snowman lighted canvas pictures!
Or any DIY canvas art that includes the soft glow of led lights to warm up your space.
Below is a tutorial to make your own canvas lights project using the free snowman .pdf I have created. Lighted canvases are fun DIY projects that make great Christmas gifts, beautiful night lights for your bedroom, or fun decorations for your living room or bedroom.
This post contains some affiliate links for your convenience (which means if you click a link and make a purchase I will earn a small commission at no extra cost to you). Please see my disclaimer page for more information.
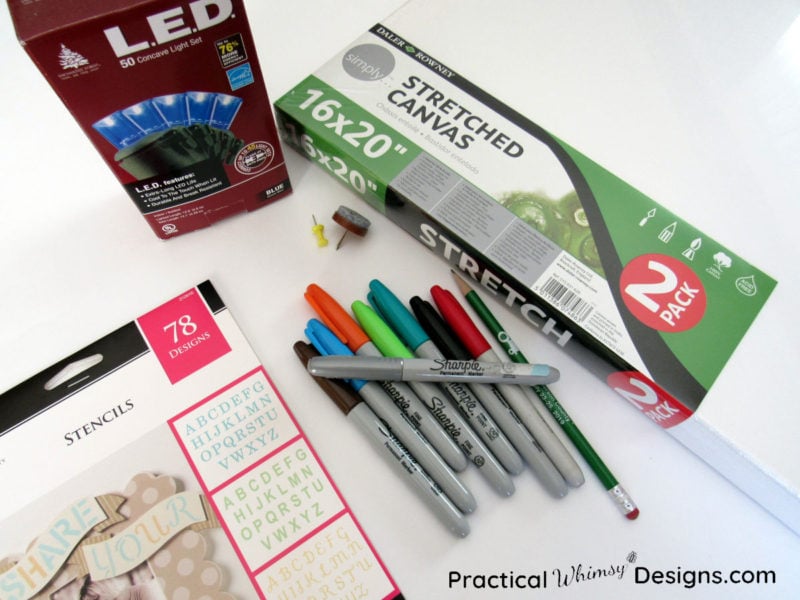
Materials You Need:
- A blank stretched art canvas (I used a 16×20 canvas for one of my pictures and a 14×18 canvas for the other) Make sure you use the stretched canvas so you can poke holes in it and hide the light wires behind it.
- 50 count LED Christmas lights (I used the lights with the blunted ends like this so they don’t stick too far out of the canvas)
- Permanent markers of various colors (Try these fun metallic markers for the spoon)
- Stencils or other letters you can trace.
- Painters tape or masking tape
- Ruler
- Pencil
- Scissors
- Tack, nail, or other sharp object (I used a felt furniture nail on pad)
- Hot glue gun
- My free snowman printable available in my free resource library. (You can get the password by signing up at the bottom of the page)
Steps for Making a DIY Snowman Lighted Canvas
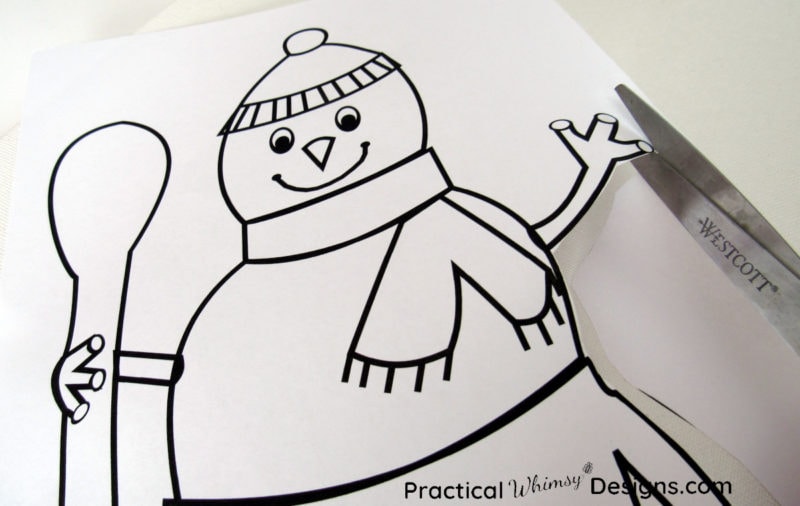
Step 1: Print and cut out my free snowman printable.
Canvas art is a lot easier if you have a template to create your own DIY canvas light. Having somewhere to start your art piece will help you get your creative juices flowing and give you a starting point for your art.
The first thing you will need to do is print out your template. If you are interested in using the free snowman printable, you can print it off here (Get the password at the bottom of the page.)
For a 16×20 canvas you will need to print off an 11×14 print. If you are using a smaller canvas, you can adjust the paper size. In most .pdf readers, you can select your paper size on the print option and click “fit” to adjust the printable.
After you print out the snowman, use a scissors to cut it out.
Step 2: Trace the template and add detail.
Position your template on the blank canvas. My design plans used the entire front of the canvas, so I placed the snowman to the right of the canvas to make sure I still had room to write words on the left . If you are afraid your template will shift, you can stick removeable painters tape or masking tape to the back of your template to secure it to the canvas.
Take a pencil and trace around your template LIGHTLY! You want to be able to erase the pencil marking if you make a mistake.
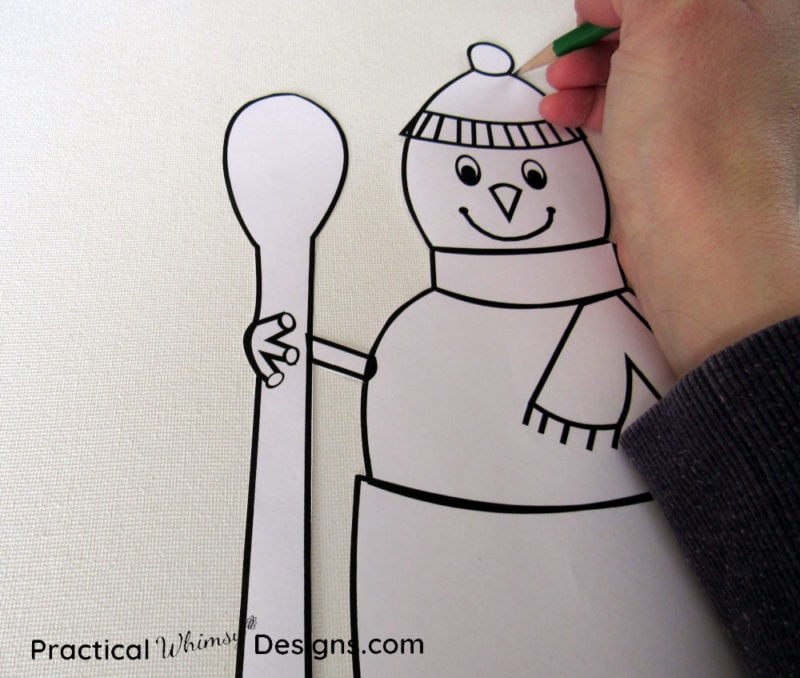
When you have finished drawing the outline of your snowman, move the template off and start adding the details in pencil. We will be moving to permanent markers soon, so you want to have an idea of where you are marking before you get carried away.

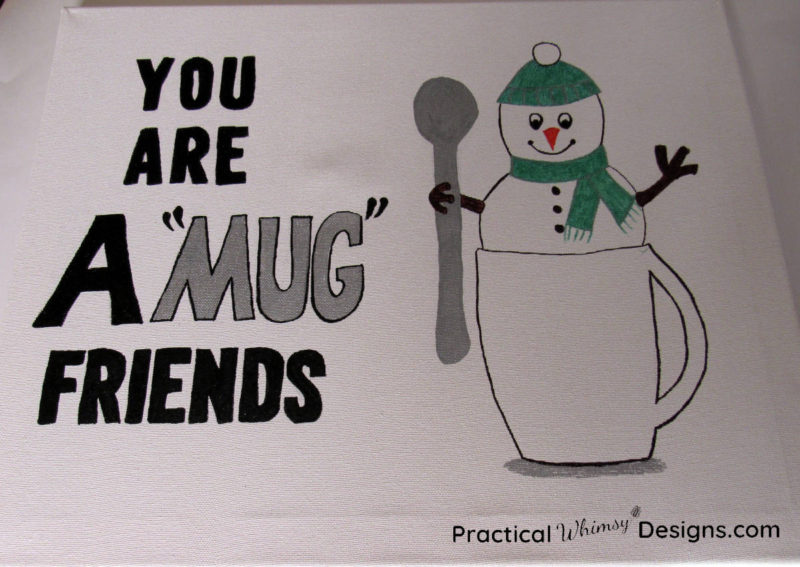
Step 3: Color in your template with permanent markers.
Ok. Take a deep breath, grab your permanent markers and make your first mark on the canvas.
Phew!
Now that you are committed, color in your template whatever colors you want! I made two separate snowman lighted canvas art pieces and used different colors for each.

This is the fun part, so don’t be shy. 🙂
Step 4: Optional-Trace letters onto your canvas and color them.
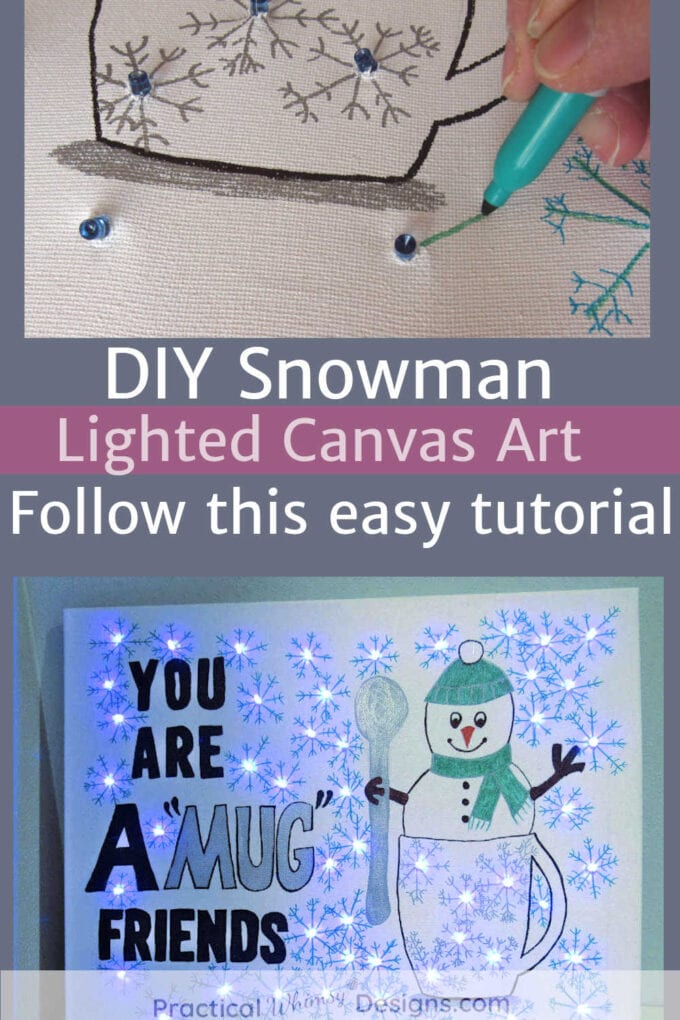
If you are following my snowman lighted canvas pattern, it’s time to add your lettering. Use a ruler to draw straight lines on your canvas to guide your lettering and keep your words straight. Use stencils or other lettering templates to trace the letters along your lines. I ended up using magnet letters that I had at home, because I liked the size and shape.

Color the letters in. I used a black marker for the text and filled the center of “MUG” with silver to make it stand out, but again, this is totally up to your creativity.
At this point your canvas should be colored in and ready for lights.
Step 5: Figure Out Your Lighting for the DIY Snowman Lighted Canvas.
Now, this step may seem a little wrong, but you are actually going to rip small holes into your canvas, so grab your sharp object (nail, tack, etc.) and get ready.
Wait!
Don’t just start poking the canvas like a crazy person! There is some strategy in this.
First, determine where you want your first light to go. I recommend a bottom corner. This is the side that will have the plug that will plug into the wall, so you need to figure out what outlet you are planning to plug into and make sure the cord will reach. If you are using Christmas lights with a battery pack you want to make sure that the heavy pack is not putting any strain on the canvas, so plan accordingly.
If you are using a 50 count light, you can mark 50 small pencil dots so that you know approximately where your lights are going. However, treat these pencil marks more like guides, not set in stone light points. Your light strand may not allow you to go exactly on these dots.
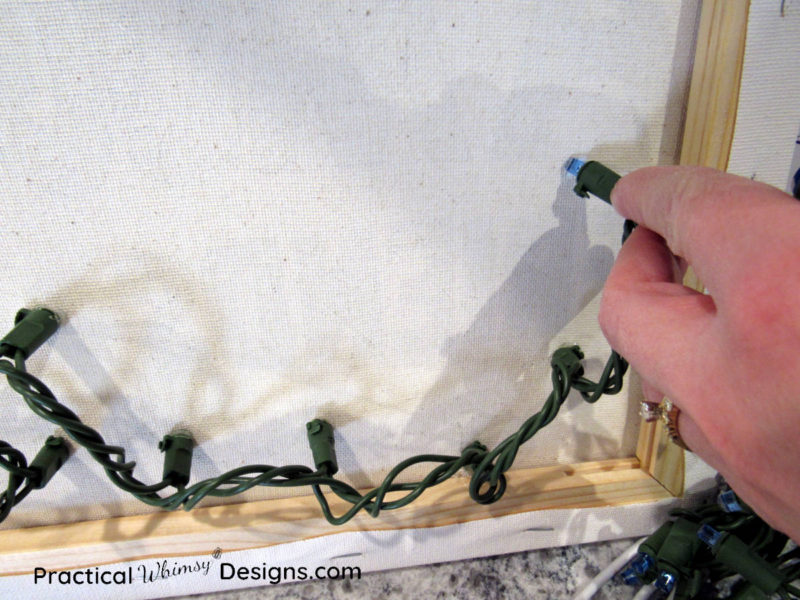
Step 6: Add Your Lights
Ok. Now that you know where your first light is going, take your sharp object and poke it into the front of the canvas, making a small hole. Use circular motions to widen the whole and make it large enough for your light to fit through.
Use a hot glue gun to glue the light below the bulb. Push the light in through the back of the canvas so that you can only see the bulb sticking through the front. The glue will help hold the light in place and strengthen the hole you made in the canvas.

Repeat for the next 49 light bulbs and sing to the tune we all know well: “49 light bulbs left to go, 49 light bulbs left… Poke one in, Do it again, 48 light bulbs left to go.”
Note: It is important to work with the strand of lights. You don’t want to make a light go in a position that puts pressure on the canvas. Work with the wires and choose locations that don’t pull on the canvas once the light is installed. Make sure that you only poke holes as you go so you can determine where the best spot on the canvas is that doesn’t put strain on it.
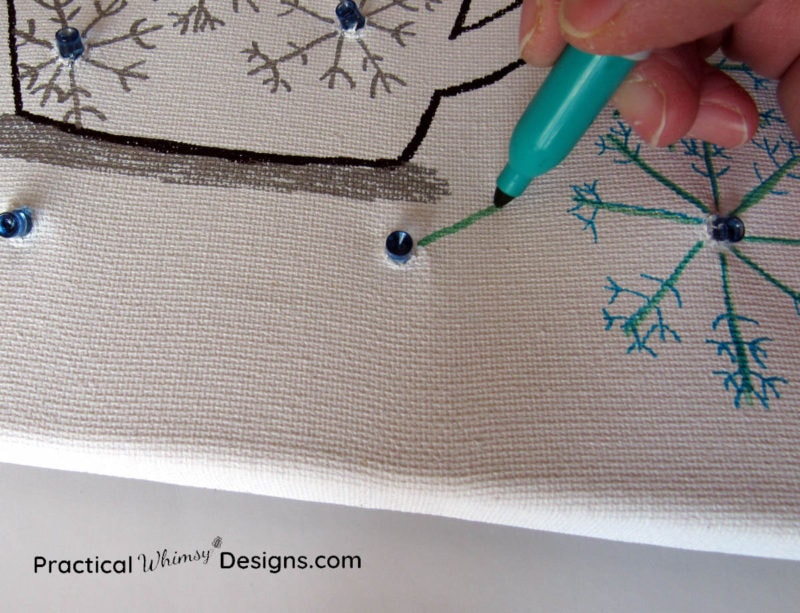
Step 7: Draw details around the lights.
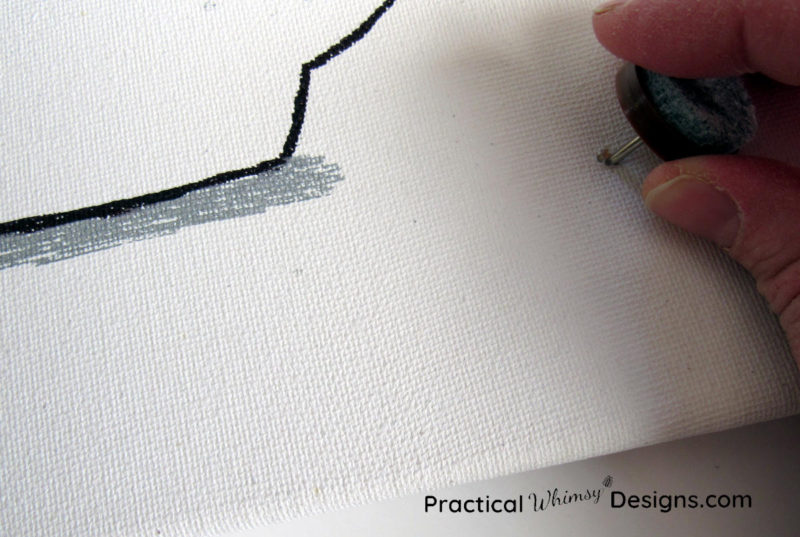
On my canvas, I wanted to add a snowflake around each of the lights. If you are following my design, gently place the canvas on a flat surface. Draw snowflakes around each light bulb with permanent markers. These don’t have to be complicated, so don’t stress too much.
Don’t worry! If your hand starts to cramp up and you need a break, I’ll be waiting here until you come back.
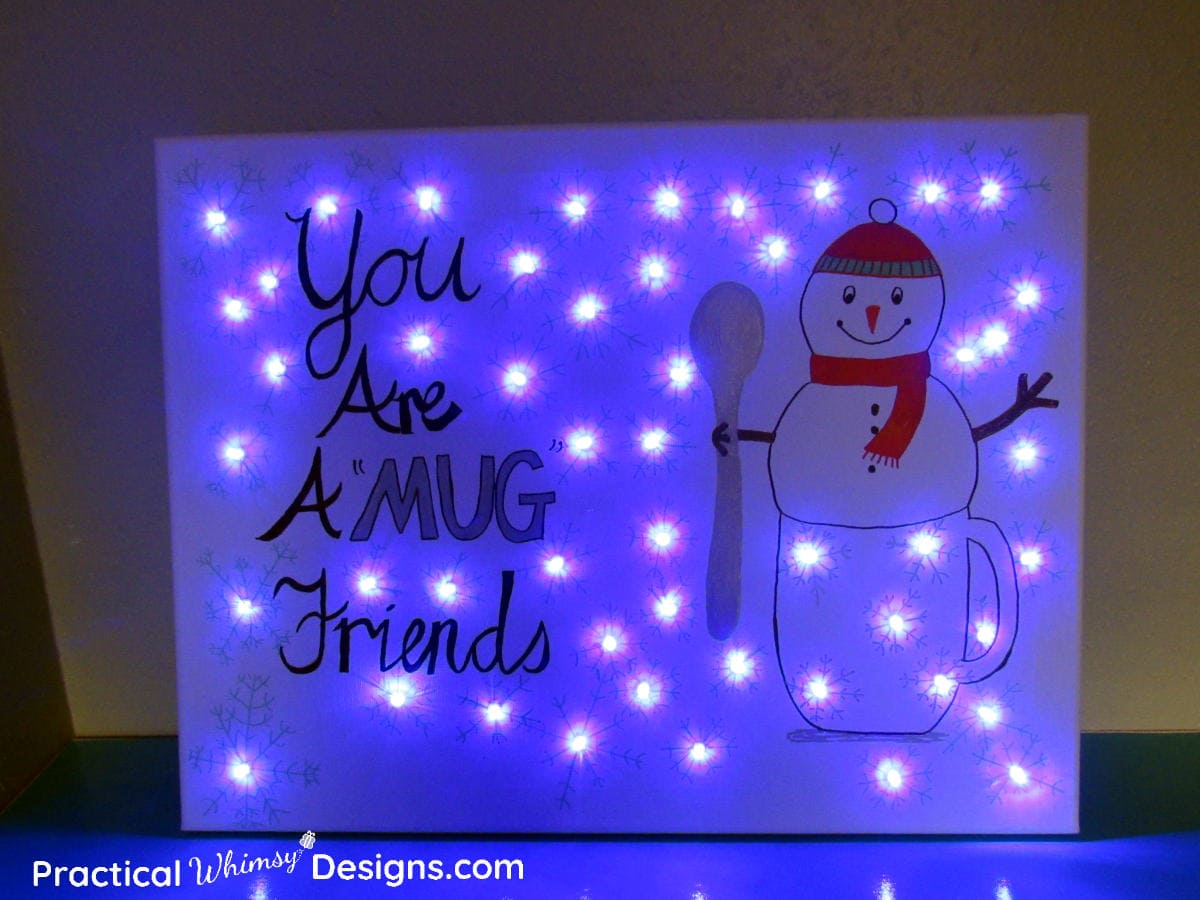
Step 8: Decorate Your Home
Once you have finished any details you want to add, your canvas is ready for display.
Lighted canvases make excellent Christmas decorations or easy projects for your kids to make as gifts (with a little help).
Depending on the template you choose, lighted canvas art can be displayed all winter or all year.

A Few Answered Questions
You will need to make sure that the templates you find to use are free for personal use and that they fit the size of canvas you are planning on using.
I have not tried these types of lights on a canvas, though I would think that you could poke a smaller hole into the canvas and secure the light in place with glue as with the previous tutorial. The challenge would be that there is nothing keeping the light in the hole besides the glue, so it may be more difficult to keep the light in place.
There are several ways to add lettering if you don’t have stencils. You can print off your favorite font in a size that fits your canvas, cut each letter out and transfer it onto your canvas. Or you can use the chalk transfer method if you don’t want to cut out each letter individually. Just rub chalk on the back side of the word you are transferring, place it chalk side down onto the canvas where you are planning on putting the word and trace around each letter with a pencil. (To see more details on how to transfer a word with chalk, check out this DIY wooden home sign post.)
The final method is with a Cricut machine, such as a Cricut maker. You can create your own stencils with a cutting machine with this tutorial.
No. You can use acrylic paint. I would recommend acrylic paint markers like these, especially for the black paint outline. They might run a little more than permanent markers, but are still easy to use.
Sign Up for Our Newsletter
Need the snowman printable template? Subscribe (free) to my newsletter below to get the password to my free resource library and this template plus all of my other free resources.
Hopefully these steps were easy enough and you now have a reason to celebrate snow (or at least cute snowmen pictures). I also hope that you had fun making these DIY snowman lighted canvases or any other lighted canvas art of your choice. Helping you create fun DIY projects is what makes my day.
Want to try your hand at a simple canvas painting? Try this DIY birch tree painting tutorial.
Want to remember this for later? Save it to your favorite DIY Pinterest Board.
Want More Great Ideas? You Might Like These..


Are we friends on Instagram?
Follow @PracticalWhimsyDesigns to see more
behind the scenes projects
This is a really fun winter craft for families. I can see myself creating this with my tween granddaughters.
Thanks! It is a really fun craft and a great way to make unique decorations for your home. I hope you try it.
Beautiful winter craft, Erin!
Thank you! It makes winter a little more fun.
Thanks for sharing this ent-“ice”-ing craft, Erin; so cool!
I’m glad you like it. Nice pun. 🙂