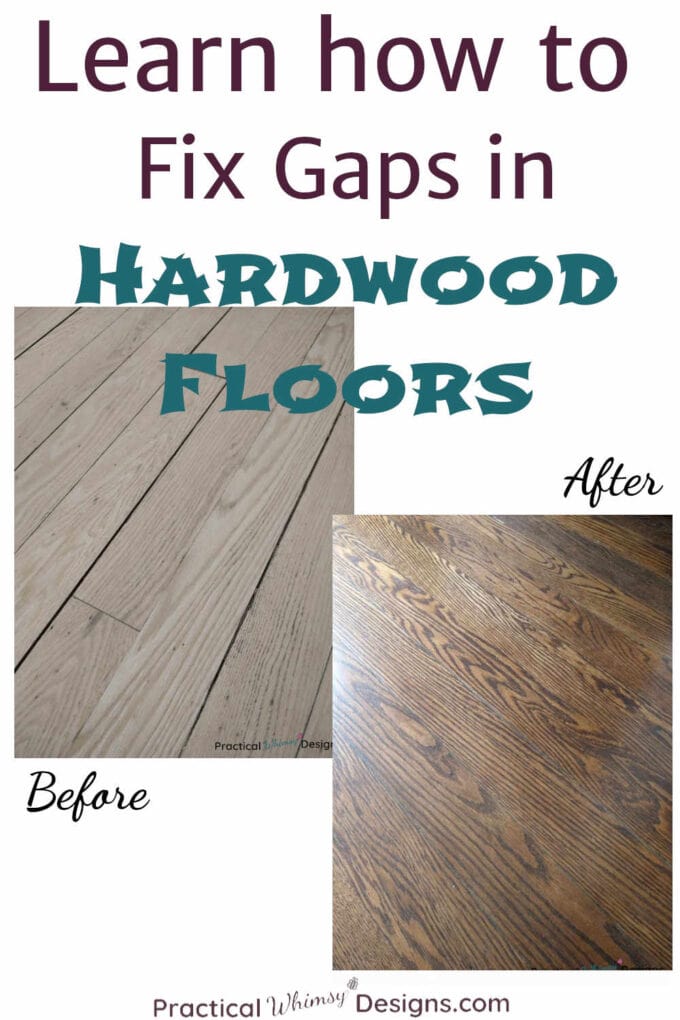
As floors get older, gaps between the boards are a common occurrence. Learn how to fix gaps in hardwood floors to create a smoother finish.
Struggling with finding the perfect paint color for your home? My design guides are available for free to my newsletter subscribers. Grab my Free Paint Guide and FINALLY pick a wall color that you love!
One of the treasures of an older home is finding original hardwood flooring. It is something that we were lucky enough to have in most of the rooms of the fixer upper that we have slowly been remodeling.
However, as is the case with many older homes, our floor boards have a lot of gaps between them. As the wood ages and dries out, these gaps between floor boards can become more pronounced.
Since we were sanding and refinishing our hardwood floors, we wanted to fill the cracks between the floor boards at the same time.
Why Fill Cracks In Hardwood Flooring?
What are some reasons to fill cracks between hardwood flooring?
Aesthetics Reasons: Depending on the color of stain, these gaps can be pretty apparent. When we remodeled our primary bedroom, we didn’t take the time to fill in the cracks. Because we chose a darker stain, these gaps are not as pronounced, but they still are noticeable. We may go back in at some point and fill them in, though it is not a priority for us right now since the room does not get a lot of traffic.
Risk of Snagging or Slivers: Depending on how big the gaps are, there can be a risk of snagging, slivers, or possibly tripping. If you have gaps in your flooring in a high traffic area you may want to fill them.
Dirt Collection: Gaps in your flooring can be a great place for dust and dirt to hide out. Filling these gaps can help you keep your home cleaner.
Should you Fill the Gaps In Your Hardwood Floors?
There will always be some flux in your wood flooring. During the summer the flooring expands with the humidity and during the winter it shrinks. If you still have gaps in your flooring during the humid summer, you may want to consider filling them.
This is especially true if the gaps pose a tripping hazard or the risk of slivers.
Risks of Fixing Gaps In Your Hardwood Flooring
The Floor May Heave: If you fill the flooring when it is at its driest (in winter) it could cause the floor to heave when it expands again in the humid summer months, depending on what you fill your flooring with. The best time to fill the floor is when the air has been at its wettest. In winter, when the flooring shrinks, there may be a slight gap again, but it will not be as pronounced.
The Filler May Crack or Chip Out: As the hardwood fluxes with the change in dry and humid weather, the filler you placed in between the floor boards may eventually crack and chip out.
You will have to weigh the risks of filling your floors and decide if it is right for you.
The form you have selected does not exist.
Ways to Fix Gaps In Hardwood Floors
What kind of shape your flooring is in can contribute a lot to how you go about fixing the gaps in your hardwood floors.
1- If you have a lot of large gaps there are a few methods for filling them including:
- Cutting narrow strips of the same type of flooring to place in between your floor boards. (You will want to find pieces of flooring that are the same type and age as your hardwood so that they take the stain in the same shade as your floor.)
- Using a natural rope to fill in the gaps and staining the rope a close shade.
2- If your floor boards are already stained and finished and you do not plan on refinishing them you can use a pre-stained wood filler to fill smaller gaps. Try the filler in a small area and see if it matches your flooring. You may have to mix two colors of filler to find the shade that best matches your flooring. Carefully apply it in the gaps and smooth it in with your finger. Wipe off any excess with a damp cloth.
3- If you are sanding and refinishing your flooring you can use the method below. (This is the method we used to fill in our hardwood floor in our upstairs hallway, guest room, and craft room before we refinished the flooring.)
This post contains some affiliate links for your convenience (which means if you click a link and make a purchase I will earn a small commission at no extra cost to you). Please see my disclaimer page for more information.
Materials You Need:
- Wood Filler (We used this brand)
- Putty Knife
- Bucket with water
- Sponge (We used grout sponges like these)
How To Fix Gaps in Hardwood Flooring During Refinishing
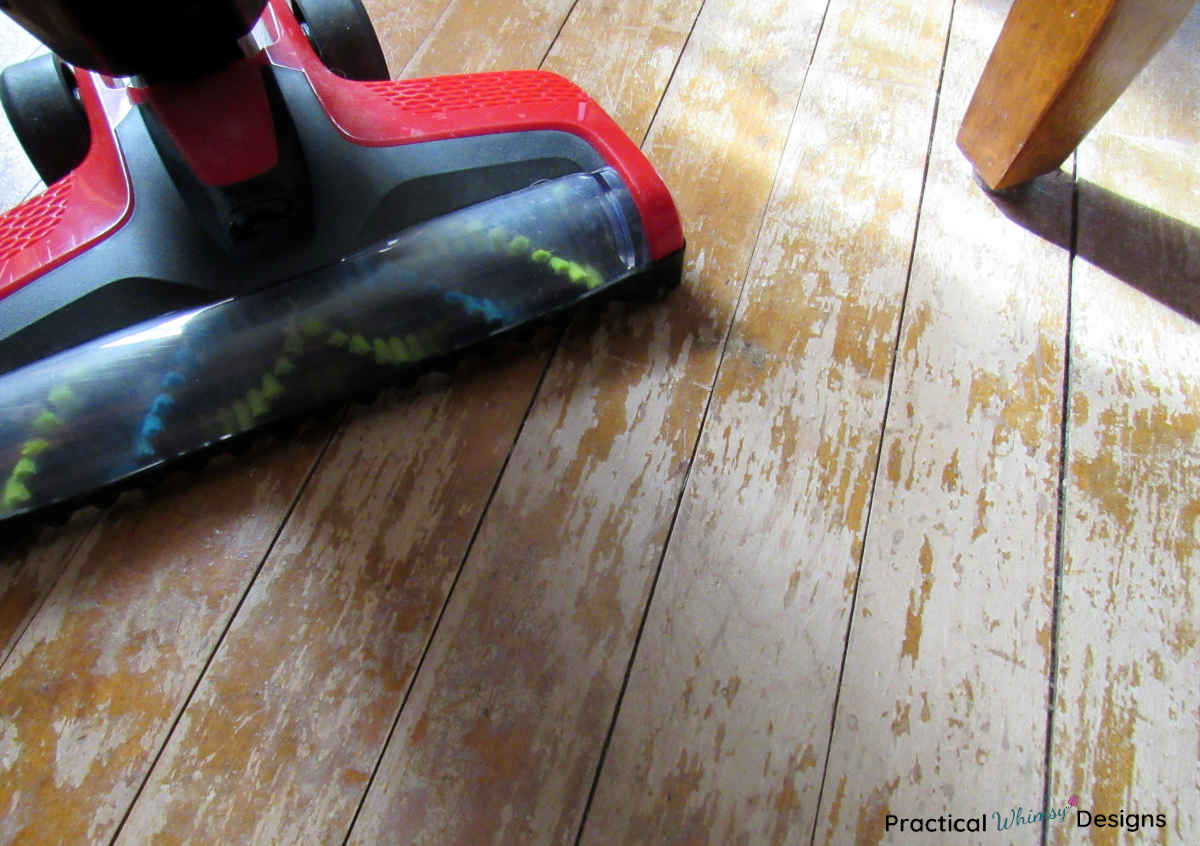
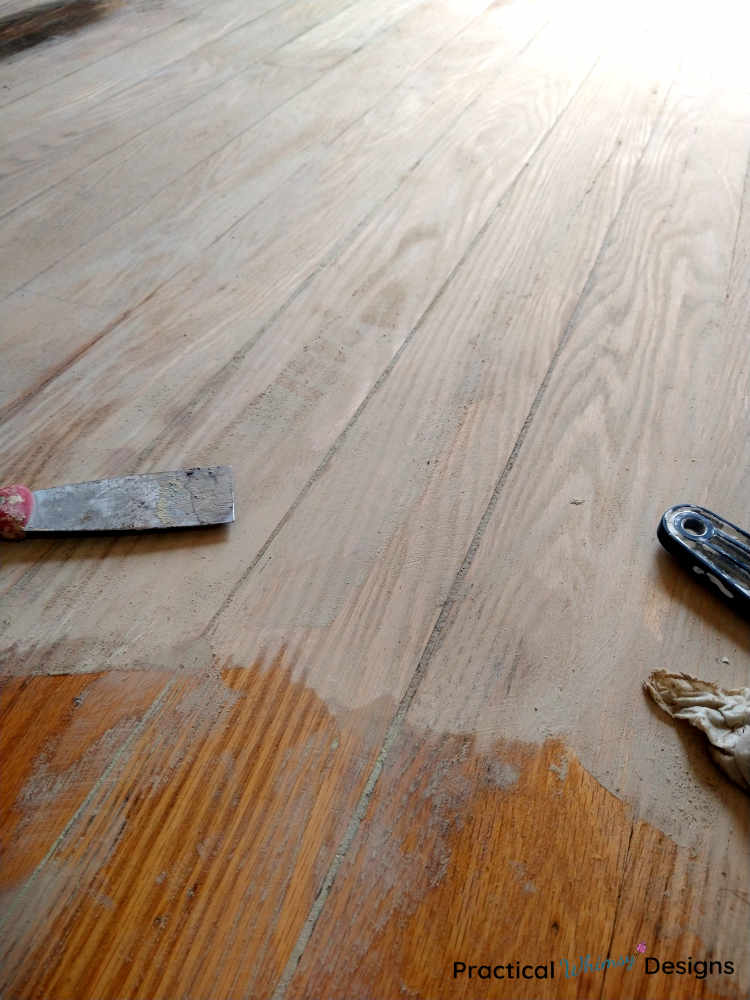
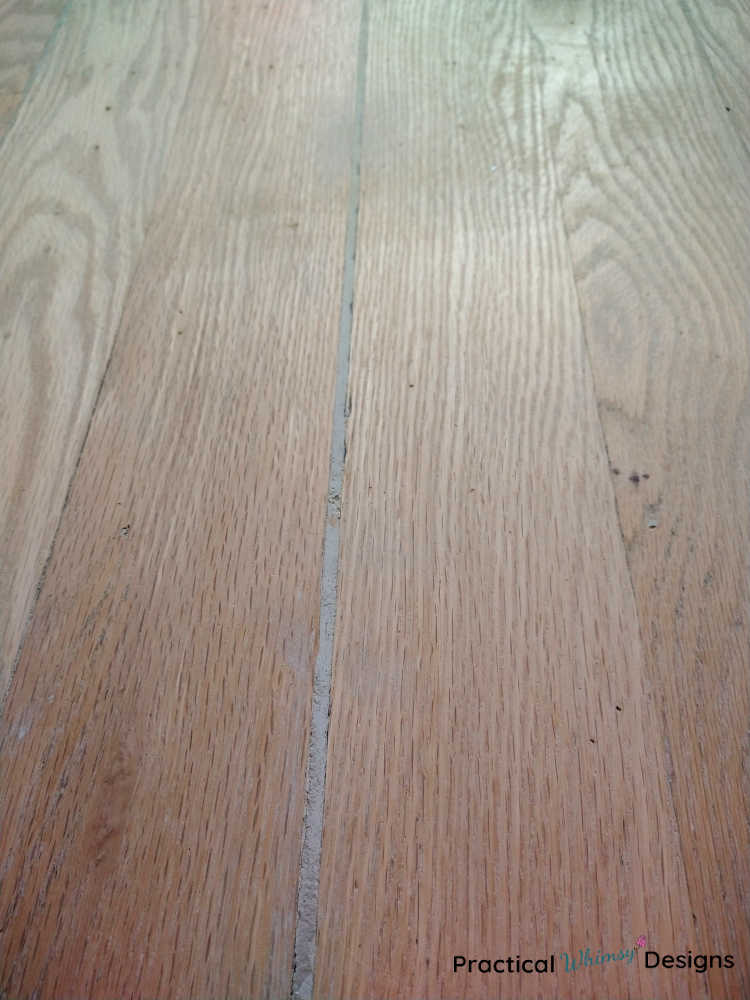
Our first part of the process was sanding all of the old polyurethane and stain off of the flooring. We were left with the unfinished hardwood flooring.

Step 1: Clean the floors
Make sure the floors are clean. Use water to wash all dust and dirt from the floors.

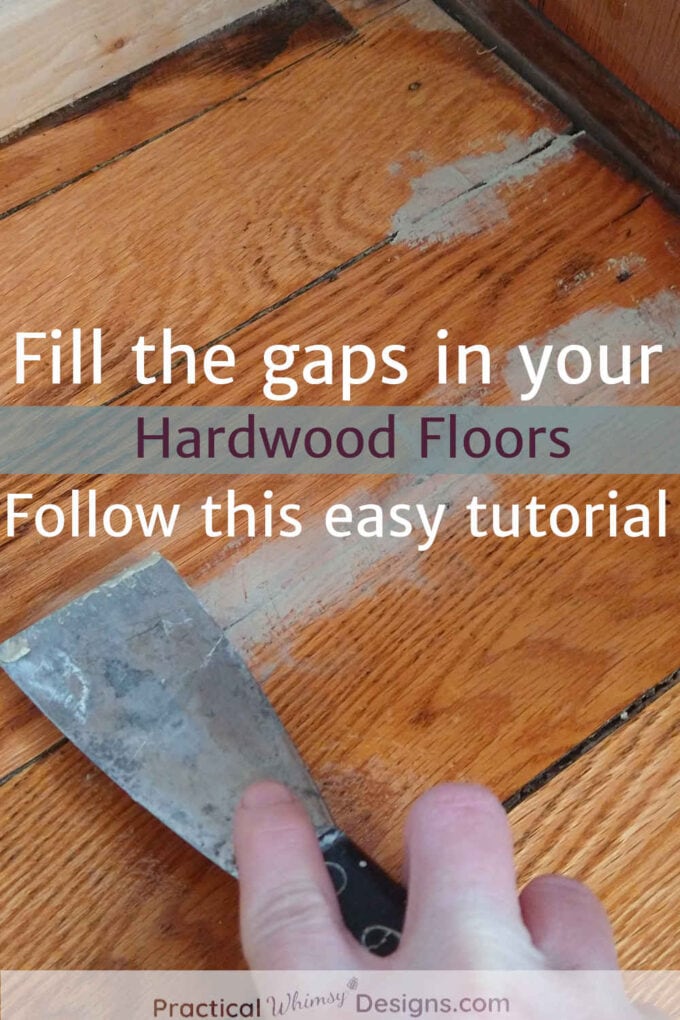
Step 2: Fill the Flooring with Wood Filler
This is the method that worked best for us:
Wet the area you are filling down with water and a sponge. Use a putty knife to spread wood filler into each of the gaps. Make sure to work it down into the gaps, then scrape the excess off the top.
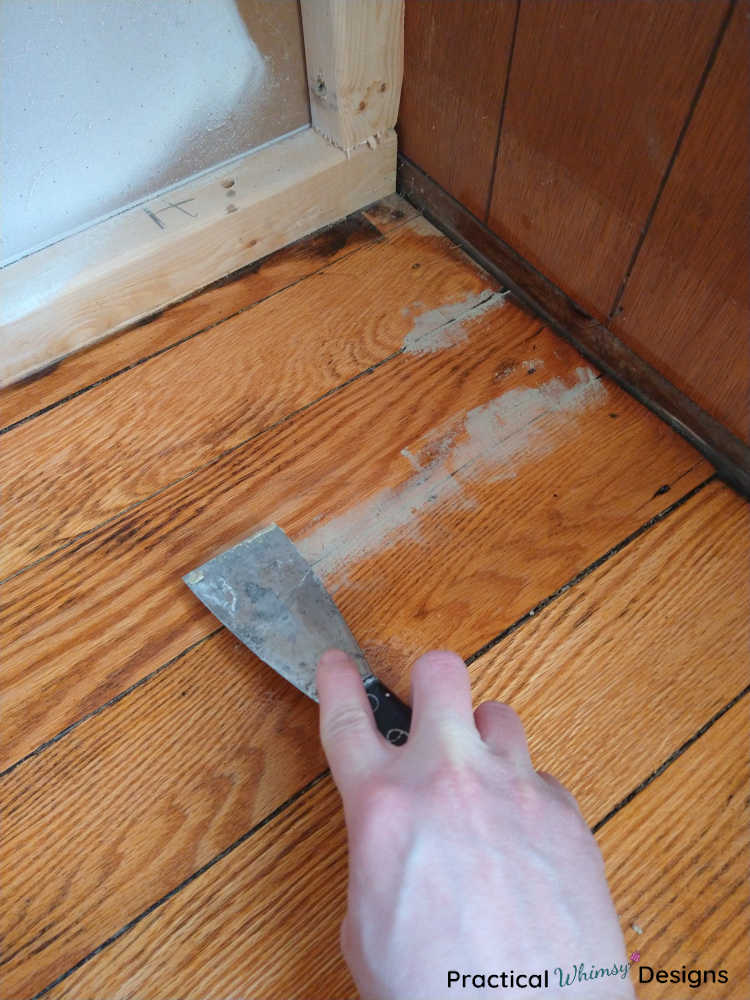
We found that wetting the floor boards with water and a sponge first allowed us to be able to spread the wood filler easier and really work it into the cracks. Otherwise the filler became gummy very quickly and was more difficult to use.
If you are planning on staining the flooring after you fill it, make sure that you use a stainable wood filler. It has pieces of wood in the filler so that it will accept the stain.
Note: The wood filler may not take the stain exactly like your flooring. It is a good idea to test a small area and make sure you are happy with the color of the stained wood filler in comparison to your flooring.
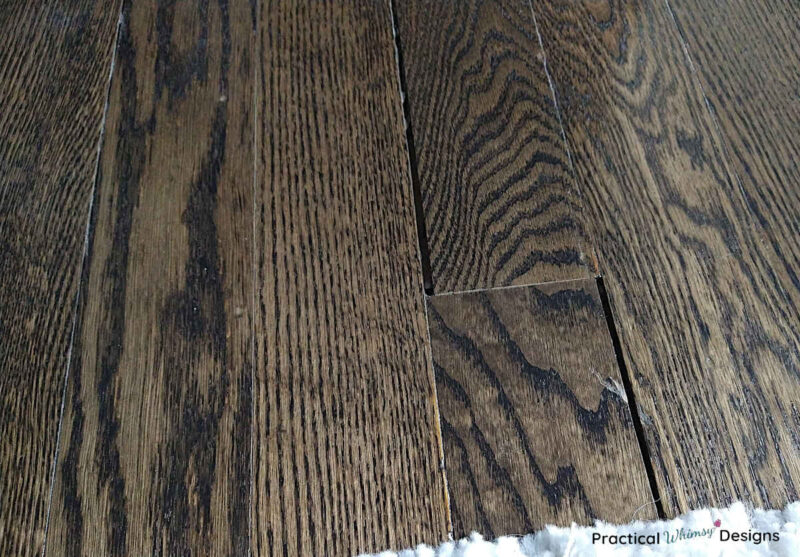
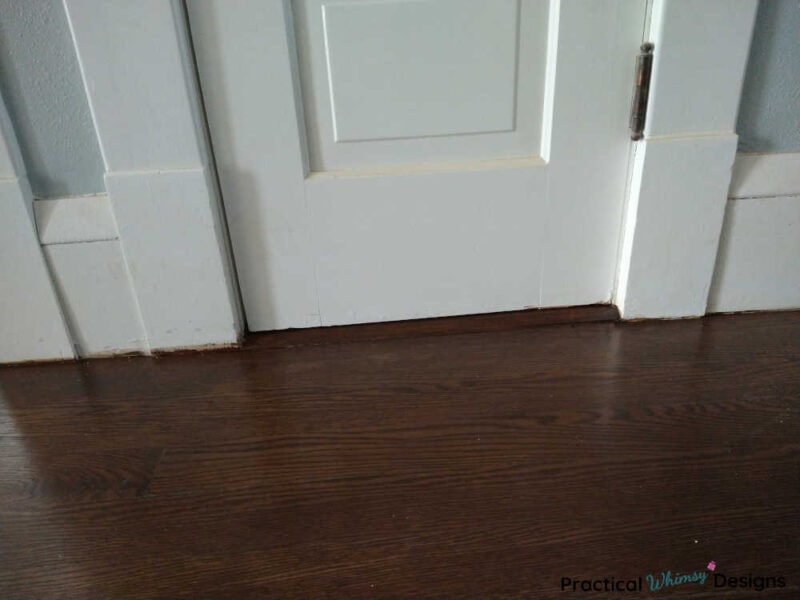
The picture below is an image of our flooring after we stained it. You can see that the wood filler is still visible, but a close enough match in color that it doesn’t draw attention. We were very happy with the results.

Step 3: Let Dry and Sand
Let the wood filler dry completely.
Use a medium grit sandpaper to sand any excess wood filler off your floor boards.
Your flooring is ready for stain. (Remember to do a test area to make sure you are happy with the color!)
Results of Filling the Gaps in Our Hardwood Floor
Though there are some risks to filling the gaps in your floor boards, the results can be worth the effort.
We love how our flooring looks now that it is filled and plan on updating this post to let you know how it holds up.
If you are doing some wood flooring repair work, be sure to check out this post on how to replace hardwood flooring. Or, if you are planning on replacing or refinishing your floors, check out this post on ways to prepare your home for new flooring.
Want to remember this later? Save it to your favorite DIY board on Pinterest.
Want More Great Ideas? You Might Like These..


Are we friends on Instagram?
Follow @PracticalWhimsyDesigns to see more
behind the scenes projects
I have wood floors that are damaged where some broards are broke an a little wider then the ones you buy at the store.Is there ways that they can be repaired an how its done.
It would depend on the extent of the damage. If the boards are cracked or broken, you may need to replace them. Ideally you would use wood of the same type and age as the original floor. If there is an area of the home (such as a closet) that you could replace the flooring in and use some of that hardwood to patch in the floor, that would be ideal. It is a pretty labor intensive repair though, because you would want to replace the flooring in a staggered pattern to not make the repair obvious. Then you would need to sand and stain the whole floor. Again, this repair is based off of the limited information that you gave me. This might be something you would need to hire a professional for.