
Love the look of mini wreaths on your kitchen cabinets? Learn how to make an easy DIY wreath with wire frame using an upcycled wire hanger.
Decorating is one of my favorite things to do. And reusing items in my decorations is a close second. I love the challenge of finding new ways and a fun twist on using an item that is no longer needed.
When we purchased our fixer upper home a lot of the closets contained wire dry cleaners hangers.
Since we now have a whole lot of these hangers, I have had the fun challenge of creating new decor out of them.
So far I have created fun DIY wire pumpkins for fall.
I also used them to reinforce some fabric storage boxes that needed a facelift.
The other thing I discovered is that they make a great wire wreath form for a 12 inch wreath. The wire hanger is thicker than paddle wire so it creates a stronger base for your wreath. Plus they can be cheaper to buy than straight craft wire.
Or, if you are looking at creating your own wire wreath frames for a mini wreath, use a wire snips to cut the hanger and make wire wreath frames in custom sizes to create wreaths for each of your kitchen cabinet doors. Cutting them in half creates a 6″ wreath. This is a perfect size for kitchen cabinet wreaths, especially if you want to hang them on every cabinet door.
(If you aren’t sure what size of mini wreath to make for your kitchen cabinet, learn how to determine what size wreath is best for you here.)
How to Make Easy DIY Wreaths with a Simple DIY Wire Frame
This post contains some affiliate links for your convenience (which means if you click a link and make a purchase I will earn a small commission at no extra cost to you). Please see my disclaimer page for more information.
If you are looking for a step-by-step tutorial to create an easy DIY wreath and wire frame that can be customized for your needs, this is the perfect holiday wreath idea. Use this same basic wreath tutorial to create wreaths for the spring or fall season too.
Materials Needed
- Wire hangers like these or 13-14 gauge craft wire
- Painters tape
- Wreath ribbon (choose ribbon based on the color you want for your wreath)
- Hot glue gun or zip ties, twist ties, or wreath wire depending on how you want to attach your garland
- Pine garland or flowers, leaves, etc.
- Wire snips
- Command hooks
- Paper clamp
How to Make a 12 Inch Cabinet Wreath with a Wire Hanger
Step 1: Create the DIY Wreath Frame
If you are using a hanger for this project, the first step you need to do is untwist and open up the wire hanger at the hook. If you purchased 13 or 14 gauge wire, cut it into 40″-42″ lengths with a wire snips. You will need extra length so you can overlap the wire.
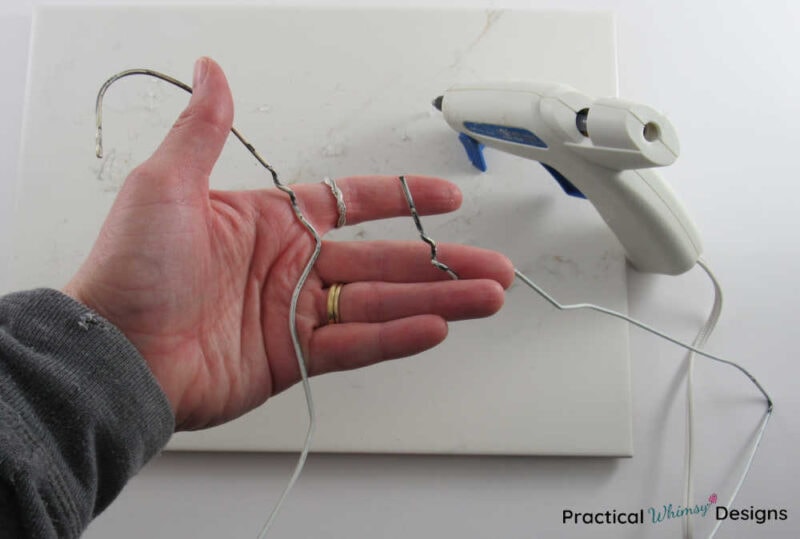
Next, bend the wire hanger or wire into a circle, working out any kinks. Twist the open ends back together or overlap them until you form a wire circle out of your hanger. Adjust the clothes hanger or wire until you have a 12″ circle.
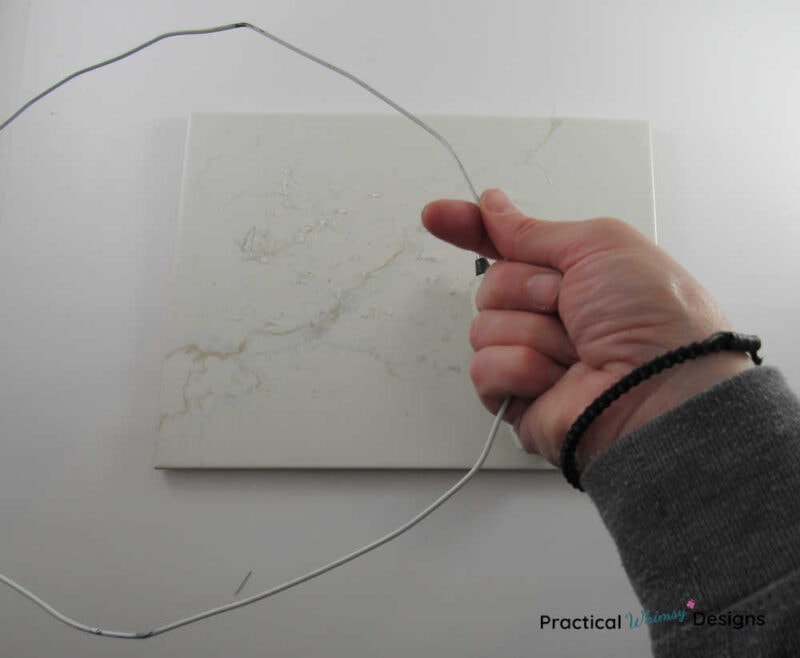
Note: This does require a little hand strength if you are using a hanger. The easiest way to do this is keep working the wire with your hands, bending and shaping it until you have a nice circle. You may want to wear gloves to protect your hands from the wire.
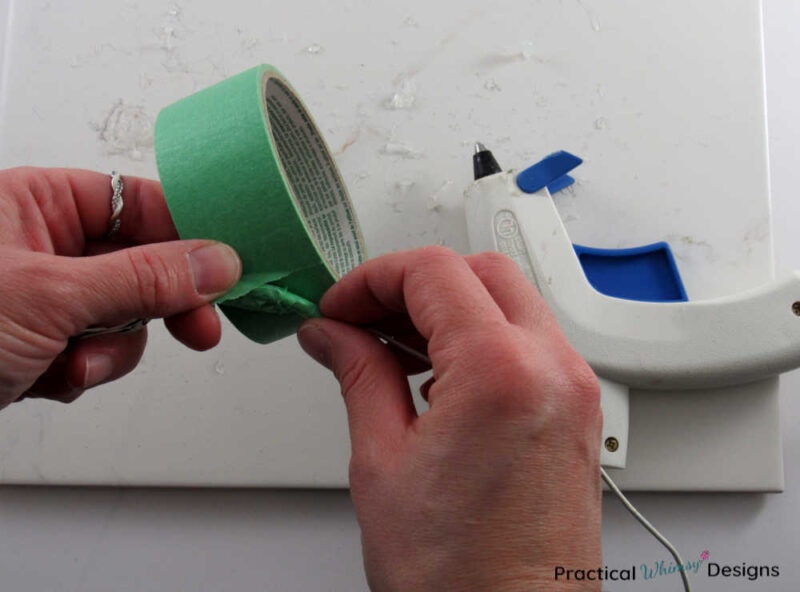
Attach a piece of painters tape or masking tape around the wire ends so that they don’t come undone or scratch the cabinet door.
Step 2: Attach the Garland
There are several ways to attach garland to your wire wreath frame.
If you are looking for a less permanent solution, you can use twist ties, or zip ties, to attach your garland, leaves, or ribbons. Or use floral wire to twist the garland onto your wire base.
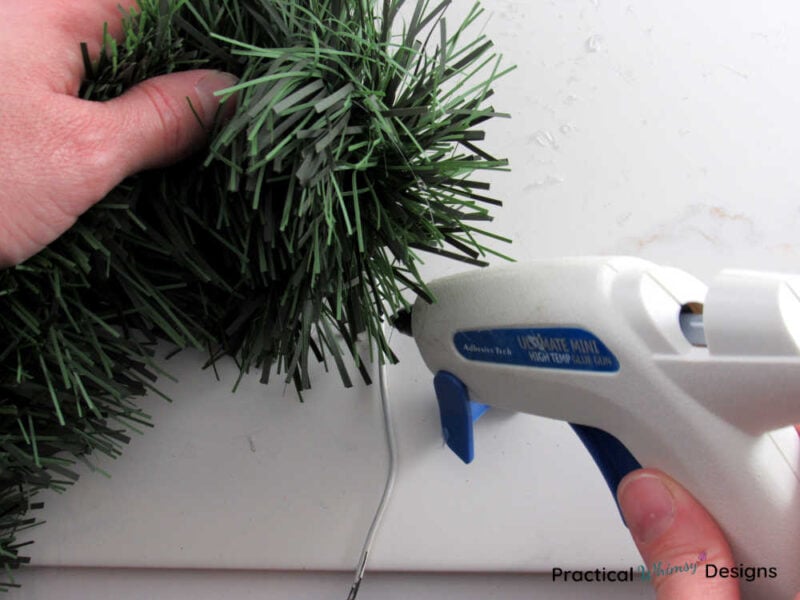
If you are looking for a more permanent solution, you can hot glue your garland to the wire, which is what I did.
I created a basic wreath with some pine garland, but there are so many fun options you can use these wire wreath bases for. Use fall leaves, magnolia leaves, artificial flowers, and other faux greenery to create wreaths for any festive season.
If you are using glue, make sure to place a piece of cardboard or mat under your project so you don’t drip glue everywhere.
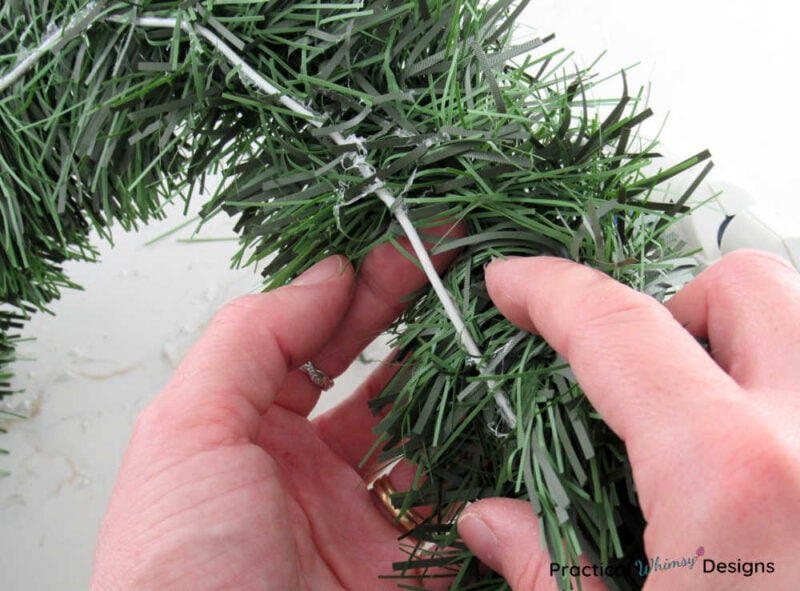
Starting at the top where you twisted the wire ends, use a hot glue gun to glue the garland onto your wire hanger circle or attach it with your twist ties. Keep attaching the garland all of the way around the wire, sticking the garland on as you go, until you meet up with the loose end at the top.
Trim any extra garland.
Now, flip the wreath over and check to make sure that all of the garland is attached to the wire hanger. Use hot glue or ties to secure any loose spots.
I chose to keep my wreaths plain, but if you want to add any decorative elements such as flowers, pine cones, cinnamon sticks, etc., there are many methods to attach them to your wreath. You can glue them on, tie them with twist ties, use a zip tie, a piece of floral wire, or paper clips to hook them on to the wreath.
Step 3: Add Ribbon
Now is the time to decide how you plan to hang your wreath. I chose to use a ribbon to hang off the cabinet in my kitchen because my wreaths were simple and I liked the look. You can also use fishing line if you don’t want the ribbon look.
I used two different ways to attach the ribbon to my wreaths.
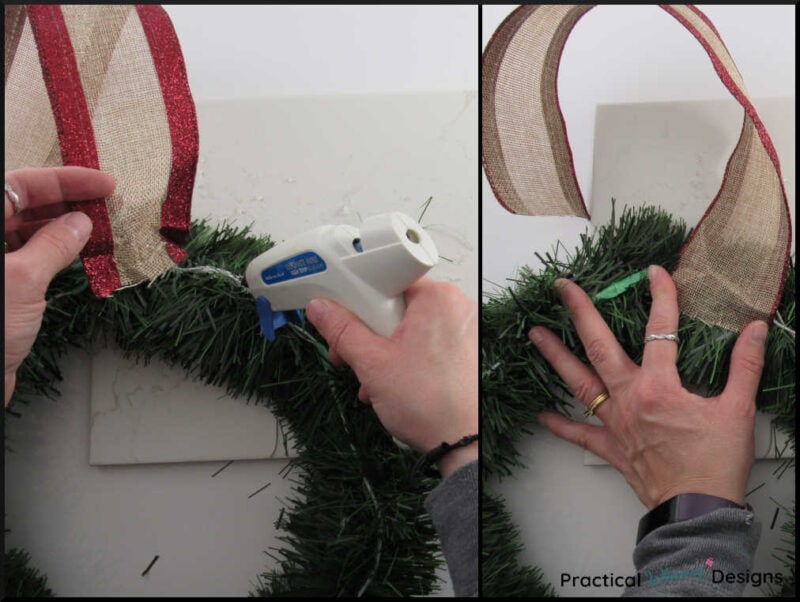
Method 1
The easiest way to do it is to cut a length of ribbon and hot glue the end of the ribbon to the back of the wreath.
If you are wanting a simple look for the ribbon on your wreath, and you don’t mind the permanence of glue, this method works great. It also doesn’t take as much ribbon as the second method I will discuss. This is the method I used on my 12 inch wreaths.
Method 2
Another easy way to attach a ribbon to your wreath is to wrap ribbon around the top of the wreath and loop it over to give it a double layered look. This method is nice because it is easy to swap the ribbons out for different colors, depending on your decorating theme each year. I used this method with a red ribbon on the small wreaths I made.
Depending on how fancy you want your wreath to be, you can also hang a ribbon bow on top of the ribbon.

For both hanging methods, the length of ribbon you use will depend on where you want your wreaths to rest on the face of your kitchen cabinets.
Measure the ribbon so it is long enough to reach from the back of the cabinet door, loop over the top, and end with the wreath hanging in the upper middle of the cabinet. Then cut 1-2 extra inches of ribbon so you can adjust the height as desired.
Step 4: Hang it on Your Kitchen Cabinet
There are multiple ways to hang a wreath on your cabinet.
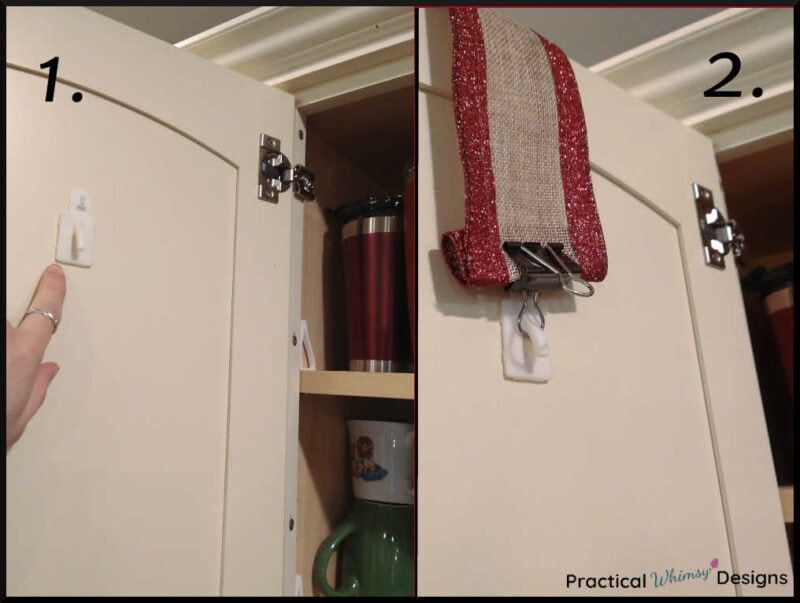
One of my favorite ways is to use a command hook inside the cabinet door. Stick it upside down so that you can hook the ribbon onto it and bring the ribbon up and over the top of the cabinet door so that the wreath can hang on the front of the cabinet. Use a paper clamp on the end so you can adjust it easily.
Stick the hook in the middle top portion of the inside of your upper cabinets.
Note: Don’t forget to make sure that the hook is facing down so you can hook onto it with your ribbon.
How to Make a 6 inch Cabinet Wreath with a Wire Hanger
The steps to make a 6 inch wreath are almost the same.
The biggest difference is that you will cut your wire hanger in half before creating your wreath base.
First, unbend your wire hanger hook.
Pull your wire hanger flat and find the middle of the hanger wire. Cut it in half with a wire snips.
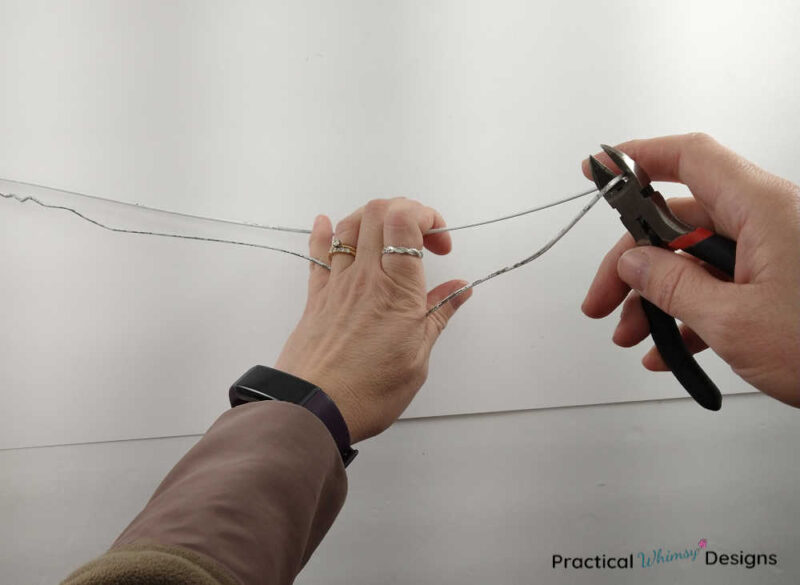
Create 2 mini circles out of your wire hanger, wrap the two ends together and tape them shut with painters tape.

Follow steps 2-4 of the 12 inch wreath to finish adding greenery to your wreath.
Other Types of Wreath Frames for DIY Wreaths
There are many wreath frames available to help you DIY your own wreath. It depends on what type of wreath you are creating. Some other ideas for wreath frames are:
- Foam wreath forms
- Straw form
- An embroidery hoop
- Grapevine Wreath forms
- Wire wreath forms
Each of these wreath forms are great options, depending on the look you are going for. However, being able to create your own DIY wire wreath frame gives you the ability to adjust the size to your needs. You can even venture away from the circular shape. Create squares or other fun shapes with this method.
Two Types of Cabinet Wreaths
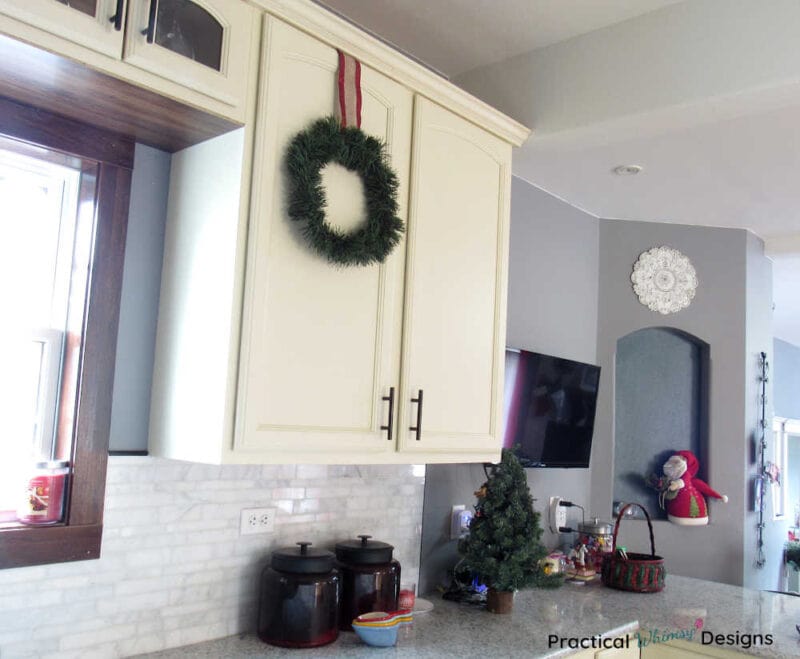
Below is a picture of a 12 inch wreath.
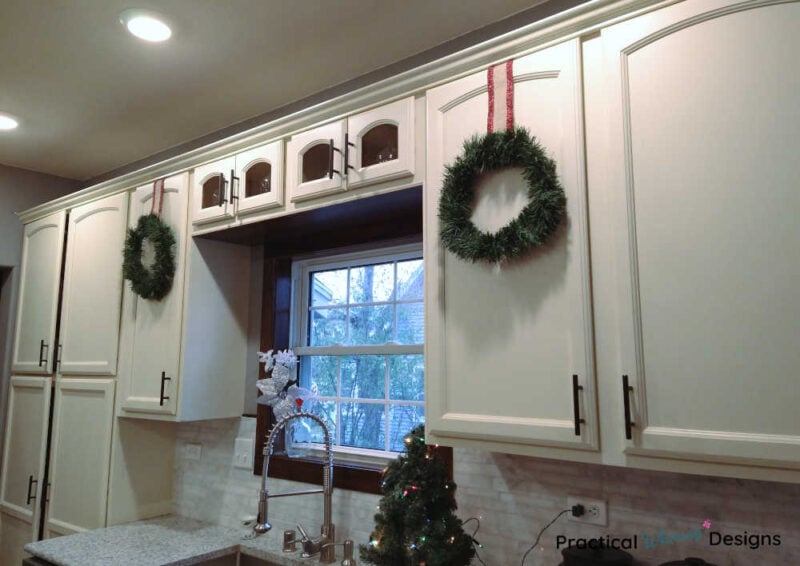
And here is an image of the mini 6 inch wreaths.

I chose to only make a total of 4 wreaths since I only wanted a few of my cabinets to have wreaths decorating them. The fun part of this project is that it is versatile.
You can use the wreaths you make on your front door, kitchen cabinets, windows, living room wall, etc. for a cheap and easy wreath you can make in 5 minutes.
However many you make, these cute little wreaths will make a beautiful statement in your kitchen this holiday season, no matter how many you make.
Knowing how to make your own wreath frames can give you the freedom to create your own beautiful wreaths that fit your space. The best part is that it is the perfect project for an easy decoration for any special occasion and it is a great way to add your own style to your home.
Want to remember this idea? Save it to your favorite DIY board on Pinterest.

We would love for you to join our newsletter community! As a thank you for signing up for our weekly newsletter, you will gain access to our free printables and resource library, including great art for Christmas. Sign up below.
Want More Great Ideas? You Might Like These..


Are we friends on Instagram?
Follow @PracticalWhimsyDesigns to see more
behind the scenes projects