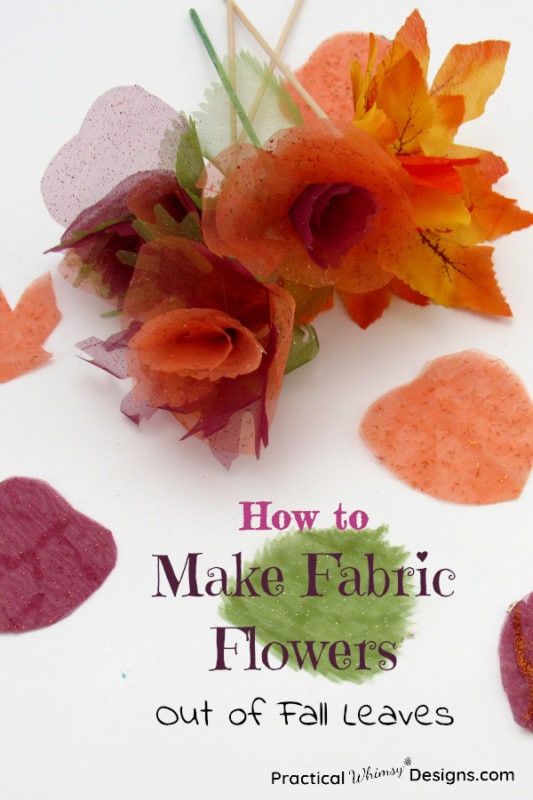
It’s easier than you think to learn how to make fake flowers? In this tutorial learn how to make fabric flowers from fall leaves to compliment your fall decor.
Fall leaves are so versatile.
They add beautiful pops of color to your yard. Fall foliage also makes an excellent addition to your Fall decor repertoire.
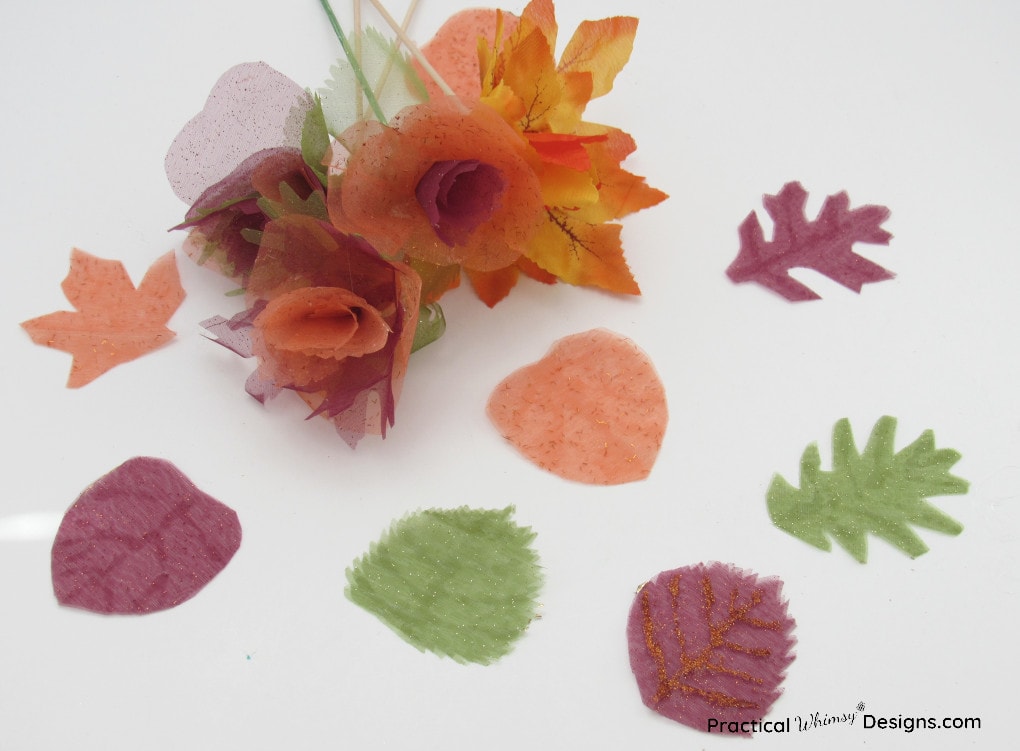
But what if I told you you could turn your fall leaves into beautiful flowers? Flowers that you can use as bouquets in your vases, on DIY Fall Wreaths, or set artistically to accent your fall decor?
Well, you can!
In a few quick steps you can know how to make fabric flowers that will add some fun color to your fall decor. Some of these flowers are a little tricky to tell that they are even fall leaves, but knowing their origins makes them all the more fun.
What you will need:
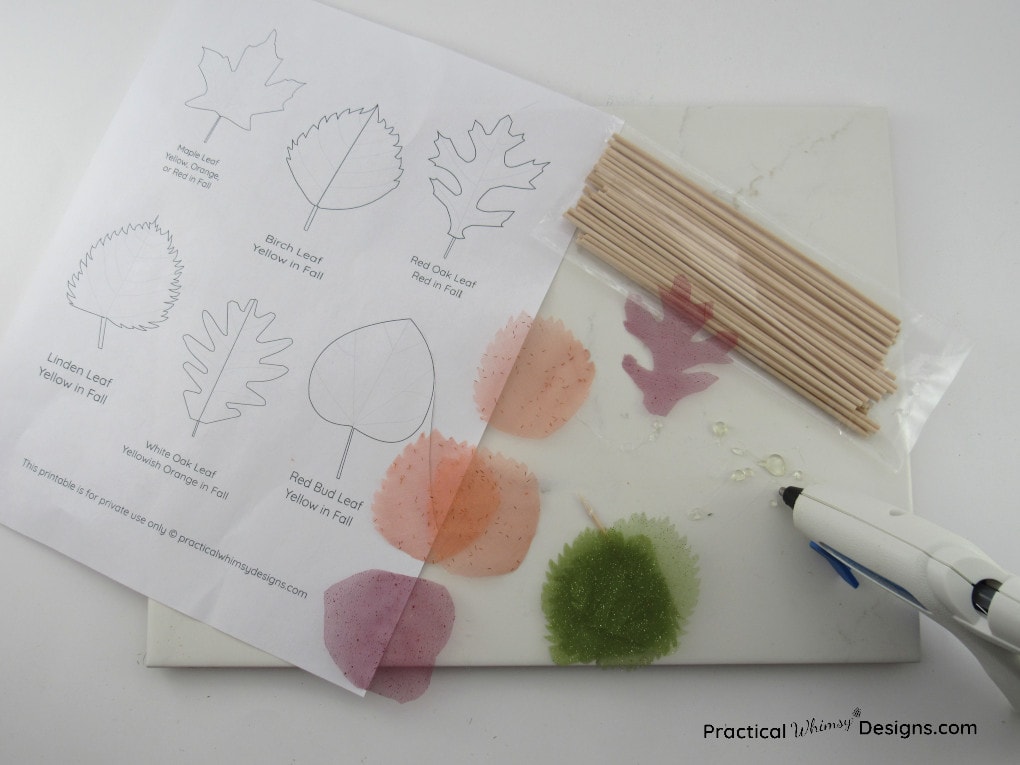
- Fake fall leaves of various shades and types (If you want to make your own Decorative Fall Leaves, visit my tutorial for some ideas. I also have a free leaf printable available in my free resource library. (If you don’t have the password yet, you can get it by signing up at the bottom of the page) I used some leaves that were cut out of decorative ribbon, and some that were fabric.
- Hot glue gun
- Toothpicks or something to spread the glue with
- Small Dowel or wreath wire to make a stem
How to Make Fabric Flowers from Fall Leaves
Step 1: Roll the center
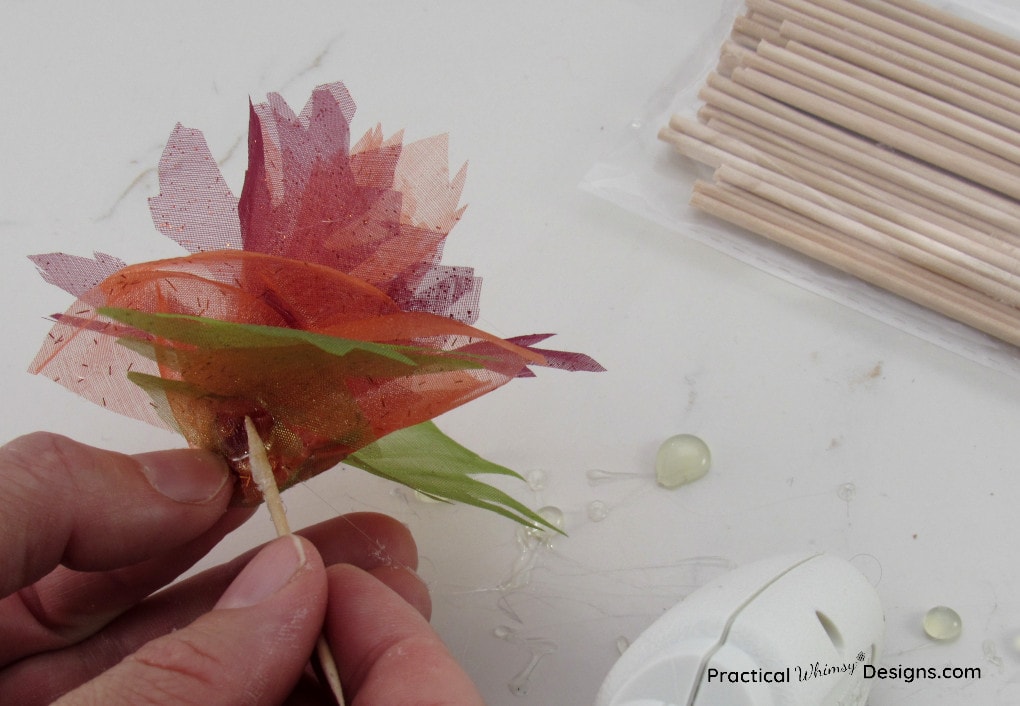
I used three leaves (I liked the shape of the birch leaf) in the center of my flowers. If you have small vs. big leaves, use the smallest ones for this part. If they are all the same size, then just pick your favorite color and go at it.
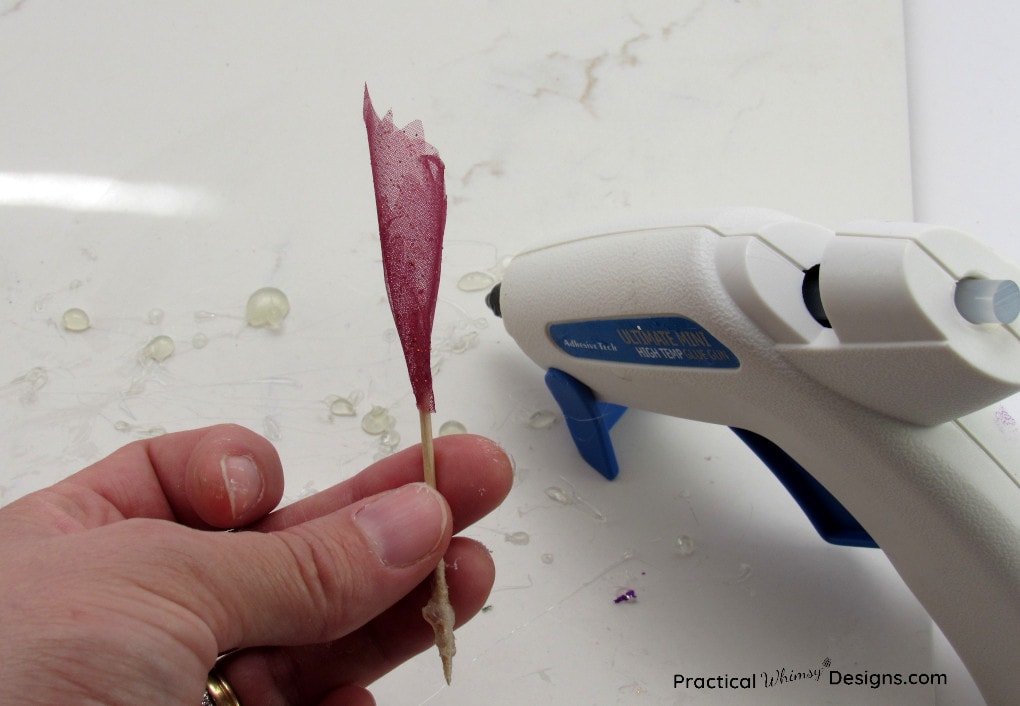
Start by placing a little hot glue in the center bottom of your first leaf.
Now carefully roll the first leaf around a toothpick or small dowel until it is wrapped around like a loose paper towel, adding more hot glue if necessary to make the leaf stick. Note: The bottom should be tight and the top slightly looser.
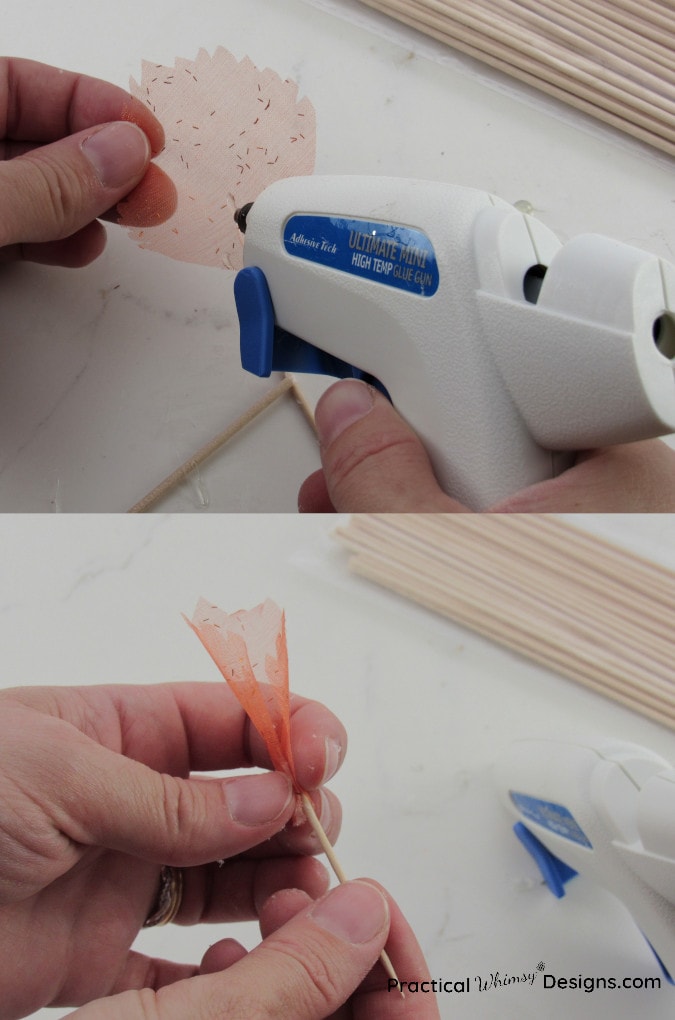
Remember! You are working with HOT GLUE so be careful. Use a toothpick to move the glue and help guide the flower petals into a roll shape.
Now it’s time to add a second leaf. Add glue to the bottom of the first leaf, close to the dowel. Wrap the second leaf around the first, using the toothpick to guide it around until it hugs the other leaf. Remember, it should be tight on the bottom and slightly loose on the top.
For the final center leaf, add glue to the side where the second leaf’s ends come together and wrap the third leaf in a hug in the opposite direction. The goal is to add a protective layer over the seam of the second leaf.
Again, proceed with caution. Hot glue is toasty on the fingers! (I figured I’d better add this in here twice, though I’m sure that after you touch it for the first time, you will be careful too.) Use a toothpick if possible! (Did I mention that I am speaking from experience?!)
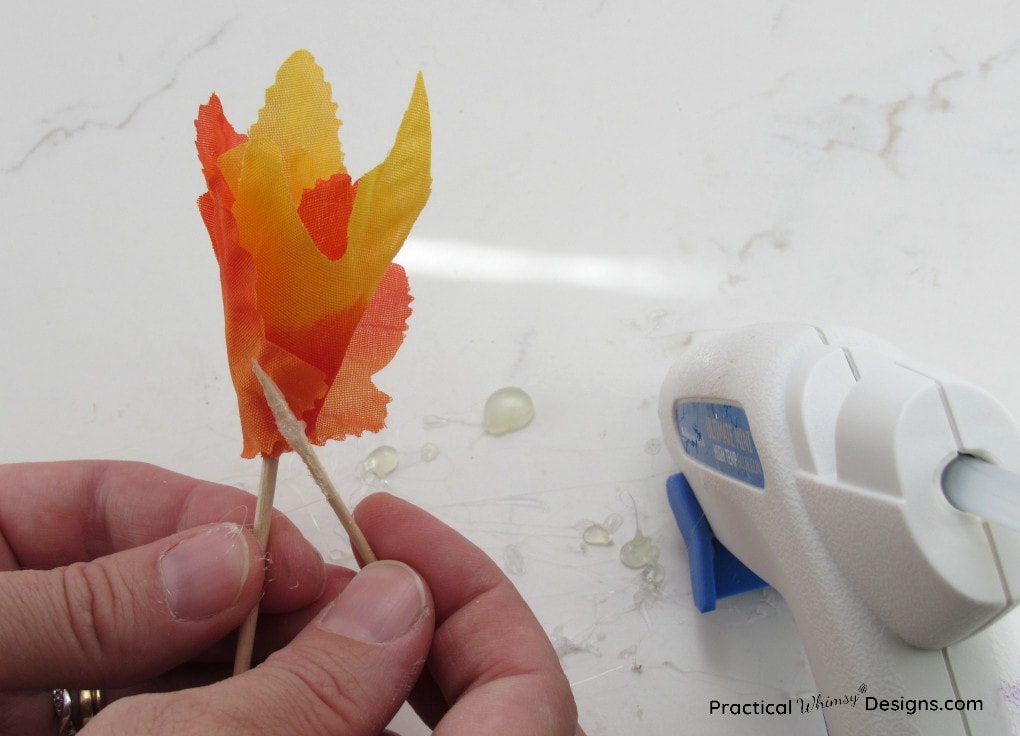
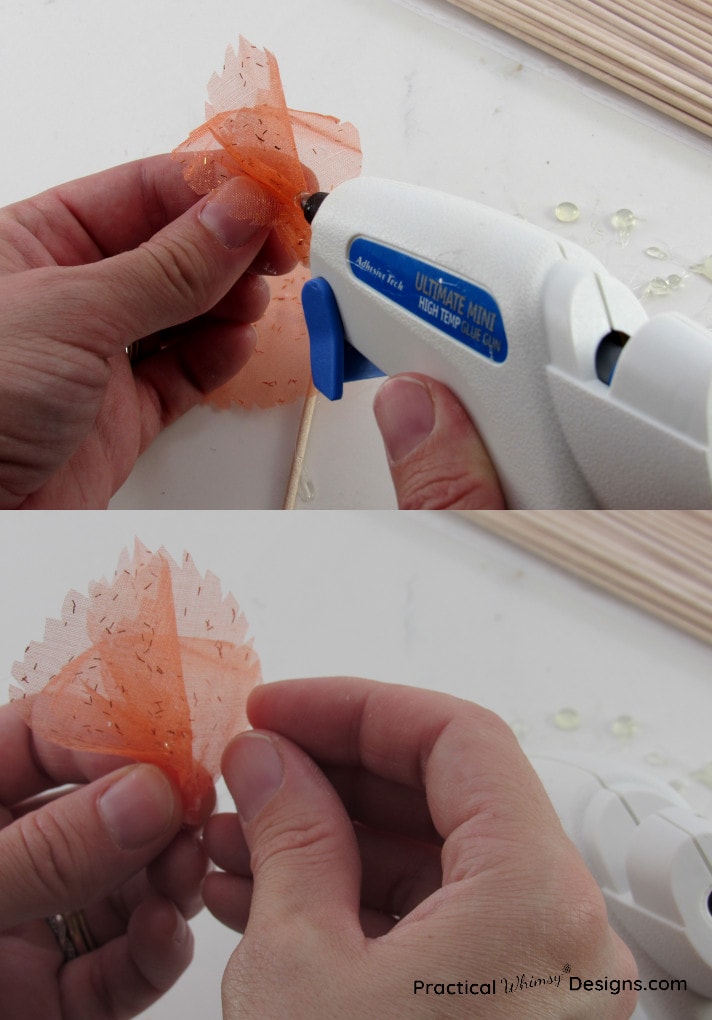
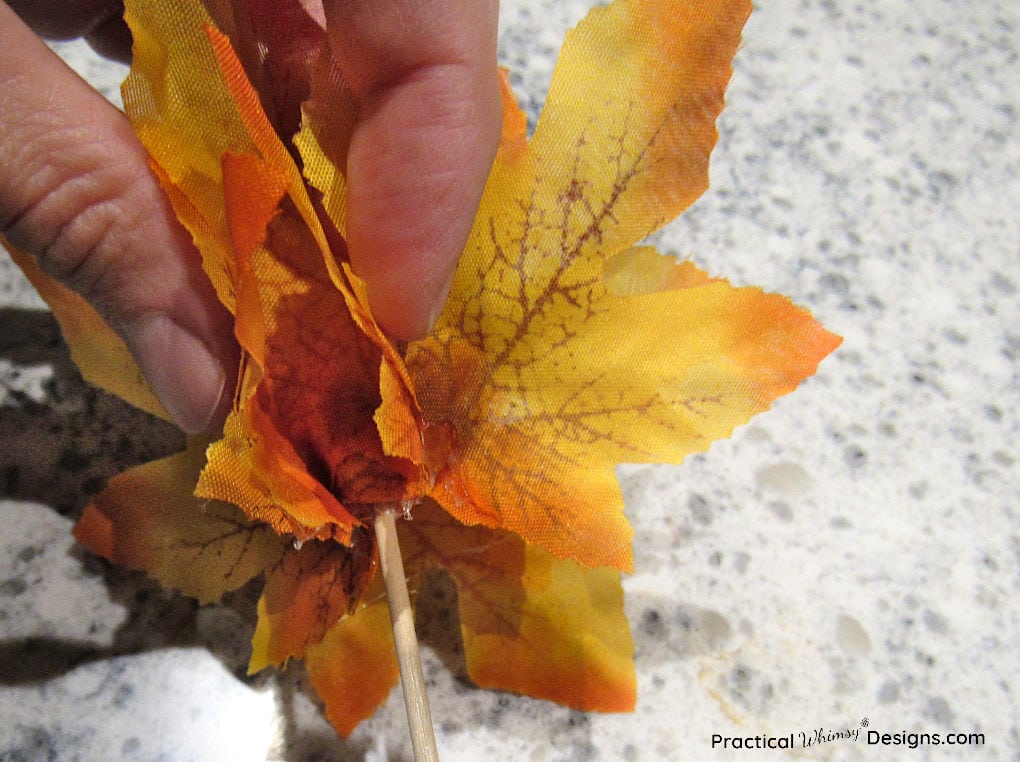
Step 2: Add Another Layer to the Fabric Flower
Now is the time to change colors and/or leaf types if you would like. I used red oak leaves for a second layer on this flower.
Place a horizontal line of hot glue around the bottom of the center leaves, next to the dowel. Wrap the leaf in a hug around the first flower, but this time bend the top of the leaf down so that the center three leaves stick out of the top. This layer is the start of the outside of your flower.
Put a horizontal line of hot glue on the opposite side of your flower across the seam of the newly added leaf. Add another leaf and bend the top of this leaf down as well. If it doesn’t want to stay down, add a little glue to the underside to keep it bent.
Keep adding layers evenly to the flower so that your flower doesn’t become lopsided, changing color and/or leaf type as frequently as you like.

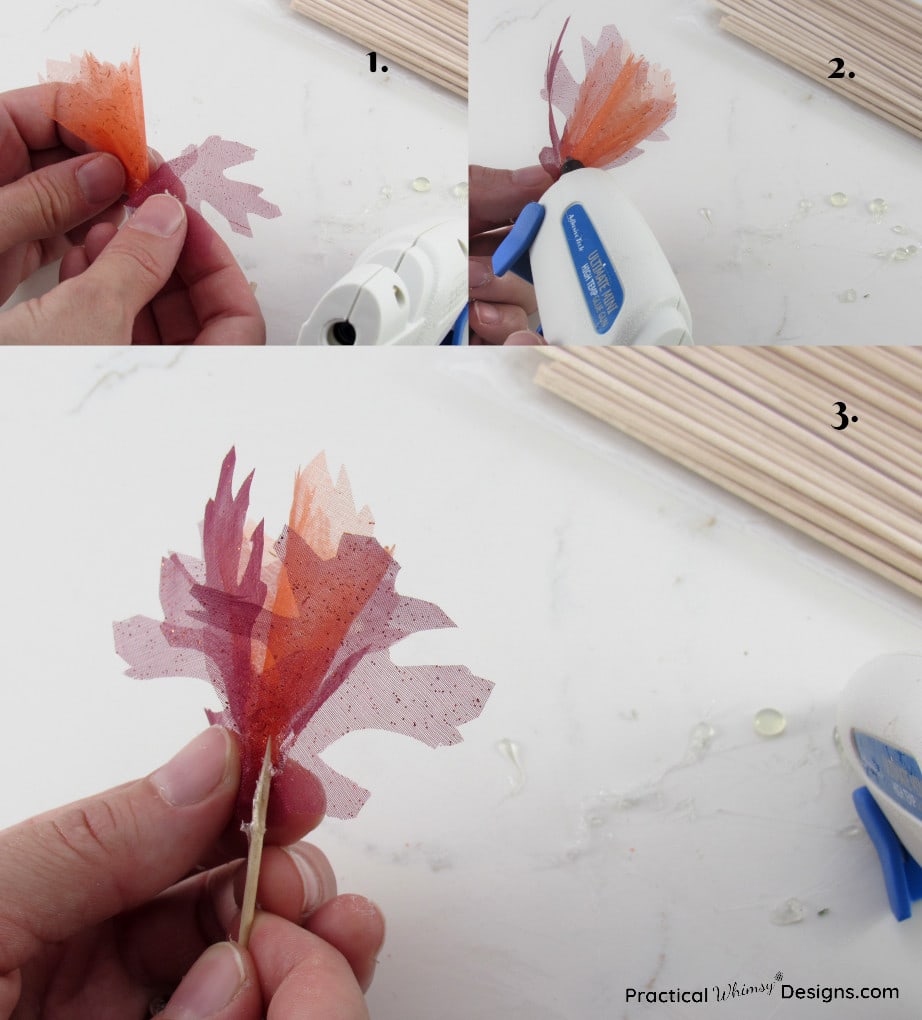
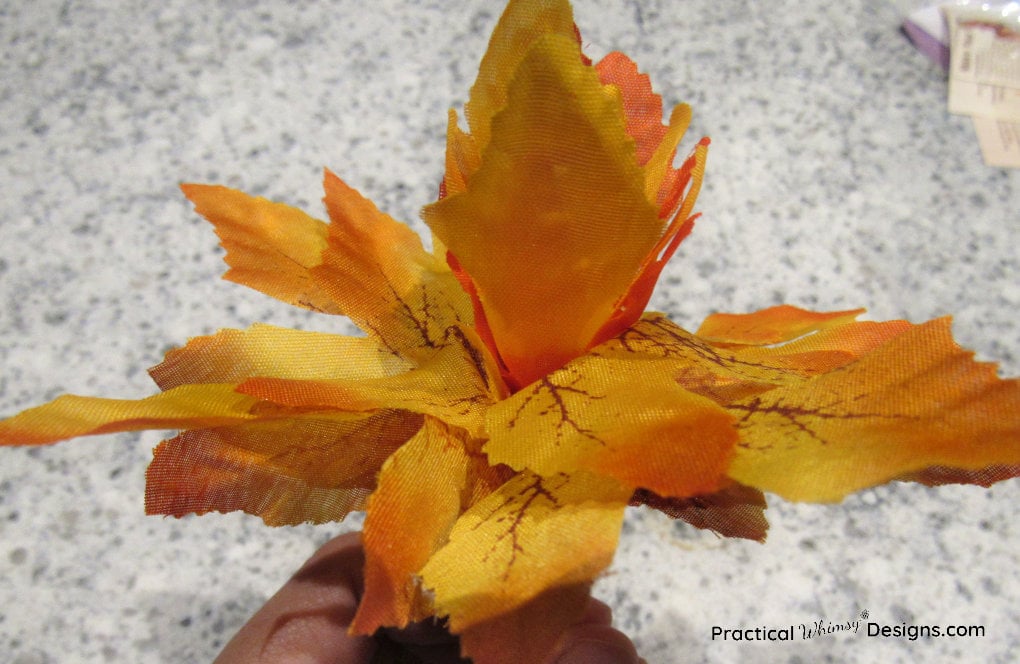
Step 3: Add the Final Petals
I used two methods to end my flowers:
Final Petals Method 1
Glue two green leaves on the bottom of the flower, opposite eachother. These act as leaves underneath the flower and should lay relatively flat.
Final Petals Method 2
If you have different sized leaves that you are working with, this is the layer that you will want to use the largest size on.
Place a dot of hot glue at the bottom of the center leaves, next to the dowel. Stick one of your new leaves on top. Do NOT wrap it around the flower this time!
Place a dot of glue on the opposite side of the first and stick a second leaf on top of this dot. You should have two leaves opposite each other. They should be attached at the center to the middle of the flower, but with their sides hanging loosely.
Take your hot glue gun and add a dot of glue in between the two loose flaps of the leaves. Fold a third leaf in a U-shape and insert it in the space between the first and second leaves. The center of the U will be glued to the flower with the sides sticking away from the flower. Now glue the sides of the U to the loose flaps of the leafs.
Repeat this process for the opposite side.
Bend these petals down to create the outside of the flower.
Ways to Use Fabric Fall Flowers
These are the two methods I used to make fall flowers for my decorations this year.
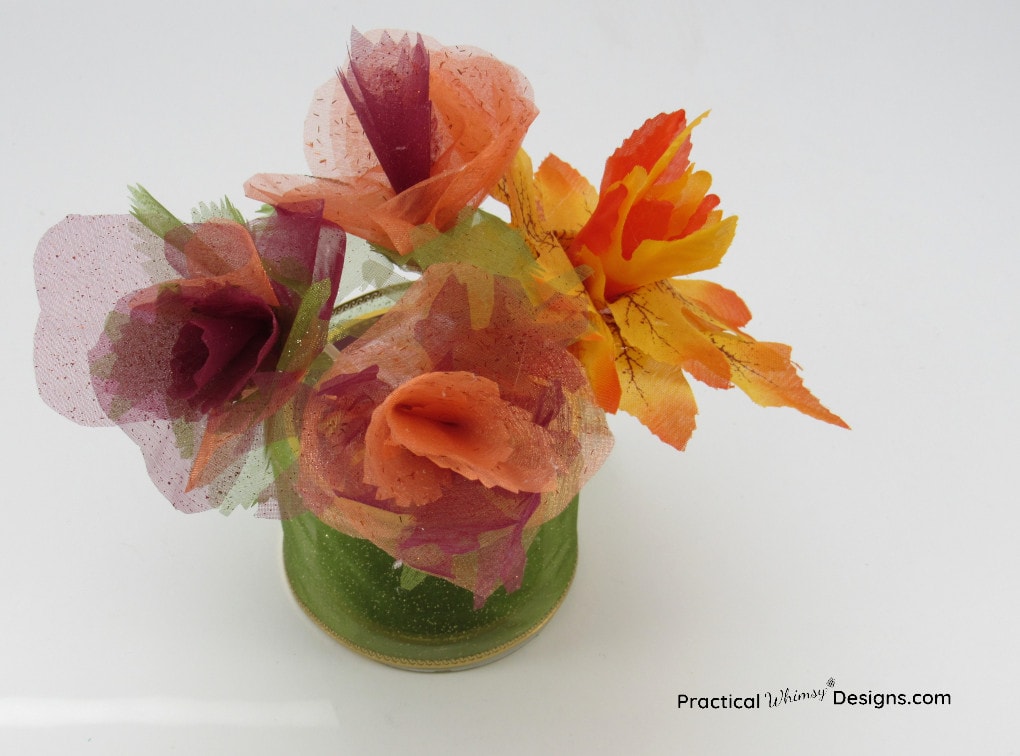
There are so many uses for these flowers. You can put them in vases, use them in your hair….

Ok, maybe not me, but my daughter would sure look cute.
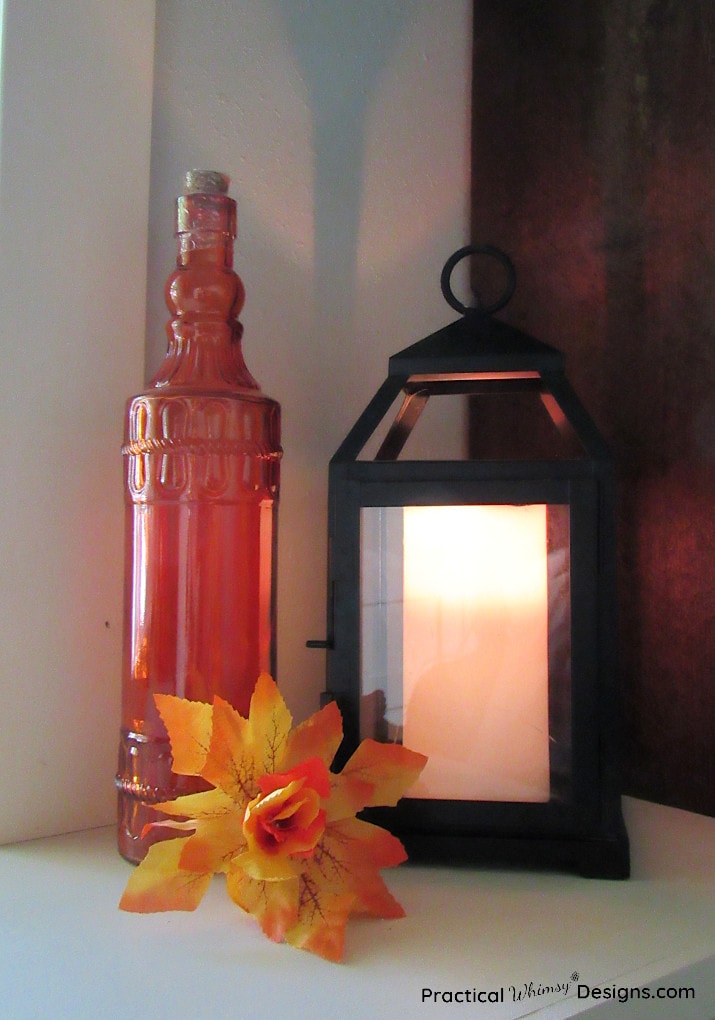
You can also lay them next to other decorations to add that fall look to your normal decor.
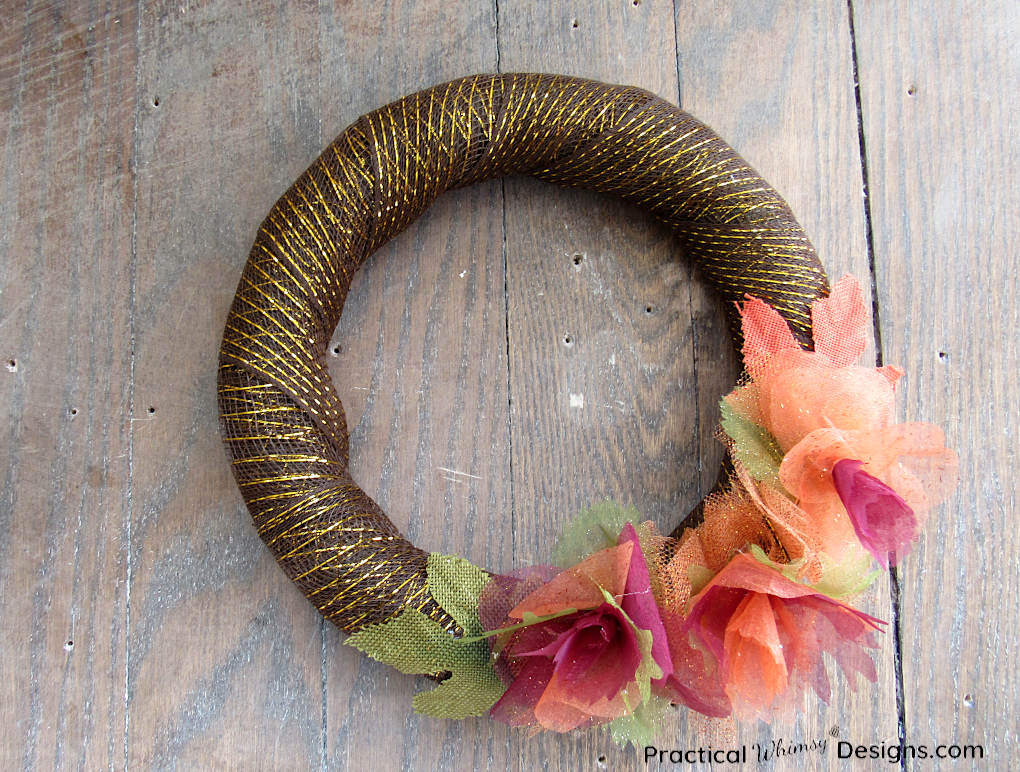
If you wish you could make a simple DIY fall wreath, jump over to this tutorial here. Guess what? You already know how to make fabric flowers for it, so you are way ahead of the game.
My free printables are one of the perks of being a newsletter subscriber. If you are interested in my leaf printable you can sign up below.
I hope that this tutorial gives you some inspiration to make a few flowers of your own.
Happy Fall!

