Want to learn how to mat a print? Use an old gift box to make a simple and cheap upcycled mat for your favorite prints.
What is flat and white and in need of a frame and/or mat?
I’ll give you a hint….
It’s NOT a newspaper…. (you know, like the joke “what is black and white and read all over……??? Anyone?)
Give up?
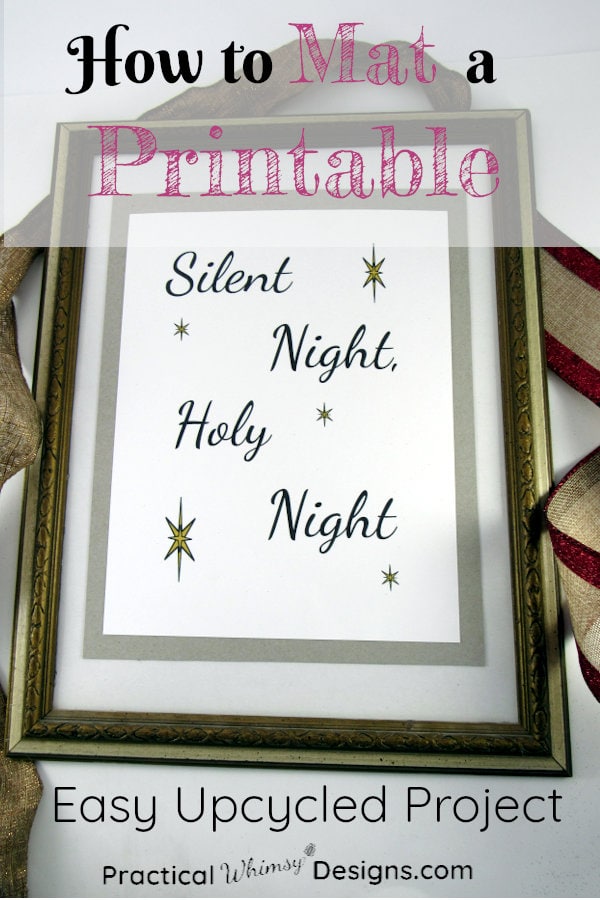
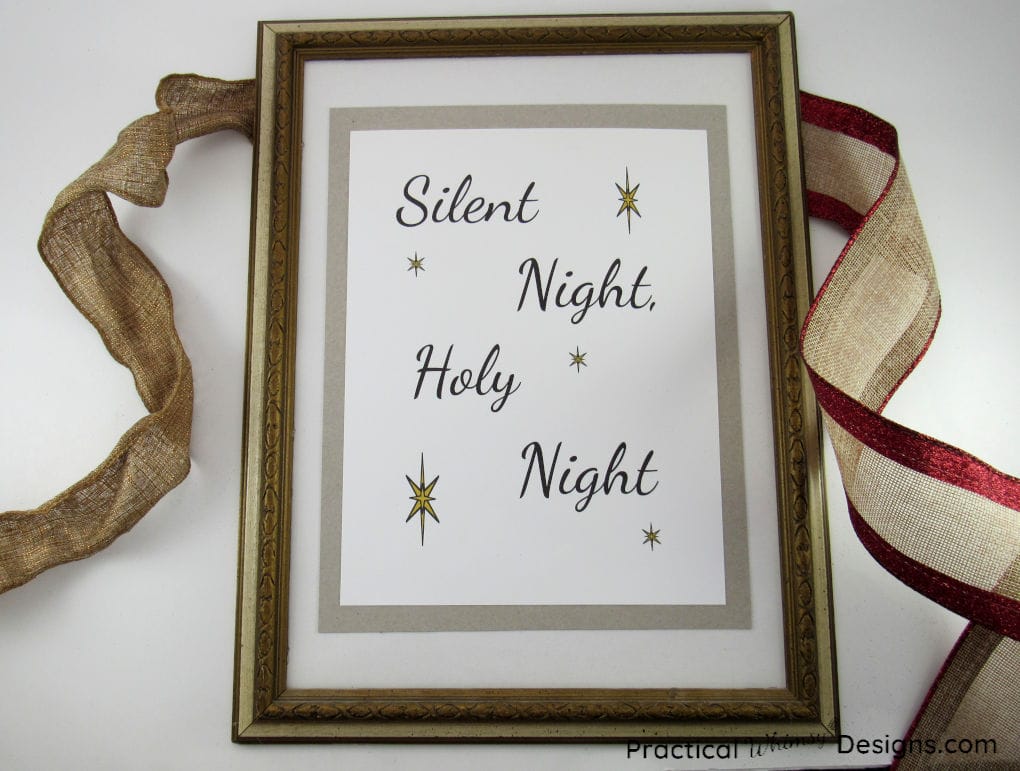
Ok. It’s the printables I made for Christmas. And with a few wording changes (not every printable is white, right?) this could be any printable you have printed. Now, you could go out and buy a frame that fits your printable, but you could also make the printable fit a frame you already have by making a custom mat……out of a box……
Yep. You heard me.
A box.
But not just any box! This box, folks, is a special box…. One that housed your gifts last Christmas. I’m talking about a gift box. The kind with white on one side and brown on the other.
So, if you have an extra gift box or two, you can learn how to mat pictures yourself.
Now, this method will give you a more rustic looking mat, but it is easy, cheap, and can be changed in the future if you so desire.
Disclaimer: If you are wanting to mat an antique photo or something valuable, gift boxes are probably not the way to go. You want to make sure that the items you use are acid free and high quality. This method is only good for items that are easily replaced and not of great value.

What you will need:
- Scissors or other cutting utensil for cutting a straight line
- Pencil
- Ruler
- Gift box large enough to fit either in your frame (if using one) or about 1-2 inches past the print you are making the mat for
- Printable
- Frame (opt.)
Steps to Mat a Print
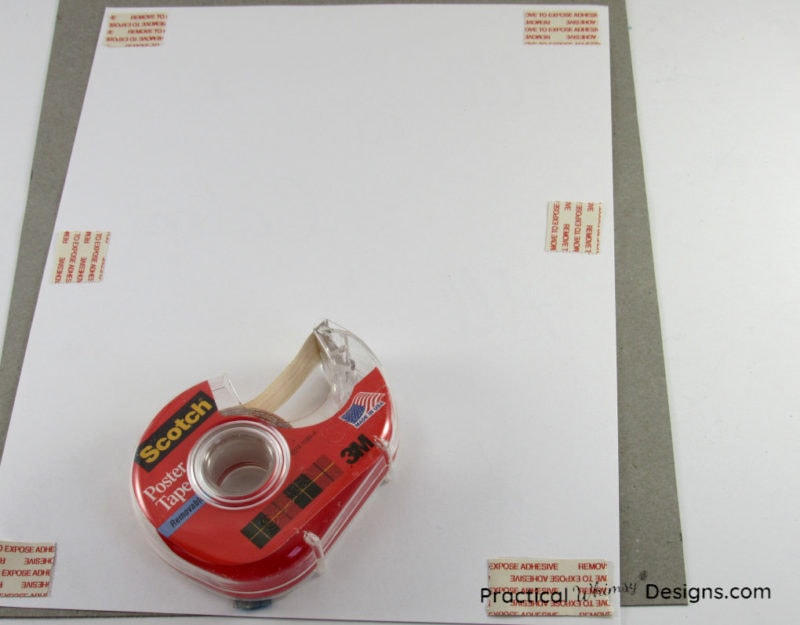
Step 1: Cut the box
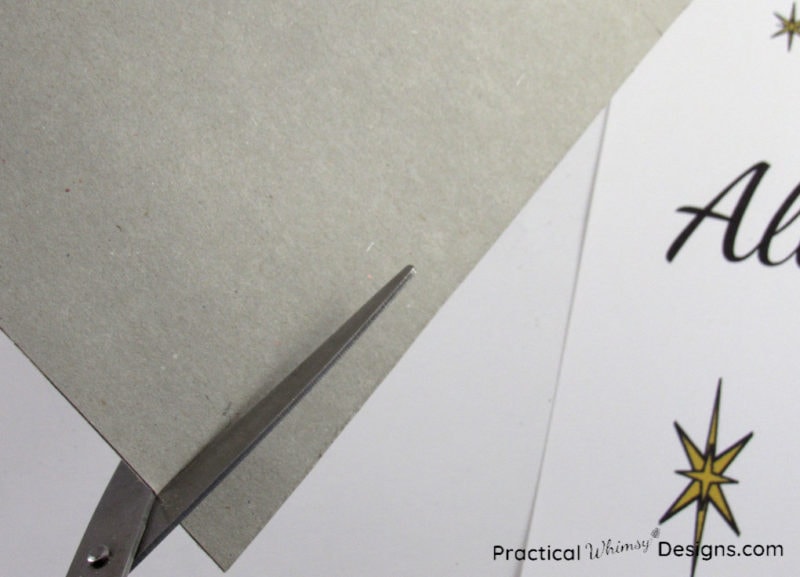
Use a scissors or other cutting method to cut the edges off the box.

Step 2: Measure the Mat
Each picture will be a little different, so this part depends on what you are going for. The frame that I chose to use for my printable had no backing and no glass front. I measured the bottom of the box and the frame and cut out the bottom of the box to fit my frame.

I wanted the white backing to be the background behind my photo.
There are 2 methods you can use to make your own mat out of a gift box.
Method 1: Stick the print over the mat
This is the method I used.
I already had the white portion of my box cut and ready to fit into my frame.
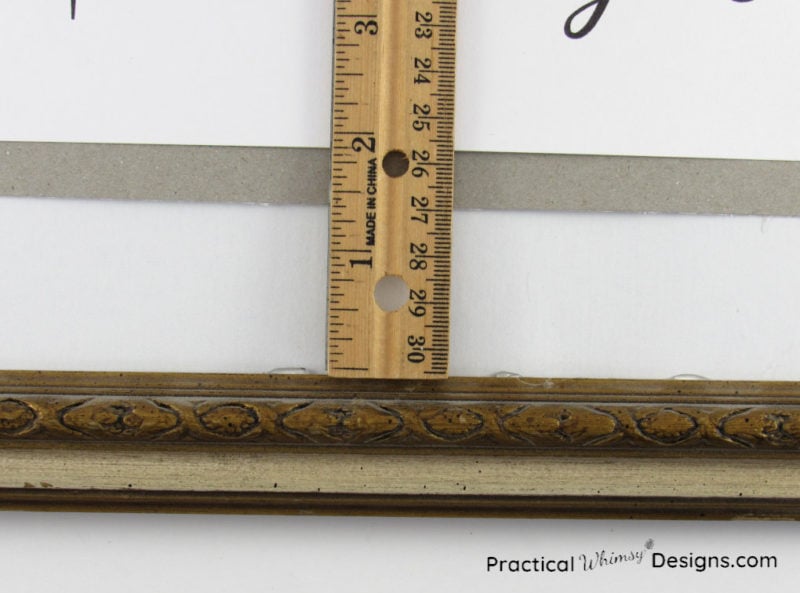
Next, I flipped the box over to the brown side and set my print on top of it. Then I measured a half inch around the print using a ruler and pencil.
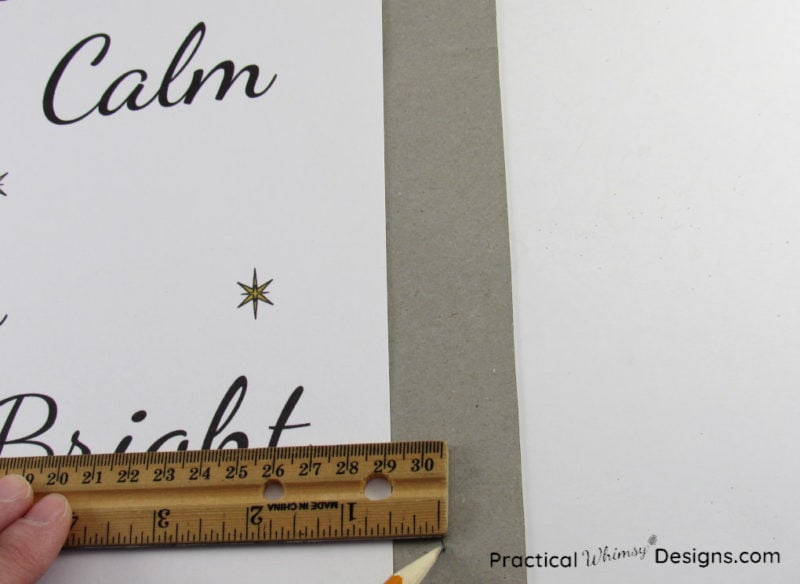
I then cut the brown side of the box out on the lines I had measured. The brown portion of my mat was a half inch larger than my print, but this is based on preference. You can choose to make it larger or smaller depending on the look you are going for.
I used double sided poster tape to adhere my print to the brown matting and then again to stick the brown matting onto the white.
Note: Make sure to measure around the print to double check that all of your sides are even before you stick the tape down.
This is any easy method to mat a print and give it a layered look. I think it is easier than the second method, so that is why I chose it, but the method you choose does depend on what look you are going for.
Method 2: Inset the print behind the mat.
This second method requires you to cut a rectangle into the center of your matting. The rectangle fits over the print and frames it.
The first step: determine if you want two colors in your matting. To get the layered look of two different colors, measure the center rectangle of the brown layer until it just covers the edges of the print. (ex. if your print is 8 1/2″ x 11″ you would cut the rectangle to 8″ x 10 1/2″, 7 1/2″ x 10″, etc.) Cut out the rectangle you measured.
Then measure and cut the center rectangle on the white box to be about 1/2″ larger on each side so that you see the brown peeking through on every edge once the rectangle is cut.
Adhere the print to the underside of the brown layer and stick the brown layer on the underside of the white. Again, make sure to measure so that all of the edges are even.
Step 3: (opt.) Place your print in a frame
I used a frame I had around the house. Since there was nothing to hold the print into the frame, I glued the mat onto the frame edge with hot glue, but, of course, do what is easiest to fit your new matted print into your frame (if you choose to use one). You can use these mats without frames too.
This was a great way to upcycle some of the gift boxes I have accumulated over the years. I love the rustic look of the white and brown mat and it was a cheap way to add some definition to my prints.
If you are looking for a cheap way to make your prints stand out this year, try this method of matting for a rustic yet classy upgrade.
Want these silent night printables? These and all of my other free printables are available to my newsletter subscribers as one of the benefits for being a subscriber. If you are interested in becoming a subscriber, you can sign up below.
The form you have selected does not exist.
Want to remember how to mat a print? Save this tutorial to your favorite DIY Pinterest board.