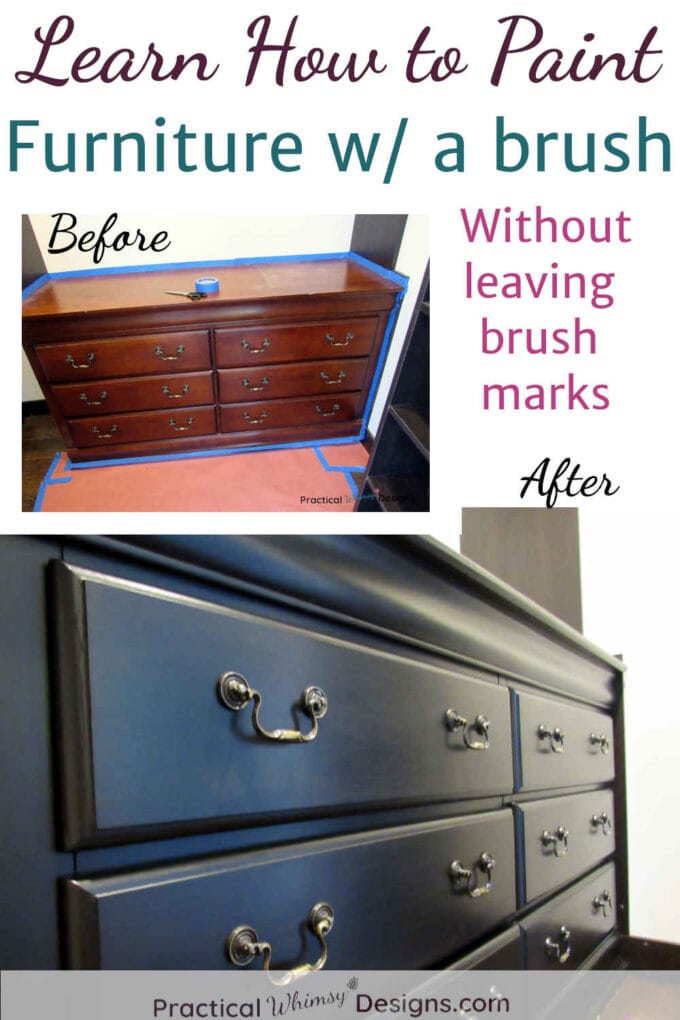
Learn how to paint furniture with a paint brush without leaving tons of brush strokes. It takes a little work, but it is possible to create a smooth finish.
Struggling with finding the perfect paint color for your home? My design guides are available for free to my newsletter subscribers. Grab my Free Paint Guide and FINALLY pick a wall color that you love!
One of the more economical ways to upgrade your furniture is by painting it.
Have an outdated dresser that needs a face lift?
Paint it.
Need to freshen up your room with a new look?
Add a pop of color by painting a table or book shelf.
Even decorations can find a new life through paint such as this bronze vase I made recently when we remodeled our Master Bedroom.
Spraying your paint onto your furniture is the best way to get the smoothest finish on your painted project. Whether you use a paint sprayer or a can of spray paint, it is much easier to get a smooth finish with no brush strokes. (Probably because you aren’t using a brush. Ha Ha.)
Sometimes, however, painting with a paint brush is necessary and you can still get a smooth finish with a paint brush if you follow these tips.
This tutorial is part of the Thrifty Thursday Collaboration where a group of bloggers share a Thrifty tutorial to help you decorate for less. Check out the other projects at the bottom of this post.
How to Paint Furniture with a Paint Brush
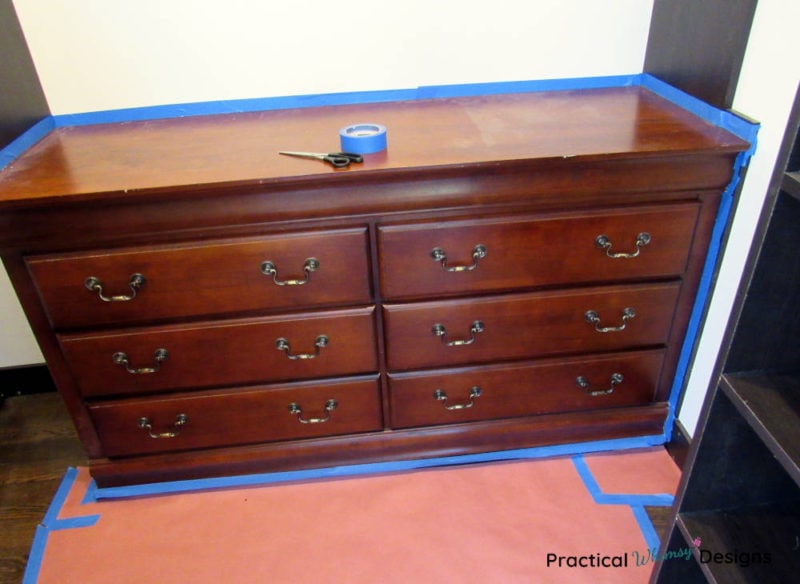
We decided to build one of our old dressers into our master closet as part of the built in shelving and drawer system we installed. This was a cheap way to get drawers in our closet without spending much on it.
The problem? The dresser was cherry red, just like our queen sleigh bed that we re-did when we remodeled our bedroom.
All of the furniture in our master suite is dark bronze in color.
We decided that the best solution was to paint the dresser to match our shelving and furniture.
Since the dresser was already built into the closet, spraying it was not a great option. I decided to hand paint it.
This post contains some affiliate links for your convenience (which means if you click a link and make a purchase I will earn a small commission at no extra cost to you). Please see my disclaimer page for more information.
Materials I Used for this Project:
- Pittsburgh Paints & Stains Fast Dry (The Color we used= Pittsburgh Black Magic with a Satin finish)
- Primer
- Purdy XL Elite Dale Paint Brush
- Misting Spray Bottle (I use this one)
- Sand paper (I used 240 grit and 400 grit)
- Painter’s Tape (if needed)
- Wood Putty (if needed)
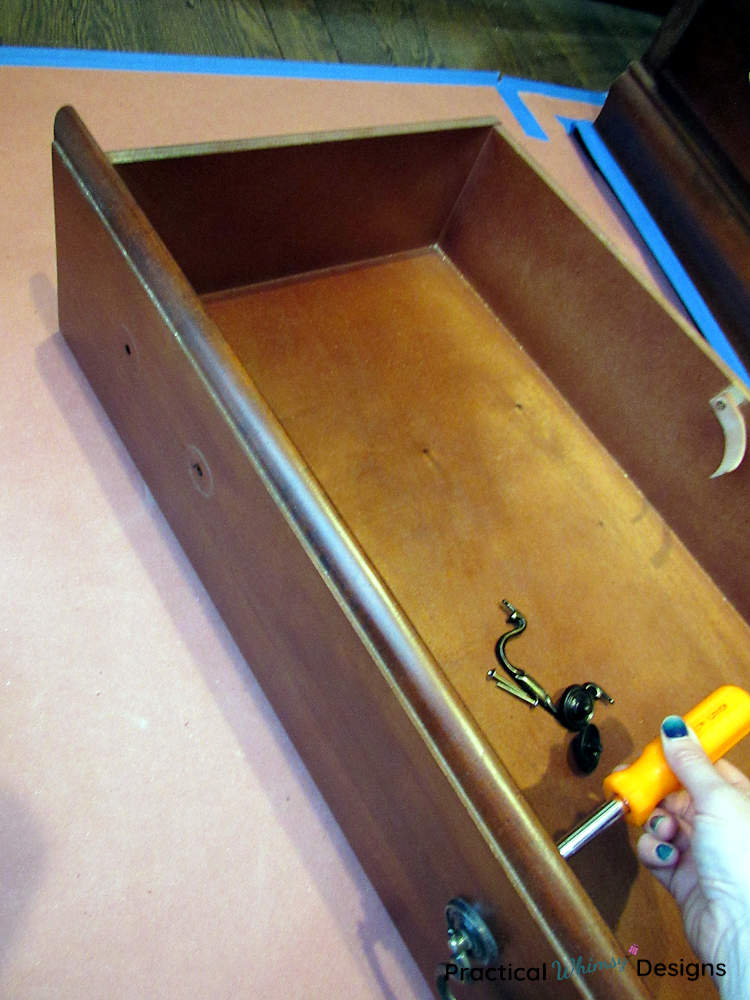
- Screwdriver for removing hardware
- Clean cloth or disposable shop towel.
How to Paint Furniture Without Brush Strokes
1. Prep the Dresser
First, if you are able, remove any hardware that is on your furniture. It is so much easier to take handles and knobs off if you can.
Use painters tape to tape off anything you don’t want painted.
Paint does not do a very good job of hiding any dings or dents in your furniture. If you have any repairs to make take a few moments to fill these in with wood putty before painting. Let the putty dry.
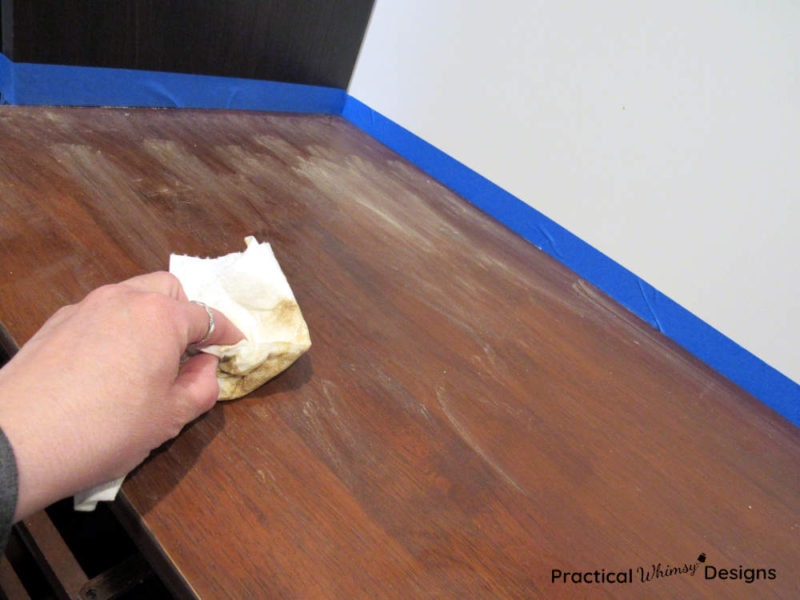
If you are painting over stain, roughen up the top coat with sand paper. I hand sanded the top coat of my dresser with 240 grit sand paper. You don’t have to remove everything. You just need to give the primer something to stick to. Use this time to smooth out any blemishes as well.
Wipe off the dust with a damp clean cotton cloth or disposable shop towel.
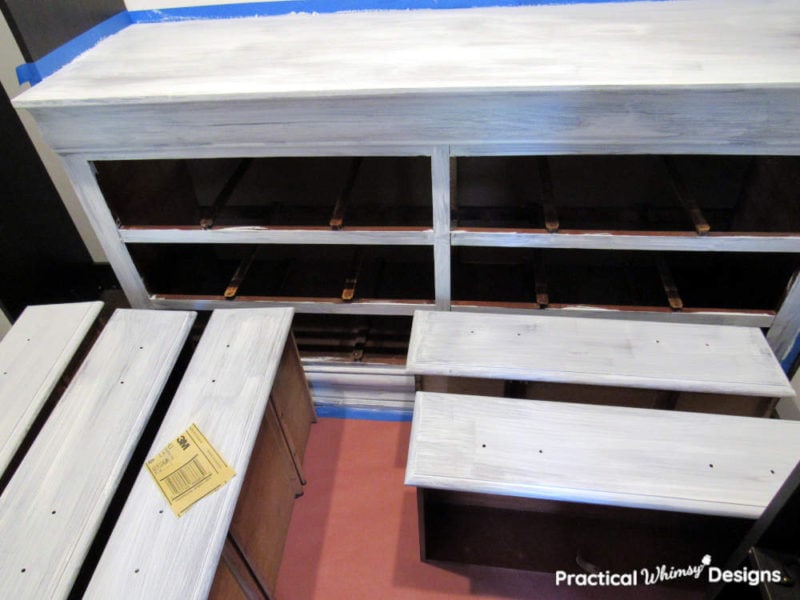
2. Paint with Primer
Use a coat or two of primer to cover over your old stain. I used two coats of primer and sanded with 400 grit sand paper in between coats.
Don’t skip the sanding!
If you have bumps on your primer, you will also have bumps on your finished product.
Wipe off any dust caused by sanding the primer before you paint your next coat.
If you tint your primer to be closer to the color you are painting, you may not need as many coats of paint, but I used a can of white primer because I already had it at home.
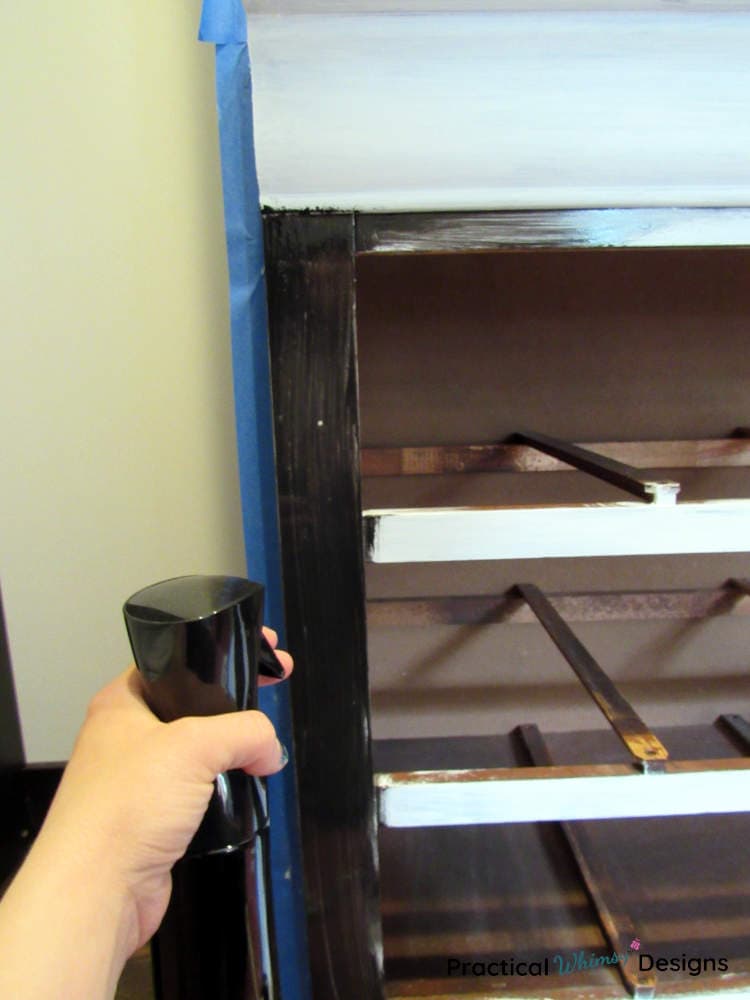
3. Use a good quality paint and brush
The paint brand that you use makes a huge difference. I have used some trim & cabinet paint that took forever to dry and was tacky for a very long time. My favorite paint right now is Pittsburgh Paints & Stains Fast Dry. It is a water based paint, so the brush washes out with water. It also dries quickly, and has a nice, smooth finish.
You also want a good brush with relatively thin bristles. I used this paint brush to paint my dresser.
The form you have selected does not exist.
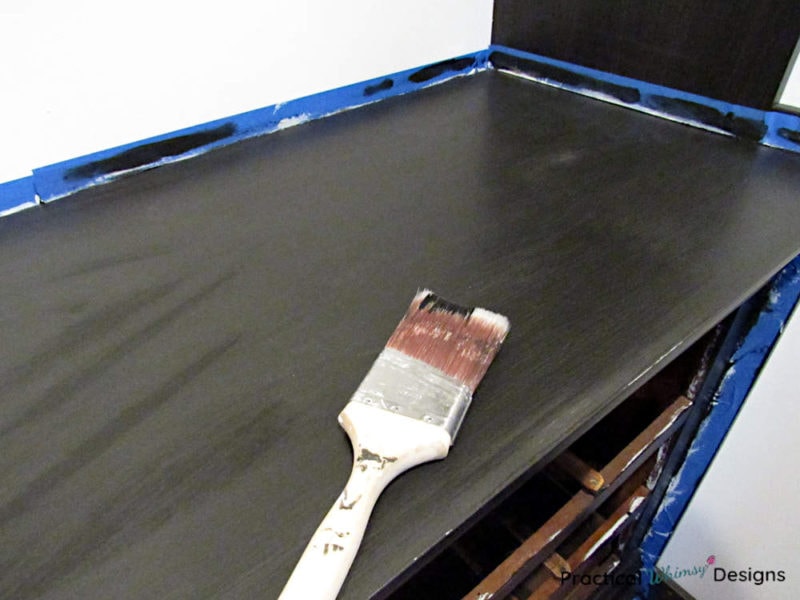
4. Thin your Paint with Water
This is probably the biggest key to getting a smooth finish with a paint brush. You need to give your paint the chance to fill in any brush marks, so this means adding a little water to your paint to slow down the drying time.
Note: This only works if you are using a water based paint! Do not add water to an oil based paint.
One option is to add water straight into the paint, but I like using a mist bottle to spritz water as I paint. (You want one that applies the water in a fine mist instead of a direct stream.) That way I can add as much or as little as I need. I paint a little paint, spritz it with water and then blend in the water and paint until the finish is smooth. I use a light hand with my brush and don’t use a lot of paint at a time.
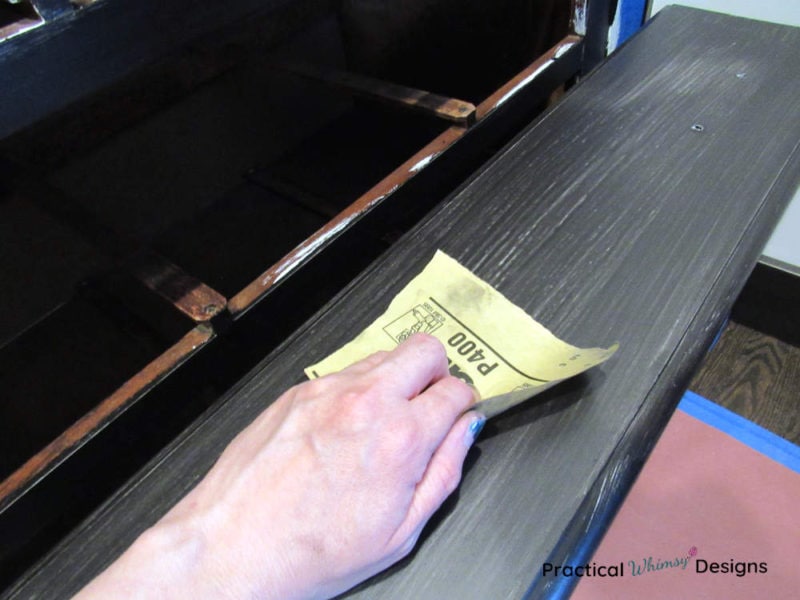
Don’t forget to sand in between coats of paint!
I know it is time consuming and it is easy to want to skip it, but getting a smooth finish takes a little work. I used 400 grit sand paper to smooth out my paint in between coats unless I made a mistake and had a larger bump to sand. Then I used 240 grit sand paper.
A Few Other Tips
- Always make sure to work in one area so that you are not painting into a space that has already begun to dry. Otherwise you will make brush marks in your paint that won’t dry smooth.
- Use multiple thin coats rather than thick coats of paint. This will give you a smoother overall finish.
I did not add a top coat to my paint because it wasn’t in a high traffic area. I did have to be careful not to scratch the paint for the first month or so after painting as the paint takes a while to fully cure.
If the furniture you are painting will have heavy use, you will want to add a top coat such as a polyacrylic or water based topcoat to prevent the paint from scratching. Just make sure that the topcoat you choose doesn’t yellow as it ages.
Finishing the Project
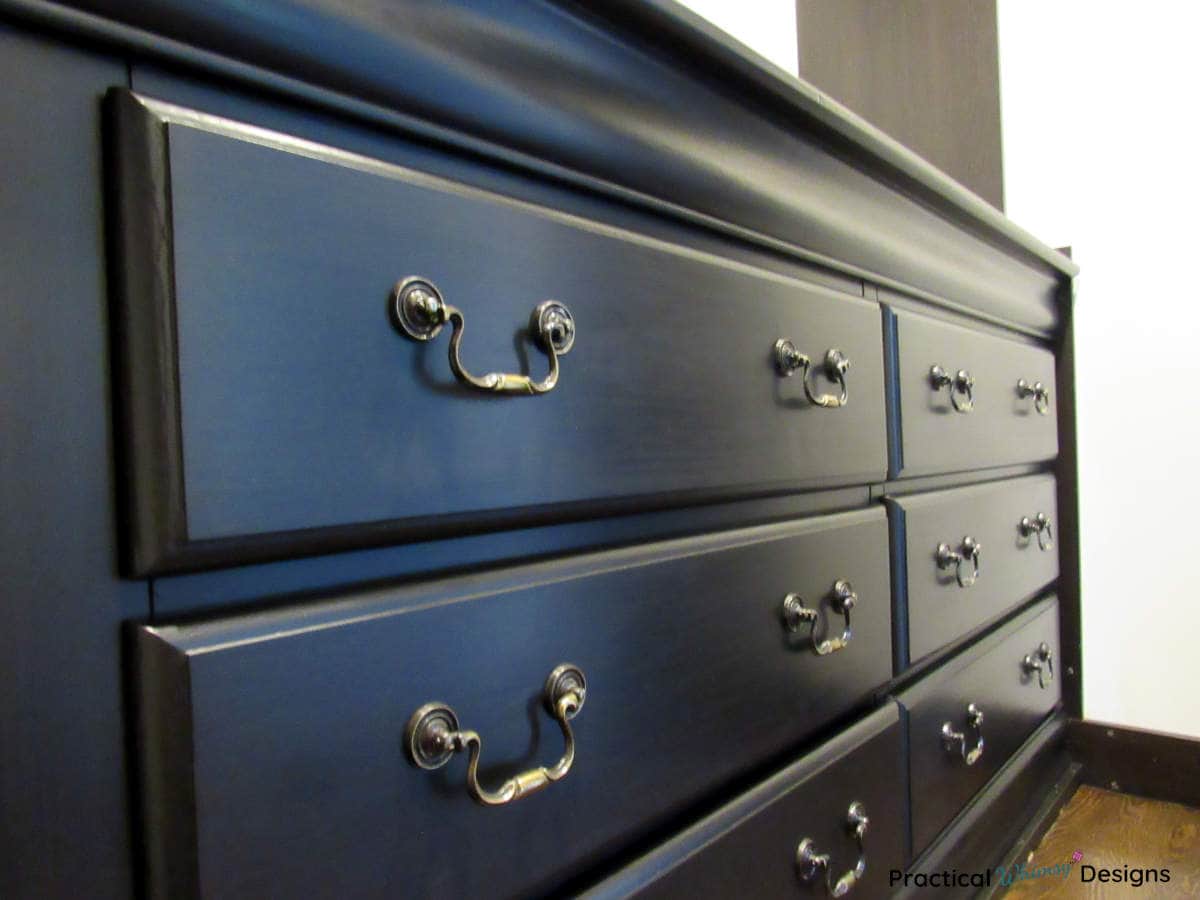
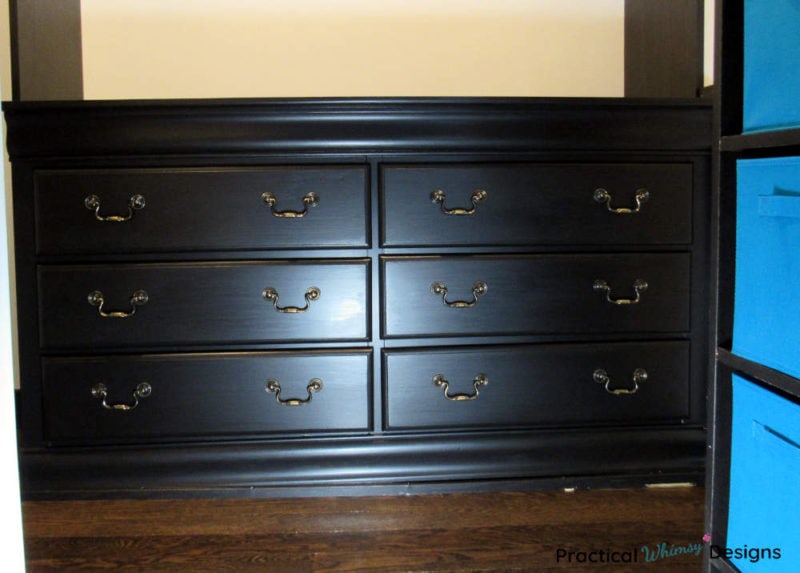
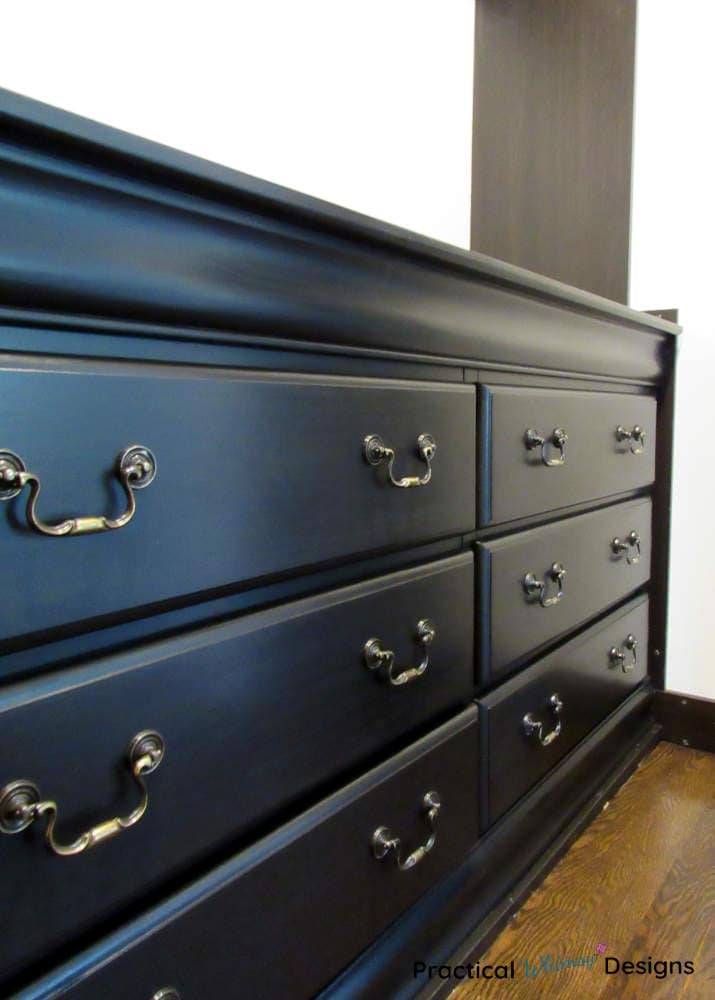
I used three coats of paint on my dresser and I love how it turned out. I can hardly tell it was painted with a paintbrush.
The color turned out perfectly and compliments the other furniture in our master bedroom.
Want to remember this tutorial? Save it to your favorite DIY board on Pinterest.
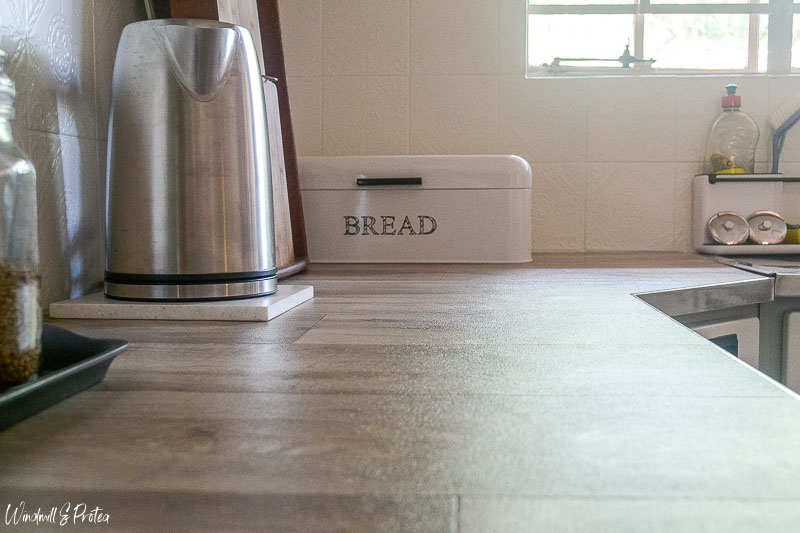
Need a few more ideas for your home? Check out these fun tutorials from the other bloggers from the group. Sara at the Inspired Decorator re-did these cute garden gnomes and Junette from Windmill & Protea made an awesome counter out of sheet vinyl.
-
 Windmill & Protea
 -
 The Inspired Decorator

Want More Great Ideas? You Might Like These..


Are we friends on Instagram?
Follow @PracticalWhimsyDesigns to see more
behind the scenes projects
I love this and want to try this technique on a storage cabinet I own. What paint finish did you use on the dresser? Thanks!
I am so glad that you are planning on trying this technique! I used a satin finish in the Pittsburgh Paints & Stains Fast Dry brand. This paint dries fast and hard and my furniture is not in a high traffic area. I didn’t use a topcoat. If your cabinet will be used heavily you might want to also add a topcoat over the paint, such as a wax or polyacrylic. Just make sure it is non-yellowing.
It’s just gorgeous, you did a fantastic job and the water is a great tip! Thank you!
Thank you so much! This painting technique really does give a smoother finish if you can’t use a paint sprayer. I hope that it helps you with future paint projects.
Wow! These are all such great, practical tips on leaving a smooth paint finish. Thank you so much for sharing!
Thank you so much! I am glad they are helpful.
I would have never of thought to mist my paint as I was painting for a smoother finish! That is awesome because I hate when I paint things and you can see brush strokes, of course after it is finished and dried! Thanks for sharing your tips!!
Thank you for reading. I am so glad that you found the tip about misting the paint helpful! I hope it will work well for your future painting projects.
Wow, this dresser looks great, Erin! Thanks for this detailed post – it wonderful that you were able to get such a smooth finish with a brush!
Thank you so much! It definitely takes some patience, but it is worth the effort.
The finish is so smooth! You can’t even tell it was painted with a brush. I love your idea of using a water mister as you go along. Jotting that one in the memory bank. Thanks for sharing!
I am so happy with how it turned out. I like the mister too, because I’m always afraid I will mix the wrong amount of water into my paint. This gives me a little more freedom to play around with the consistency. I’m glad the idea was helpful to you too.