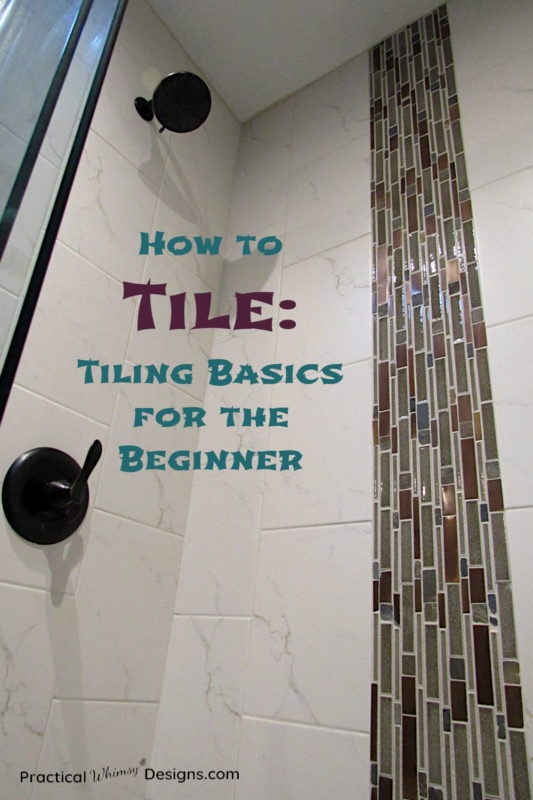
If you are a beginner and have always wondered how to tile, this tutorial is for you. Learn the basics of tiling and a few tips and tricks to help you succeed.
There is no denying that when it comes to the construction part of our DIY projects, my husband is the expert. It is what he does for a living and I usually just let him do his thing. I am way slower and not nearly as experienced in the way of construction.
However, I always am on a quest for more knowledge and I honestly do wish that I was better at some construction techniques. One of the things I have been trying to have him teach me is how to tile.
We have been doing A LOT of tiling on our house so I have had a few opportunities to learn now. As I was attempting to follow his instructions, (and believe me, I am still painfully slow at this process,) it dawned on me that maybe a few straight forward tutorials and secrets of the trade, could be a helpful thing to share with others.
Now, this tutorial is for those who do not have much experience with tiling. However, even if you are a seasoned DIY veteran, I hope that this tutorial is a good refresher on the basics.
Basic Tiling Supplies
- Notched Tile Trowel (Size varies depending on the type of tile, so check your tile box for the size you need)
- Drill (This needs to be a strong, heavy duty drill. If you own a smaller drill you will only be able to mix a little mortar at a time)
- Mixing Paddle
- 5 gallon bucket
- Mortar
- Tile
- Tile Spacers (Size depends on the look and width of the grout line you are going for)
- Measuring tape
- Straight Edge (level, ruler, chalk line, etc.)
- Pencil
- Tile Cutter
- Tile Nippers and/or Grinder with a diamond blade
I know that this is a pretty long list of tools that are needed for tiling. However, if you are planning on doing your own tiling, these are the basic tools required.
How to tile
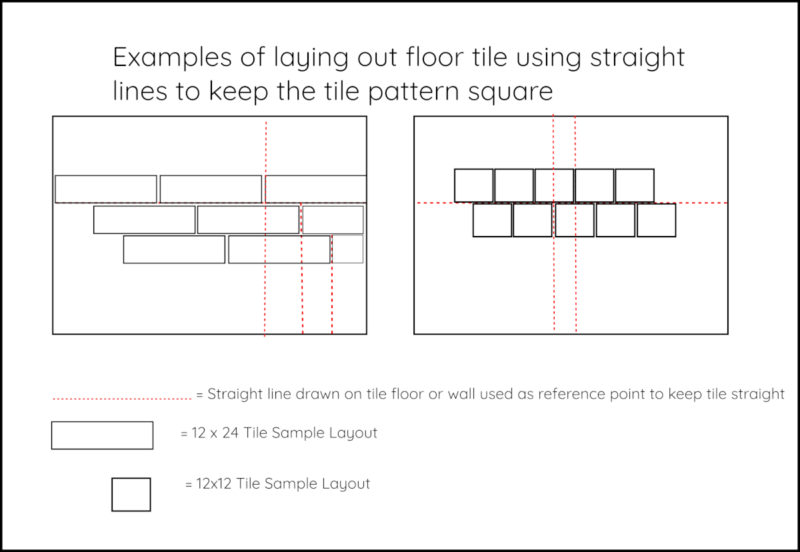
I wish that you could just slap the tile on, but there is actually some strategy to laying out your tile. You want to make sure that you don’t end up with a sliver of tile on one end of your room and a full piece on the other. It needs to look balanced when you are done.
You also want to have a full piece of tile on high traffic areas, like doorways and next to tubs. That way the tile is strong and isn’t as much of an eye sore. Also, staggering the tile seems to be the current design style. Usually you don’t want the tile to be laid out in a grid like fashion unless it is an intentional design choice.
Step 1: Lay out your tile.
Before starting any tiling project, it is a good idea to lay out your tile to get an idea of your design.
Your first step is to draw a reference line close to the center of your room. To figure out exactly where this line should be, measure your room width and then measure the width of your tile. You will need to determine how many rows of tile are required to go across your room. (Take into account the tile spacers when measuring.)
Note: The spacers will help keep your tile straight and give the grout line a more uniform look. The size of spacer depends on the look you want and how large of a grout line you are going for, so determine which size of spacer you want to use and add that into your measurement.
Draw your line close to the center of your room using a level, chalk line, ruler, etc. to give you your straight line. Again, this line may not be at the direct center. You don’t want a small sliver of tile on either end of your room, so you may need to shift the line a little to prevent this from happening.
Use this center line as a reference and lay your first row of tile along it. Then draw a 90 degree angle off of the original reference line and lay your next row of tile, staggering the tile as you go. You will use multiple straight lines to keep your tile symmetrical. Verify that your high traffic areas (doorway, tub, sink, etc.) have close to a complete tile width and adjust your line accordingly.
Below are a couple of sample layouts so you can get a visual of the lines.
Step 2: Cut your tile.
Once you are happy with the tile placement, it is time to start cutting your tiles to fit.
Measure the space and mark the tiles with a pencil. (Don’t forget to account for the spacers!)
Use a tile cutter, nippers, or grinder to cut your tile to the correct length.
Note: Tile cutters work well for large, straight cuts. You will need to use a nippers or grinder for any curved cuts (ex. around toilets, shower heads, etc.) or small cuts. To use a nippers, score the tile first with a glass cutter and follow along the score mark with your nippers. This is a time consuming process, but a little less intimidating for a beginning tiler then a grinder. You can also use a grinder to make curved cuts, but it takes more skill and confidence.

When all of your tile is cut and ready, it is time to move on to the next step. Mortar!
Step 3: Mix the Mortar.
Now, there are a few cases and types of tile with which you could use mastic to “glue” your tile to your surface. Read the instructions on the tile box to see what is recommended for your particular type of tile. Many tiling jobs require mortar. Mortar helps cement the tile to the wall or floor and helps fill in any discrepancies in your surface. I mean, face it. If you are working on an old house, chances are the floors and walls may not be as straight and level as they once were.

Mortar comes in bags of fine powder that need to be moistened with water before using. Your first step is to get that mortar wet and to the correct consistency.
Grab your 5 gallon bucket and put about an inch of water in the bottom of the bucket. Then add about 1/4 of the bag of mortar to the bucket. This keeps the mortar from sticking to the bottom of the bucket and allows the water to penetrate all the way through. It also keeps the mortar from puffing up as much when mixing.
Use your big mixing paddle and drill to mix the mortar. Keep adding water, a little at a time, as you mix until your mortar is the consistency of mayonnaise.
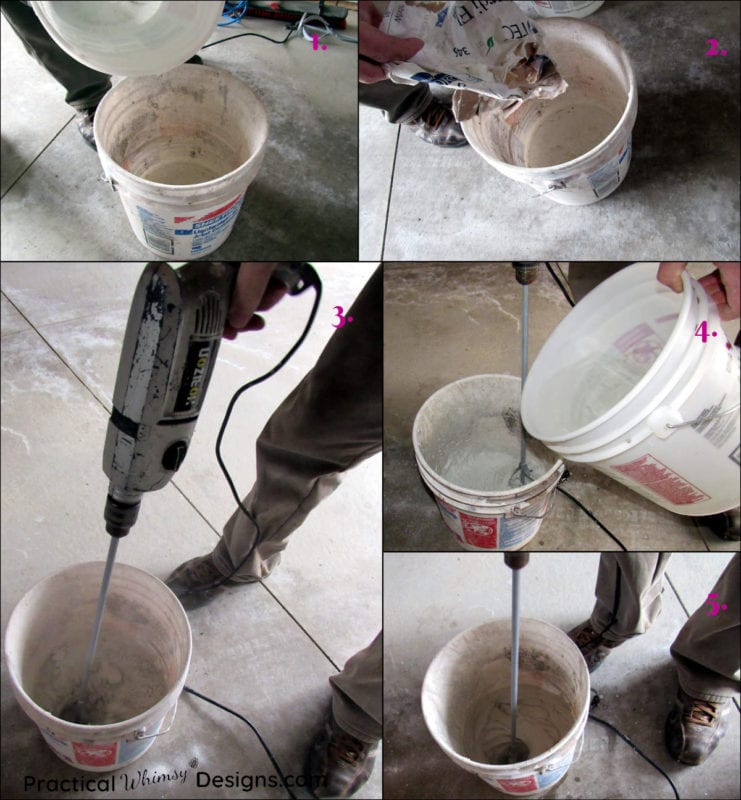
To test this, stop mixing the mortar and lift your paddle out of the bucket. The mortar should drip off the paddle in slow clumps.

When your mortar has gotten to that perfect sandwich spread consistency, let it stand around 5 minutes to let the water completely penetrate the mortar. Then remix it before applying. (Look at the instructions on your bag of mortar to see how long to let it sit. Different brands of mortar may have different instructions. Always follow any safety regulations listed.)
Note: Starting out, I would recommend not mixing up more than 1/4 bag at a time. Mortar dries as you use it. Usually you can apply about a 1/4 bag of mortar before it starts to get unusable, so this is a good amount to start with. This is also a great time to clean off your tools so that the mortar doesn’t harden onto them and ruin them. Use water to rinse off your tools. So remember, 1/4 bag of mortar, then wash tools and repeat.
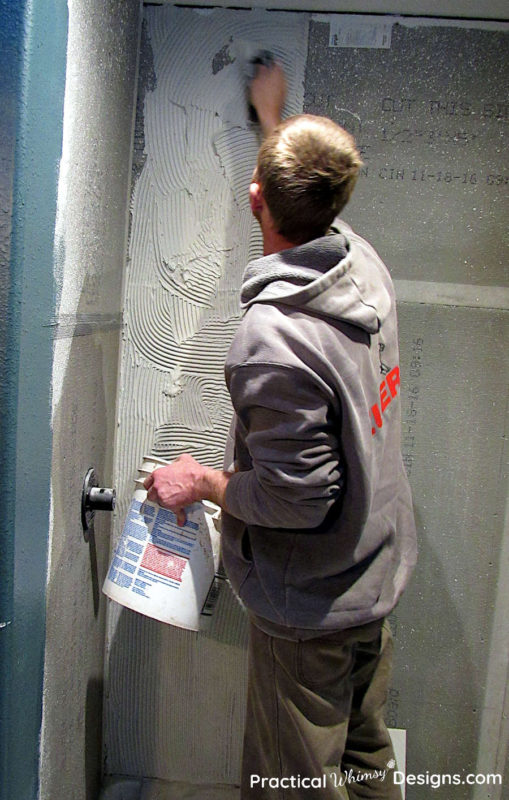
Step 4: Apply mortar.
Use the trowel to apply mortar to the wall. Hold the trowel at a 45 degree angle when applying. The trowel will create ridges in the mortar. This adheres to the tile and creates a suction that holds the tile to the wall or floor.
Use your straight line as a reference point as you add the mortar. This will help you keep your lines straight.
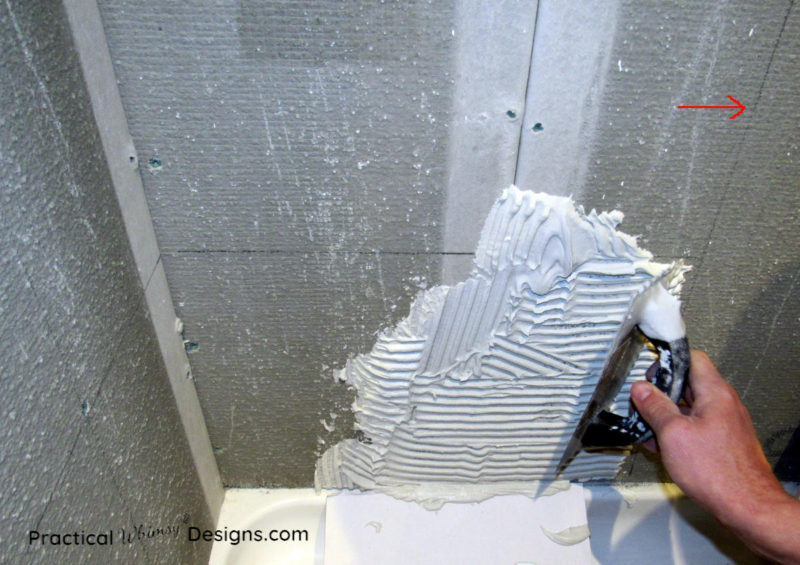
Keep applying mortar until you have your section filled.
Step 5: Lay the tile.
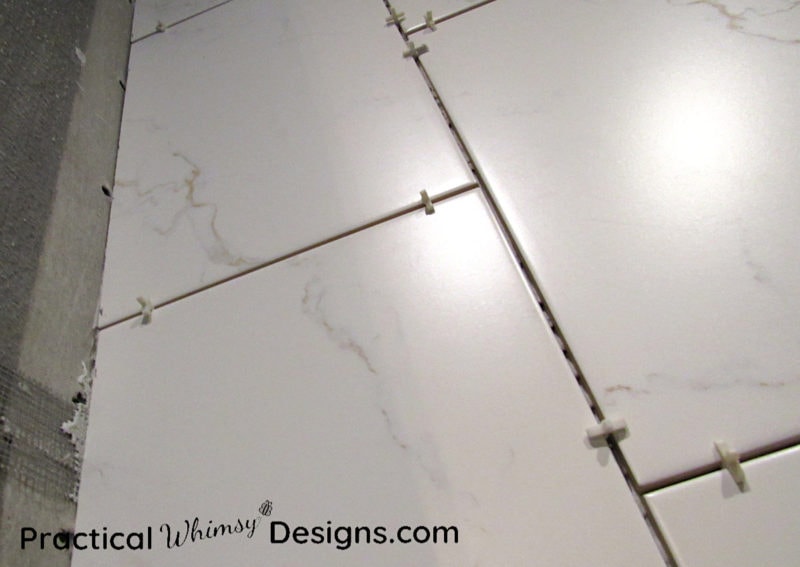
Set the tile into the mortar and place your spacers in between each one.
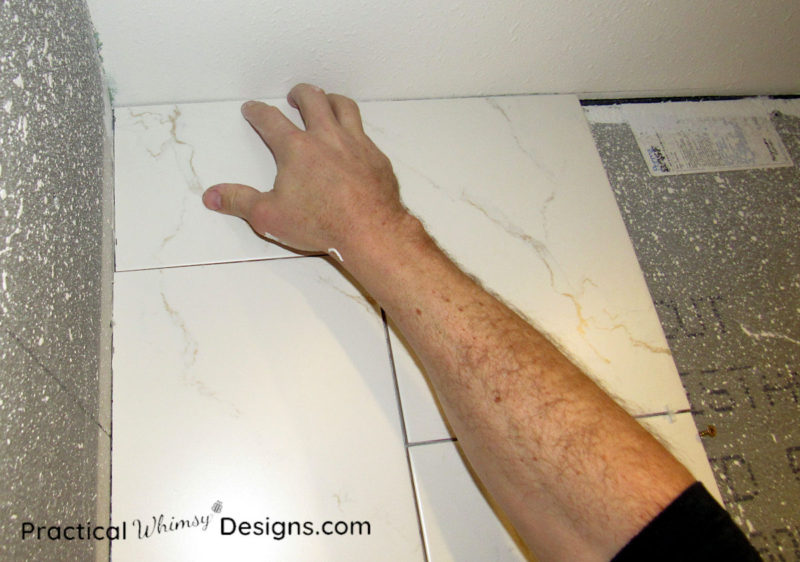
Finish your next row of tile, placing spacers in between the first and second row as well as in between each tile on the second row.
Repeat until all of the mortar that you have mixed is used up.
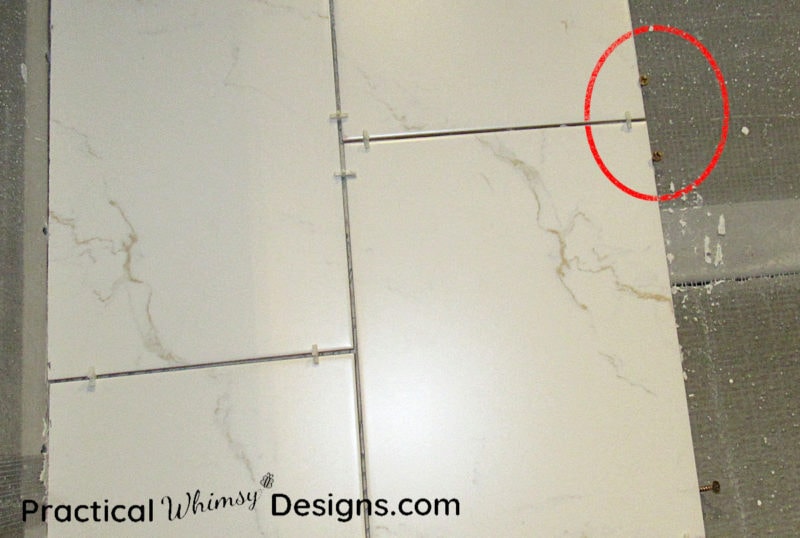
Pro tip: If you are changing tile types or are done with your 1/4 bag section and need to mix more mortar, put screws in along the tile as you work your way up. This is especially helpful on walls. The screws will hold your tiles straight so they don’t shift and slide across your level line.
Let your tile dry overnight before you walk on it or add grout.
Conclusion
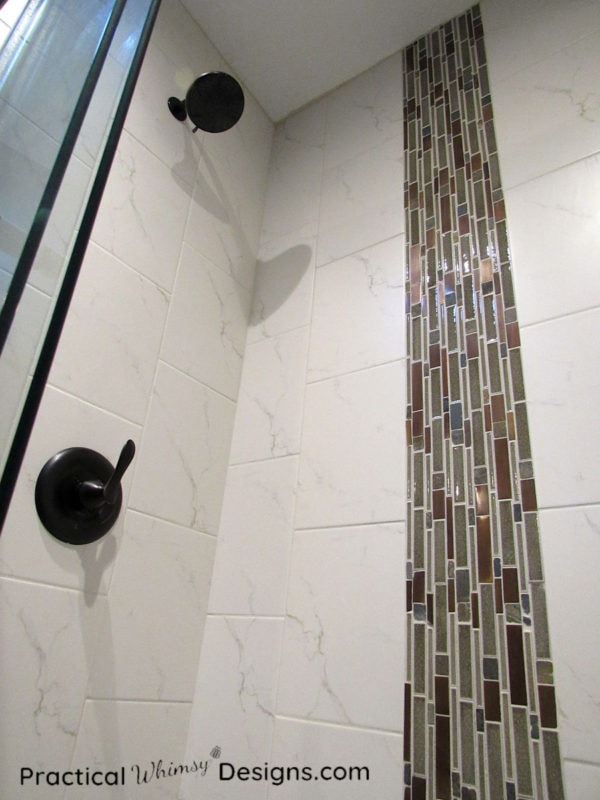
This is the basic concept of tiling and it should get you started on an easy tiling project. I hope to add a more advanced tiling tutorial soon, but I wanted to give a starting point for anyone who has never tiled before and needed step-by-step instructions.
What’s next? Grouting of course. If you need a tutorial on how to grout you can check it out here.
What are some of your tiling dreams or challenges? What tiling projects do you wish you knew how to do?


Hi Erin, Thanks for sharing this great tips on how to tile. Really informative and detailed. Helpful to those who wanted to do it by themselves.
Thank you so much for your kind words and for reading.