Wanting to learn how to install a stacked stone fireplace in your house? Natural stone veneer is a cheaper way to get the stone look you crave.
Struggling with finding the perfect paint color for your home? My design guides are available for free to my newsletter subscribers. Grab my Free Paint Guide and FINALLY pick a wall color that you love!

Stone vs. Paneling.
Tile vs. Shiplap.
When it comes to picking out the material for a fireplace surround, it can be really hard to choose.
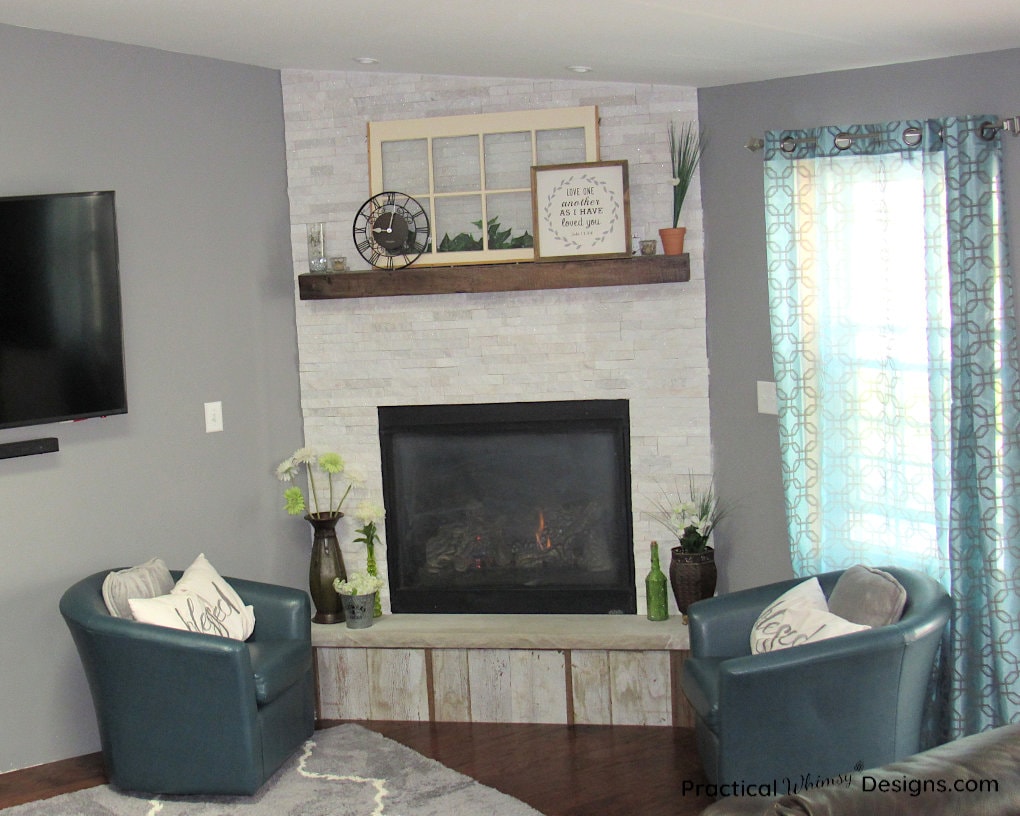
Last summer we were faced with the same challenge. Of course, the first step was to narrow down the look we were going for in our family room fireplace. After A LOT of back and forth, we decided a more modern stone fireplace with a rustic mantel was what we were going for in the space.
Note: From a design sense, we have been working on tying modern elements and mixing them with the old character of our over 100 year old house. The mantel we chose was an old barn wood timber that was used to decorate our run down pool room. When we purchased this house, the pool room was falling apart so we converted it into the family room where this fireplace is being installed. (If you are curious about our house, you can read more about it here.)
We settled on modern stone…..but what now?
Why Should You Install Stacked Stone Veneer?
We did a little research and a lot of store browsing and agreed on stacked stone veneer for 3 reasons:
- It is cheaper than real stone.
- Stacked stone veneer weighs a lot less so it is easier to install and doesn’t require extra support
- It comes on mesh panels that hold together easier and installs a lot like tile. If you have had experience with tiling, it should be fairly easy to catch on to using this product.
There are different kinds of stone veneer. Natural stone veneer is made from, you guessed it…. natural stone. Manufactured cultured stone is man made and will give you a different look.
If you have decided that stacked stone is the look you want around your fireplace, here’s what you will need to install it.
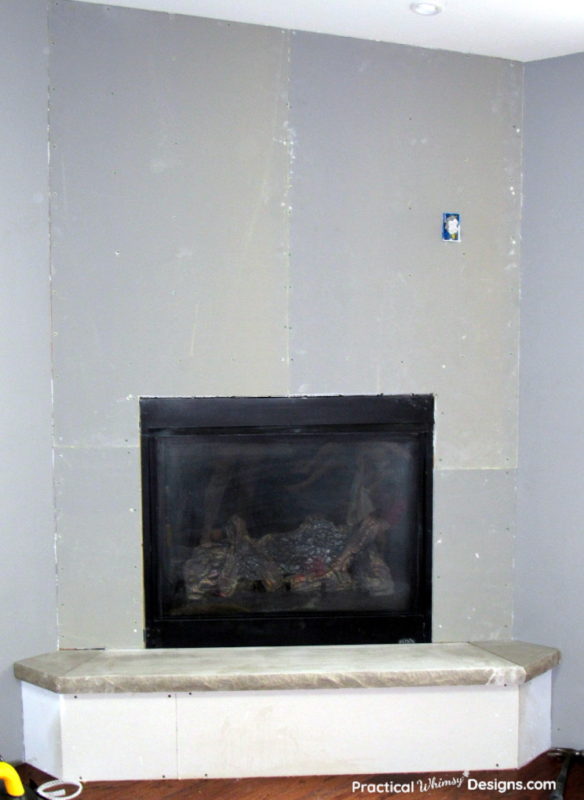
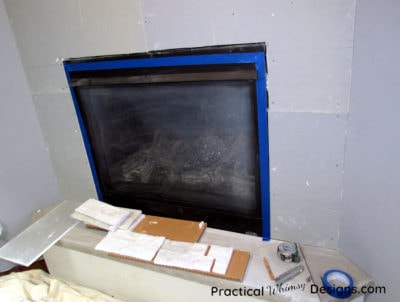
Note: This tutorial only covers installing stone veneer over cement board/tile backer. The framing, fireplace, and cement board should already be in place before these steps are followed.
This post contains some affiliate links for your convenience (which means if you click a link and make a purchase I will earn a small commission at no extra cost to you). Please see my disclaimer page for more information.
Materials You Need:
- Stacked Stone Veneer of your choice
- Mortar
- Painter’s Tape
- Pencil
- Tape Measure
- Notched Trowel
- Grinder or Cement Saw
- Diamond blade that fits your tool
How to Install Stacked Stone Fireplace
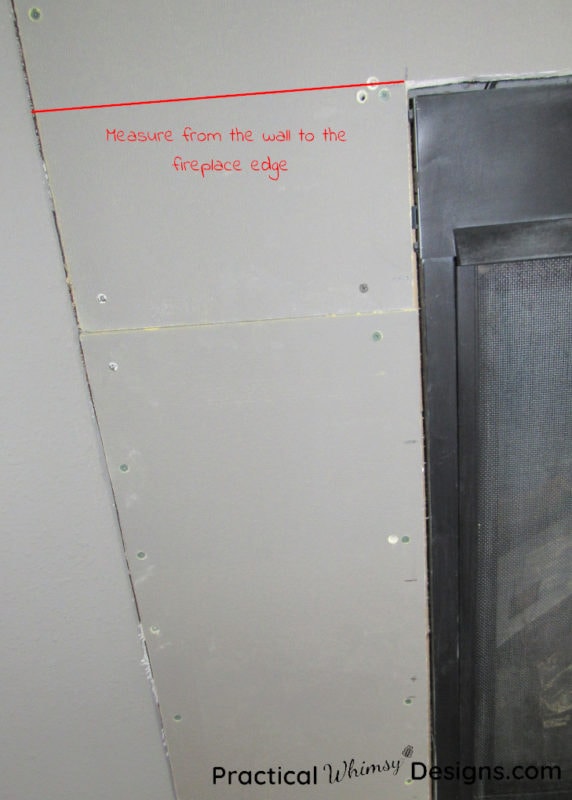
Step 1: Measure the height of your fireplace
This will be based off of your preference for how you want your stone to look.
We wanted the bottom of our stone panel to cover the top of the frame of our fireplace. This hides the gap between the fireplace and the tile backer.

It is best to start your stacked stone fireplace installation at the bottom of the cement board, right above the hearth. This allows the panels to rest on each other and not slide down the wall.
It is important to take the time to measure before you start slapping panels up.
The reason you do this is because you want your cleanest edges around your fireplace. The factory edge of the panel is a lot smoother than the cuts you will make with your grinder. Since the fireplace is the focal point of the wall, it is important to keep the edges of the panels smooth around the fireplace.
Measuring your fireplace versus the height of your panel will help you determine if you need to cut anything off your bottom panel.
First, measure to the top of the fireplace from the hearth. Next measure the height of your panel and mark the wall. Our stone panel was 5′ 7/8″ tall.
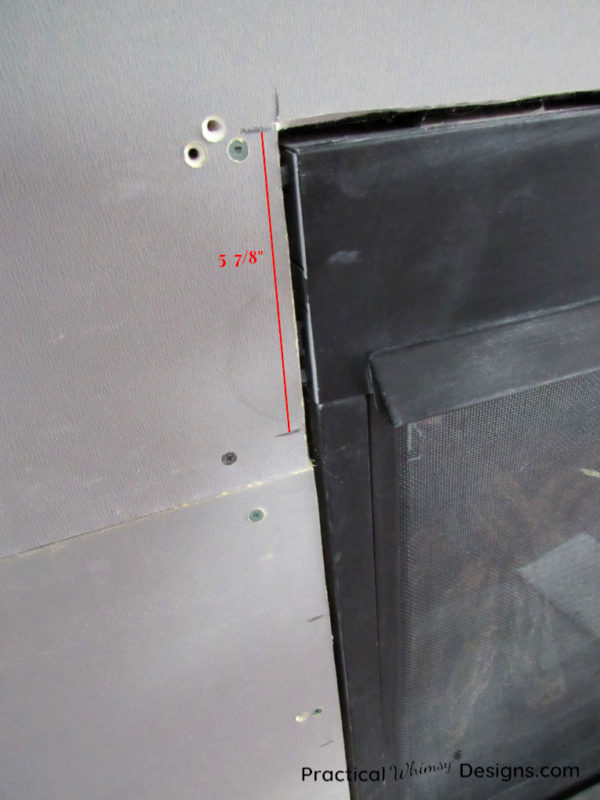
Continue marking the wall with your panel height until you reach the top of your fireplace. Because we measured, we were able to see that our panel needed to be trimmed in order to cover the top of our fireplace.

Measure the difference between your desired height and the actual tile height to determine how much you need to cut off your first tile.
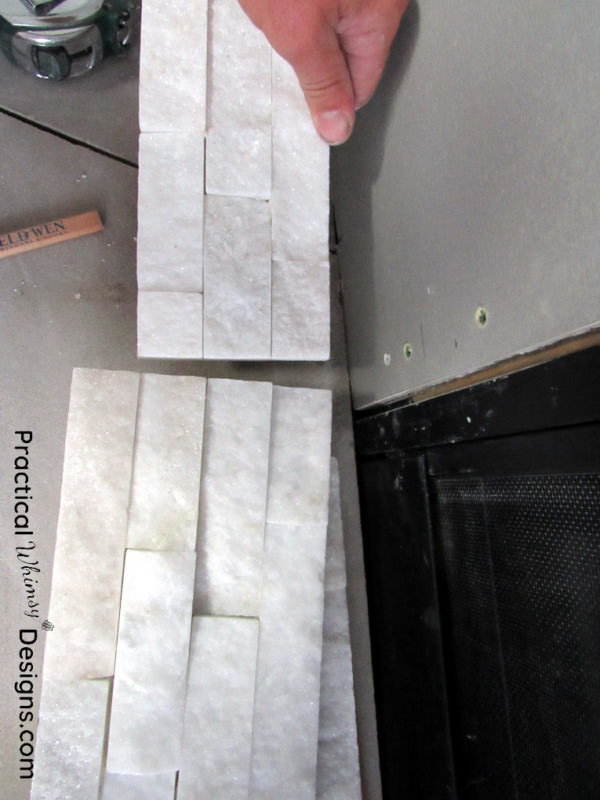
Here is the difference between the two panels after we cut the bottom panel.
Step 2: Measure the width
Next, measure the width of the cement bored you need to cover. You will need to cut your panel the correct width as well. Remember to keep your factory edge along your fireplace.
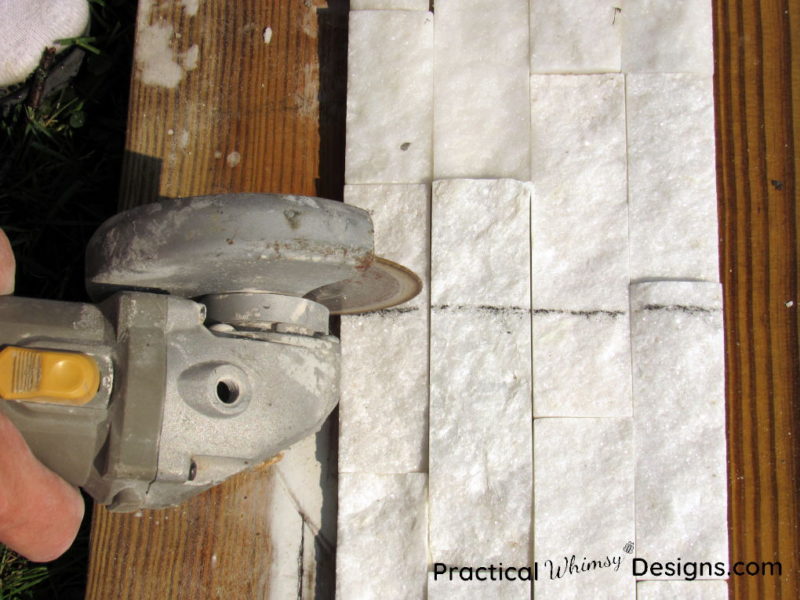
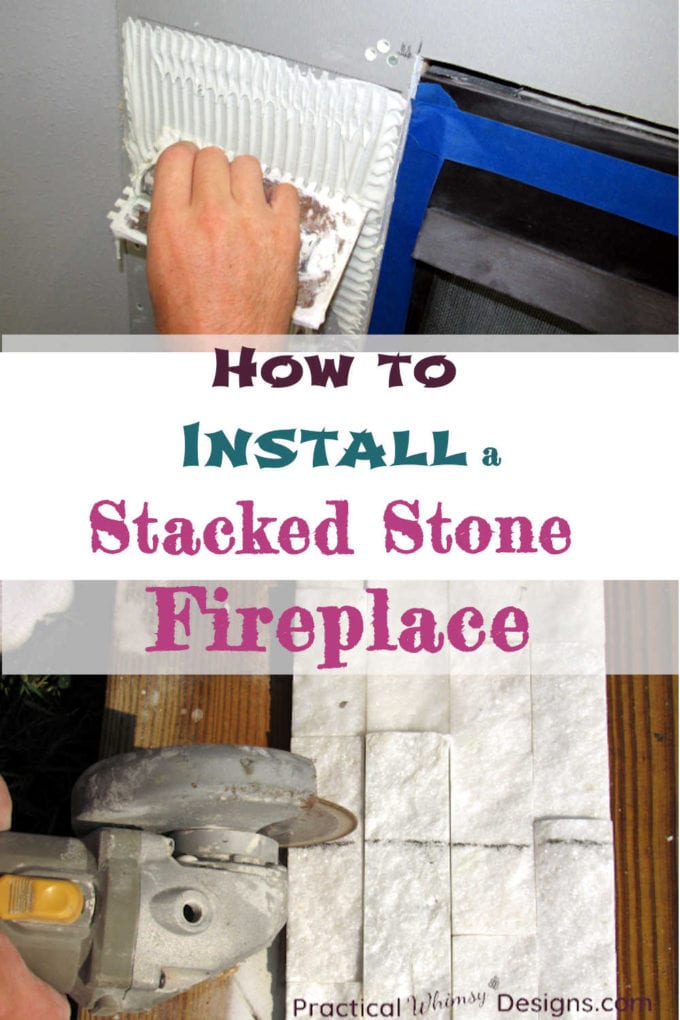
Step 3: Cut the stacked stone panels
Now that you did all of that careful measuring, it is time to cut your panels to fit.
Disclaimer: This post is for informational purposes. There is always a risk when using power tools and certain safety recommendations to follow. Get help from an expert if you need it.
This makes a mess, so it is ideal to work outside if you are able.
You can either use a cement saw or grinder to cut your panels. Remember you are cutting through stone, so you will need a diamond blade to cut through.
Use a measuring tape and mark your cutting marks (based on the measurements you did in step 1 and 2) on your stone panel with a pencil.
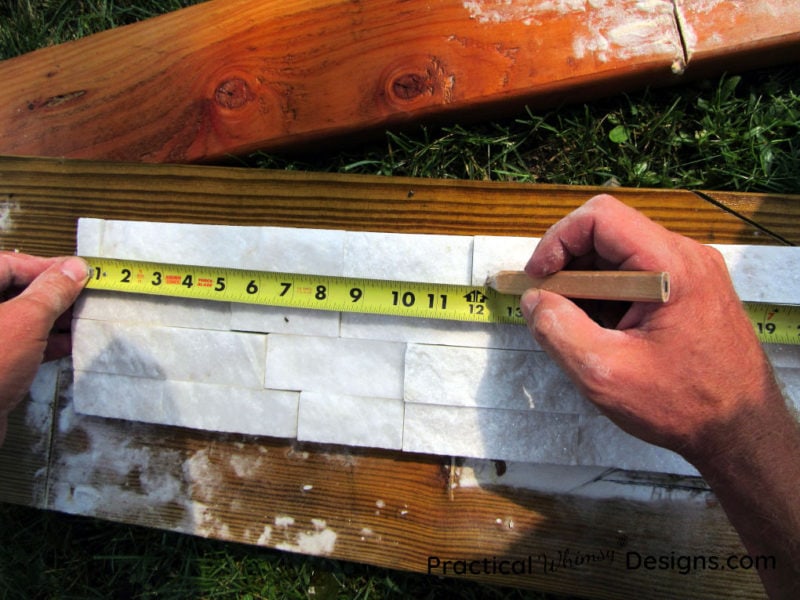
Cut your panel. You may want to cut a few ahead once you have confirmed your first cut is accurate. This gives you a supply to work with when you are ready to apply mortar.
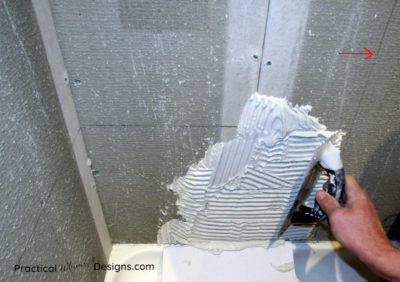
Step 4: Mix mortar and install panel
The next step is to mix the mortar that will hold the panel on your wall. The mortar you use is the same stuff you can use to install tile. Make sure you only mix it in small amounts because it dries quickly.
Note: If you have never mixed mortar before, I have a detailed tutorial under step 3 of my post on Beginning tiling, which you can find here.
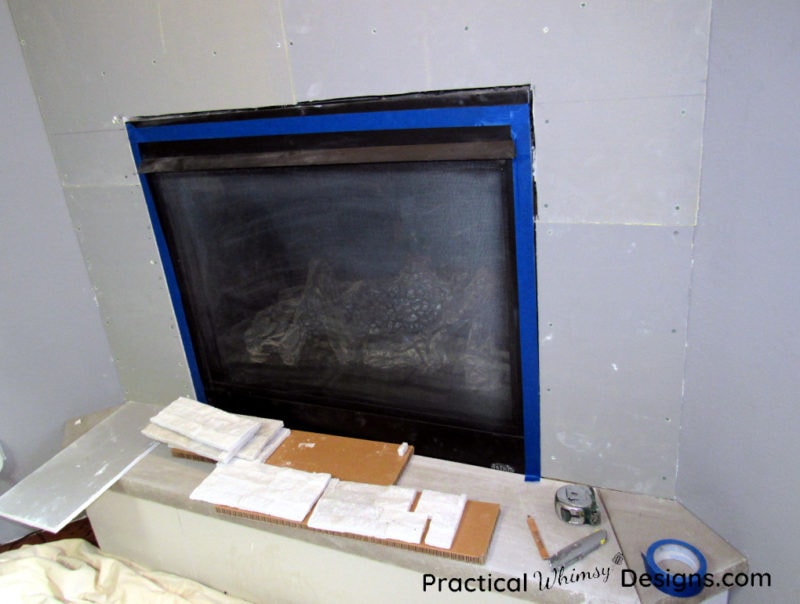
Pro Tip: Before applying mortar, put painters tape around the fireplace to protect it from the mortar and to give you a clean edge when you finish.
After your mortar is mixed, use a notched trowel to apply mortar to the cement board in small sections at a time.
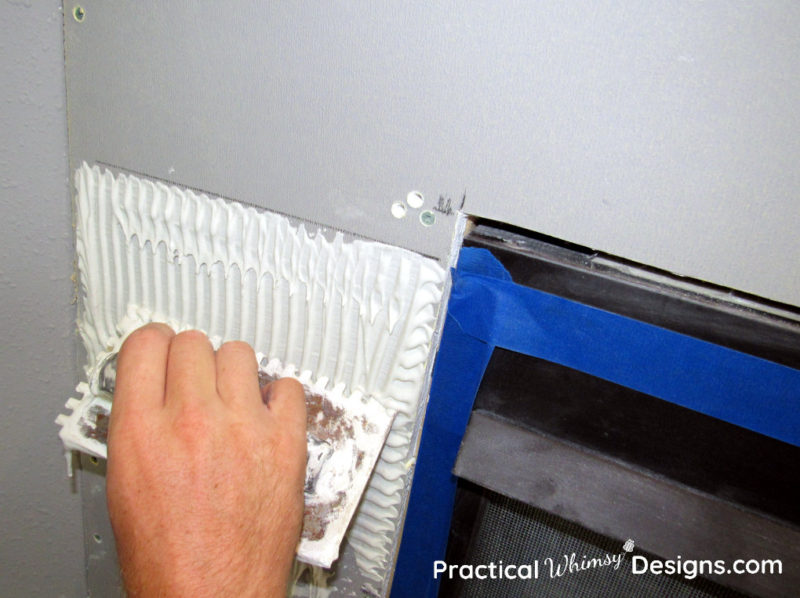
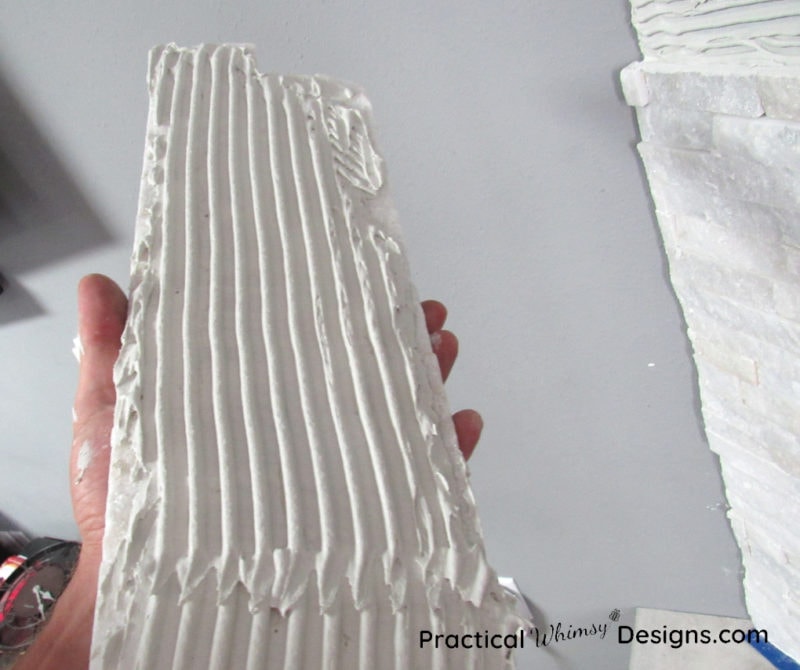
Next, back butter the stacked stone panel with mortar. (Back buttering is just a fancy way of saying put mortar on the back of your panel.)
Because stacked stone panels are heavier than some tile this technique is helpful. Back buttering your panel creates extra suction between the mortar on the wall and the mortar on your panel. This suction keeps your panel from tipping off the wall before it is fully dried.
Continue the process of measuring, cutting, and applying your tile until the cement board around your fireplace is covered.
Remove the painters tape from around the fireplace.
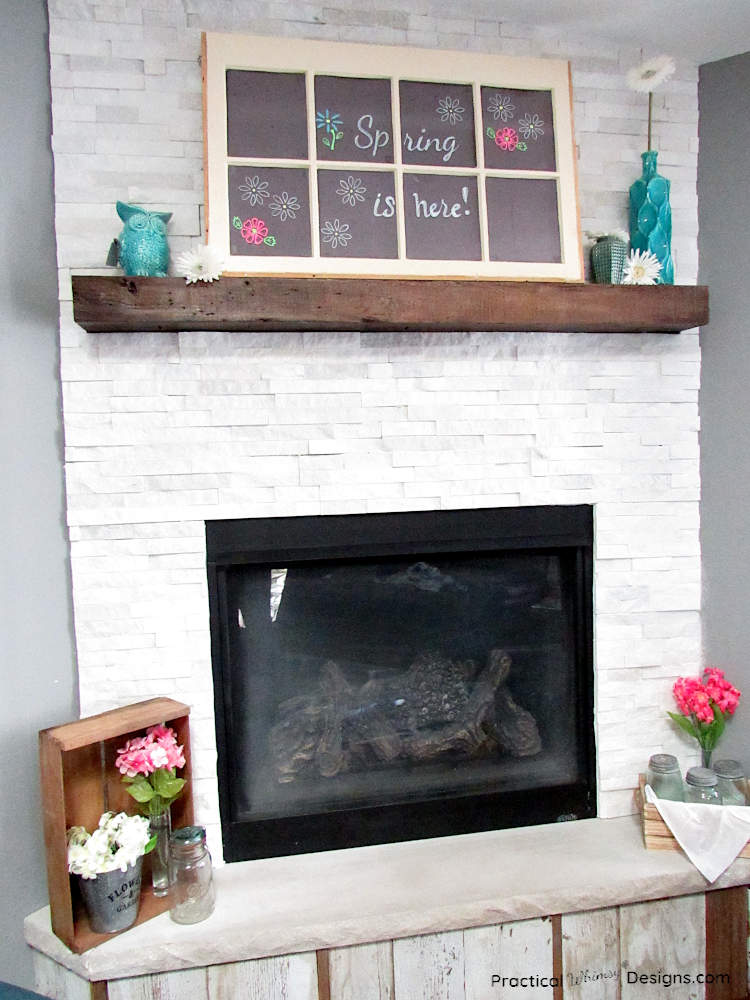
Then enjoy the fruits of your labor as you gaze upon your new stone fireplace.
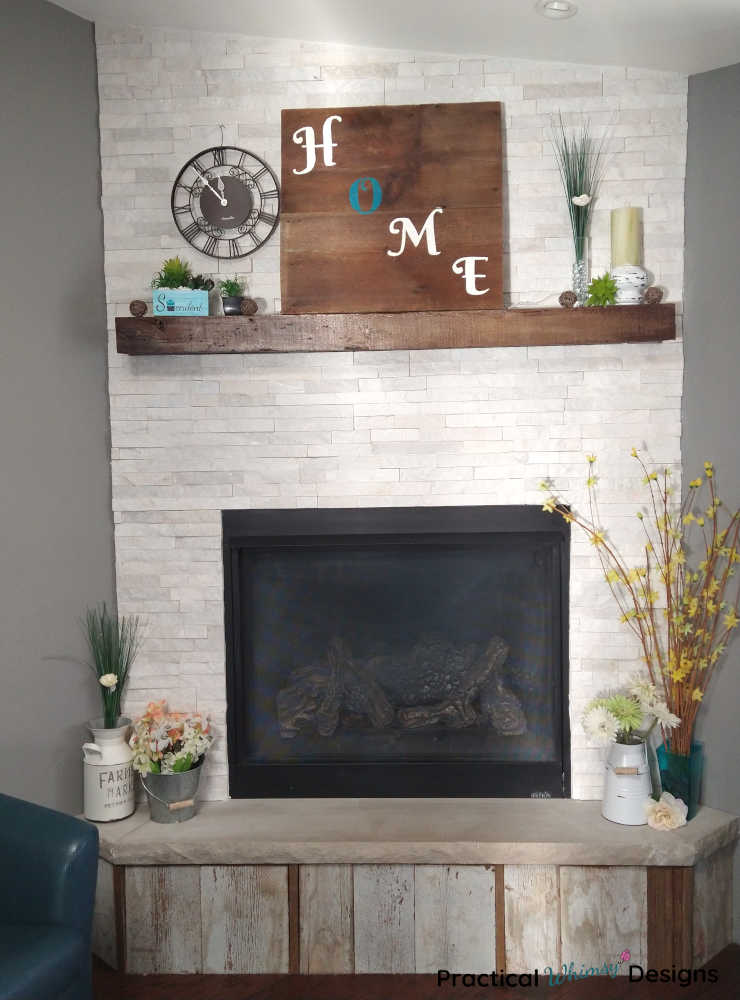

Stacked stone is versatile and works with both modern decor as well as being a great accompaniment to rustic elements. I love how well it compliments the rustic barn wood we salvaged from our old pool room.
I hope that this tutorial helps you in your quest for a stacked stone fireplace of your own.
Want to remember this tutorial for later? Save it to your favorite DIY board on Pinterest.
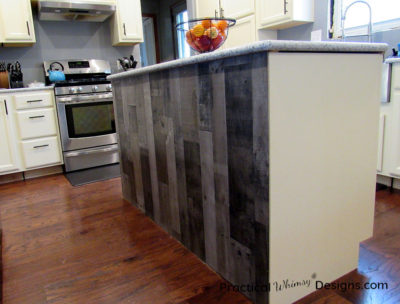
Interested in more Home Improvement tutorials? Check out these posts on how to tile and how to install a simple island back panel.
Want More Great Ideas? You Might Like These..


Are we friends on Instagram?
Follow @PracticalWhimsyDesigns to see more
behind the scenes projects
It looks beautiful u did a fabulous job- I have a 60 “ linear fireplace I’d like to do that to – how did u install the mantle
Thank you so much!
For the mantel installation, we used a kreg jig to drill a hole into our mantel at an angel so the screw was hidden. We made sure to screw it into the studs on both the top and the bottom of our mantel. (We used three screws on the top and three on the bottom to coincide with our studs).
One could also do this by pre-drilling a hole at an angle and then setting a screw into the mantel so it isn’t visible.
The screw used needs to be long enough to sink into the stud a ways to hold the mantel firmly in place.
I hope this helps.
I love the look. Can you please tell me what veneer (make and color) you used.
Yes! I used the Designer’s Image brand of thin stack stone veneer. The color is Arctic River.