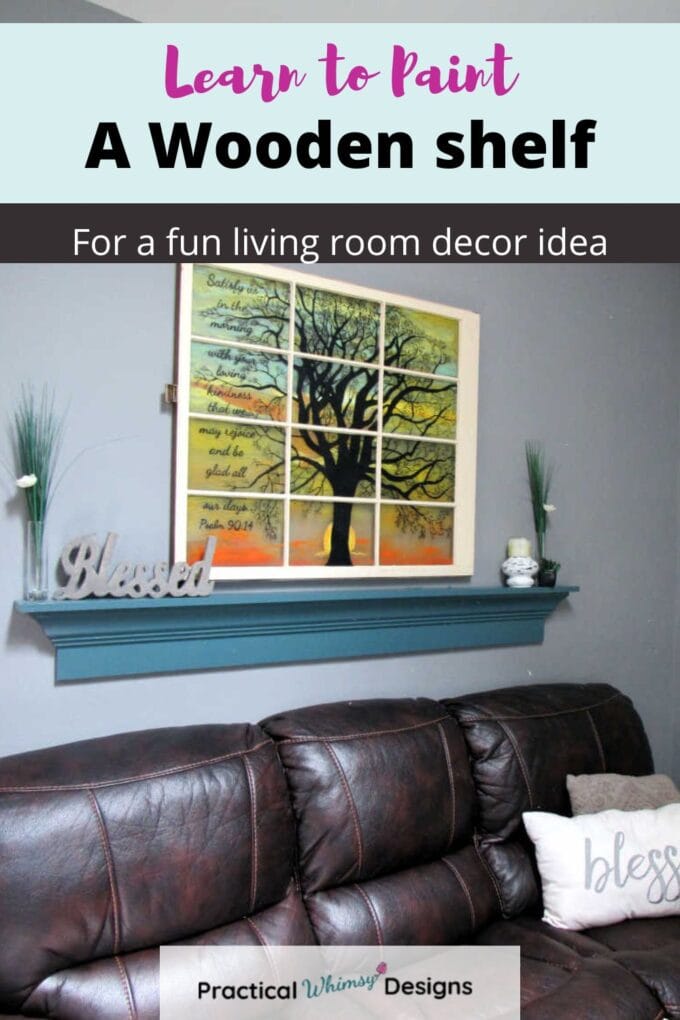
Learn how to paint a wood shelf on a wall as an easy way to upgrade your living room decor and create a focal point on your wall.
Sometimes it can be hard to come up with different and unique living room decor. The default fix to upgrade your living room decor is to throw up a few new pictures.
Perhaps you know that your decor needs a change, but you don’t know where to start. Or maybe you are looking for that inspirational piece that will fit your style before you make a change.
A Great Idea for Living Room Walls
This was true of my living room walls.
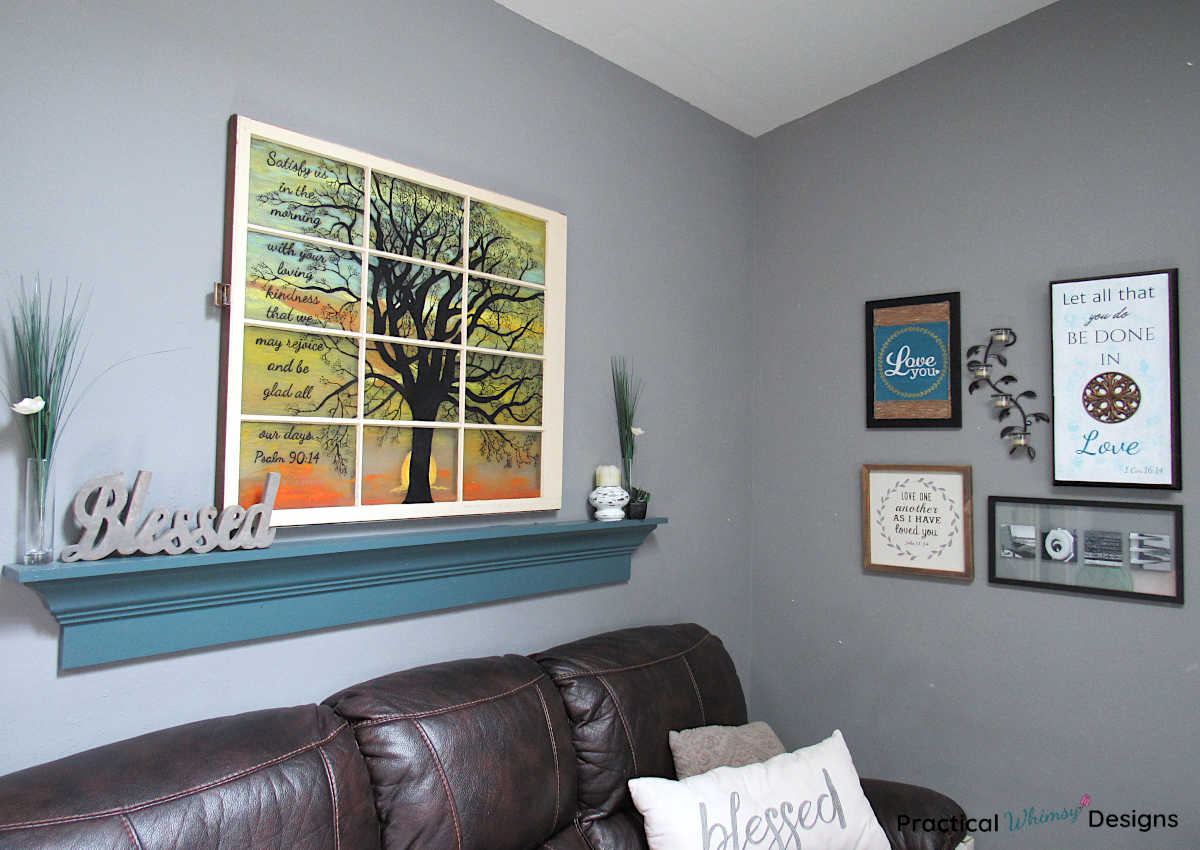
I knew that my art was undersized for the area above my couch, but I wasn’t sure what other pieces I wanted to add. I had made a faux stained glass art piece several years ago and had hung it over the couch. However, it was not large enough for the wall and needed more to accompany it.
Right before Christmas, I remembered that I had an old ornate trim piece that my husband had made for above a window at our old home. We had an extra one that we carted to our new fixer upper home and it had sat in storage for several years.
It was the perfect piece for our living room to add a different feel to our walls and provide a place to change decorations throughout the year.
However, after I hung it, I realized it needed a change in paint color. I wasn’t a fan of the maroon paint with the painting.
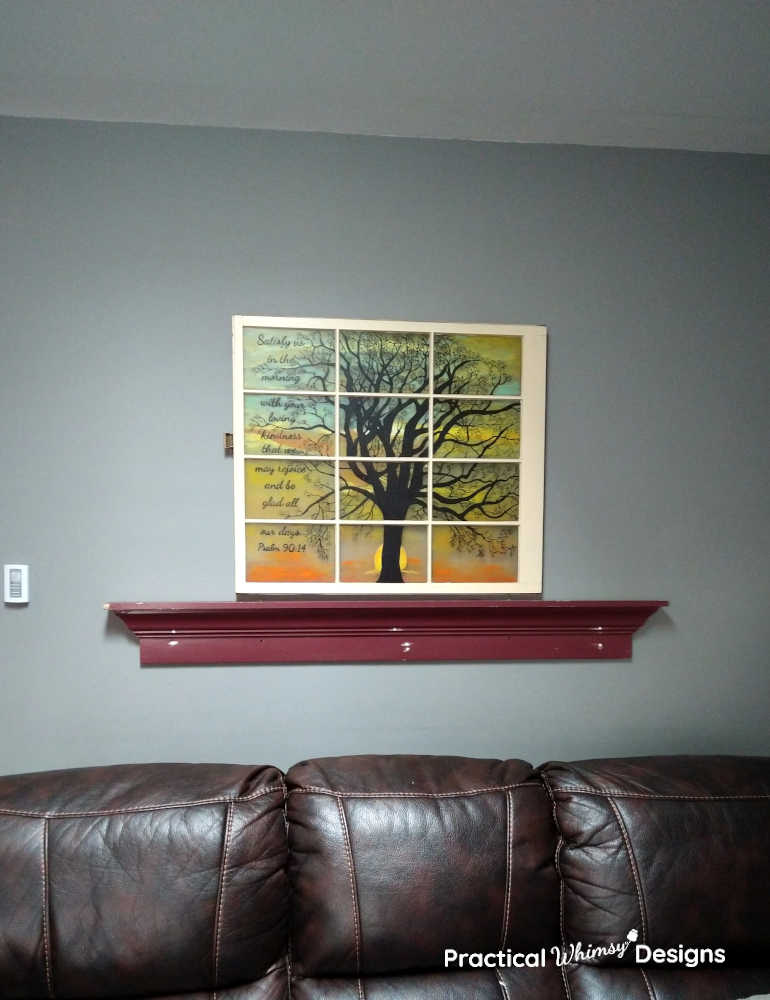
Since I had to change the paint on this shelf I created this tutorial to show you how to quickly paint a decorative shelf for your living room wall decor in case you want to try out a new look for your space.
This post contains some affiliate links for your convenience (which means if you click a link and make a purchase I will earn a small commission at no extra cost to you). Please see my disclaimer page for more information.
Materials You Need:
- Shelf to paint
- Gloss or semi-gloss indoor paint
- Primer, opt.
- Angled paint brush
- Painter’s tape
- Drop cloth
This tutorial will work well for any wooden item you want to paint in place.
Step 1: Prepare the Shelf
Since my shelf was heavy and we had already secured it to the wall, I opted to paint the shelf while it was hanging on the wall.
I also was adding paint to it in the middle of winter so I couldn’t spray it or paint it outside.
The ideal way to paint an object is to remove it and set it up on a saw horse outside or wherever you can make a mess, however, sometimes it can be difficult to remove an item from the wall and weather is always a factor too.
In this case, preparing your space is important.
Place a drop cloth under your work area.
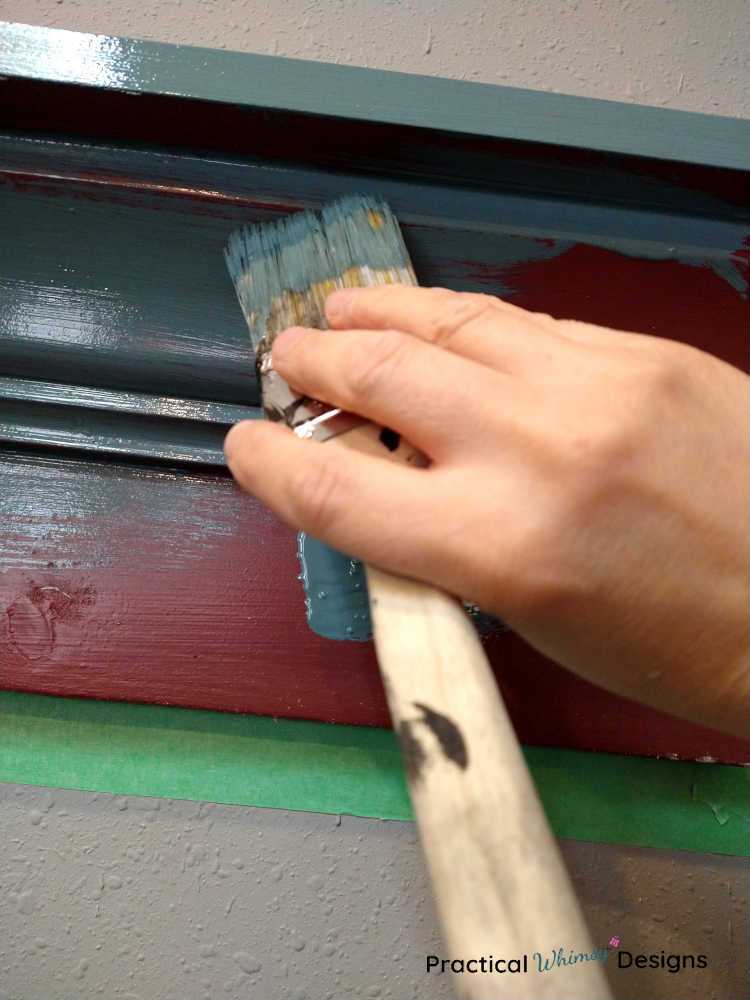
Then use painter’s tape to carefully go around the shelf you are painting. If there is space behind the item, make sure to tuck the painters tape behind it.
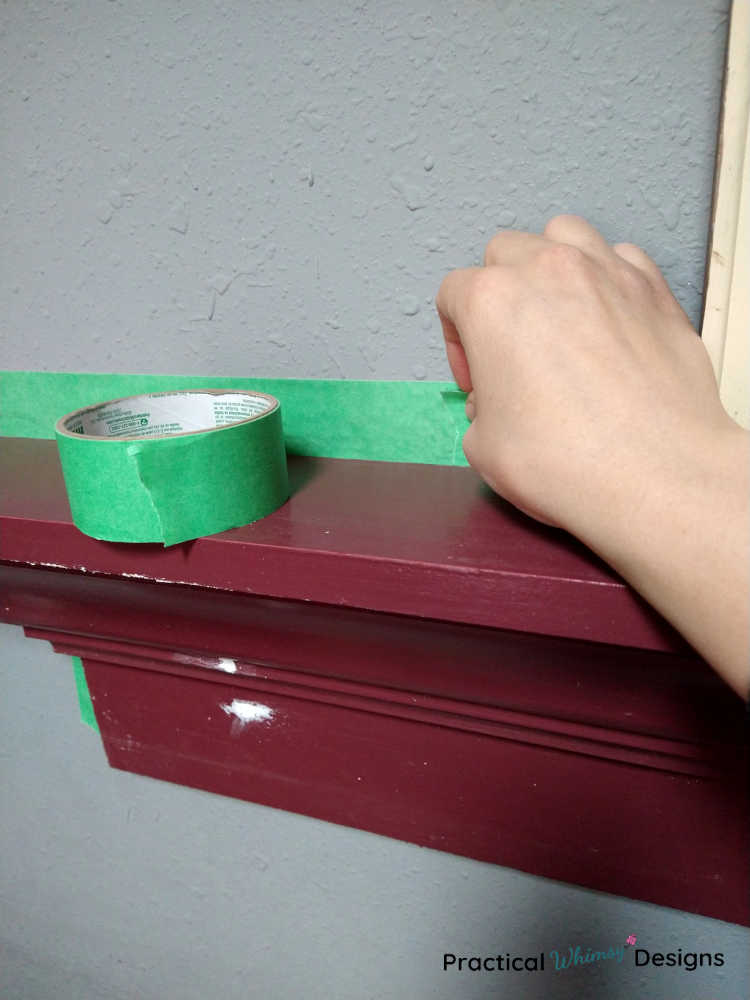
If you have weird angles to tape around, rip smaller pieces to work around the shelf.
Unless you have a very steady hand, this is an important step.
I know it is time consuming, but using the painters tape to keep your wall from getting paint on it will make clean up a lot easier.
Step 2: Paint the shelf
I usually recommend priming a painted item first before covering it with new paint. It gives the new paint something to cling to and gives you a neutral undercoat so you use less paint to provide a full coverage.
However, on this project, since I was in a hurry and I knew the shelf would not be bumped or moved frequently, I used the paint straight on the old color.
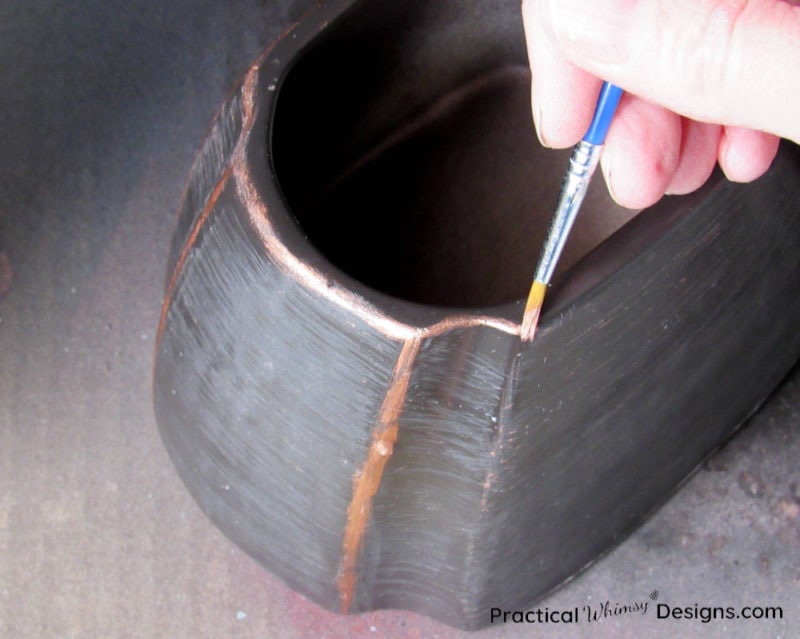
To prime and paint: use a paint brush to paint the shelf or item.
I like using an angled brush for this type of painting. It allows me to have more control over the details and gives me the ability to cut in closer to the edge without making a mess.
Any cabinet paint or gloss or semi gloss paint should work for this type of project. Especially if the shelf will mostly have decorations set on it and will not see heavy use. I used a semi-gloss I had left over from my downstairs bathroom walls. Just make sure the paint is a high quality brand that you have tried and love.
If you know that the furniture will have more wear or use, look for a cabinet paint. I like the finish of the Pittsburgh Paints & Stains Fast Dry paint, though you do have to work quickly since the pain dries fast.
Paint the shelf, being careful near the edges. You can use this painting method for a smoother finish.
Let the paint dry and add a second coat if necessary.
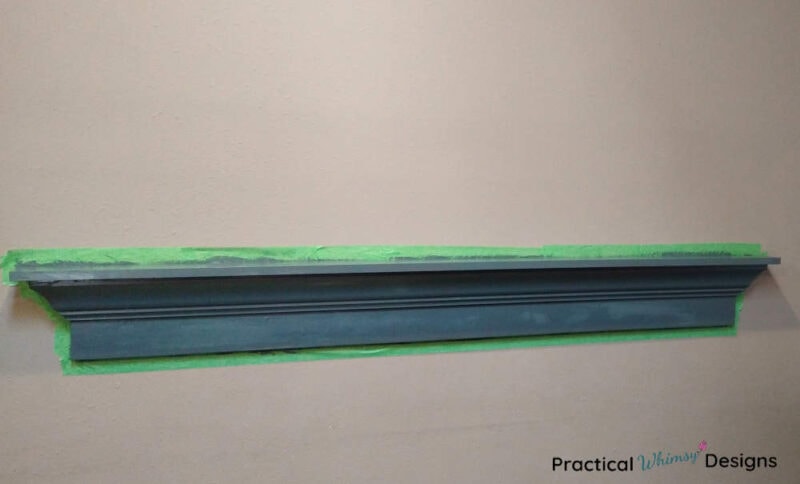
Remove the painters tape right away after the final coat so that the tape doesn’t stick to the walls.
Though the paint will be dry to the touch in a couple of hours, I recommend letting the shelf dry for quite a while. It can take almost a month before paint cures. If you do want to set something on it right away, try to choose light items that won’t dig into the paint or it will leave marks in your finish.
An Easy Way to Upgrade Living Room Decor
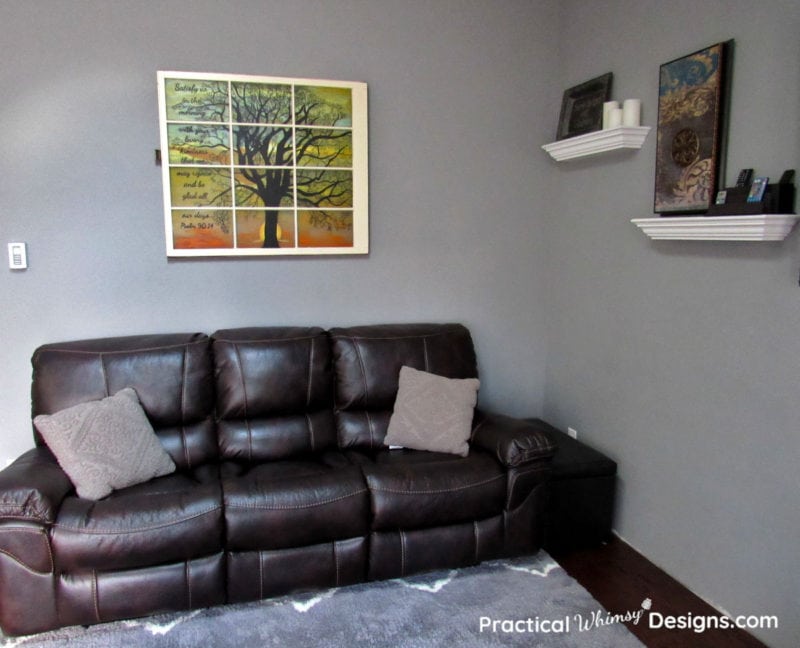
This painted shelf was the perfect way to upgrade my living room decor and create a larger piece of art over my couch.
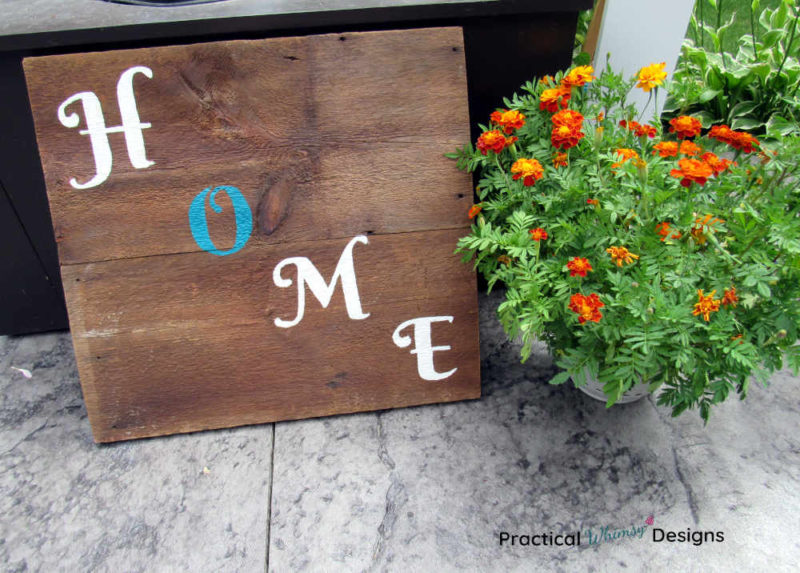
I also added a gallery wall featuring this DIY Cricut Love sign.

We have plans in the future to add an accent wall behind the tv, but for now, I am happy with the way this project turned out.
Where to Find a Large Shelf
If you like this look, the best way to find a similar shelf is by searching for a mantle.
My favorite place to look for an item like this is used at a flea market, thrift store, garage sale or online marketplace.
Or you can shop the items below for a brand new mantel shelf. Just click on the pictures for more details. Find one in a color you love or paint it to fit your style. Remember to measure the space you are planning on hanging it to make sure it is the correct size.
Shop Similar Items

Want to remember this idea? Save it to your favorite DIY board on Pinterest.
Want More Great Ideas? You Might Like These..


Are we friends on Instagram?
Follow @PracticalWhimsyDesigns to see more
behind the scenes projects