
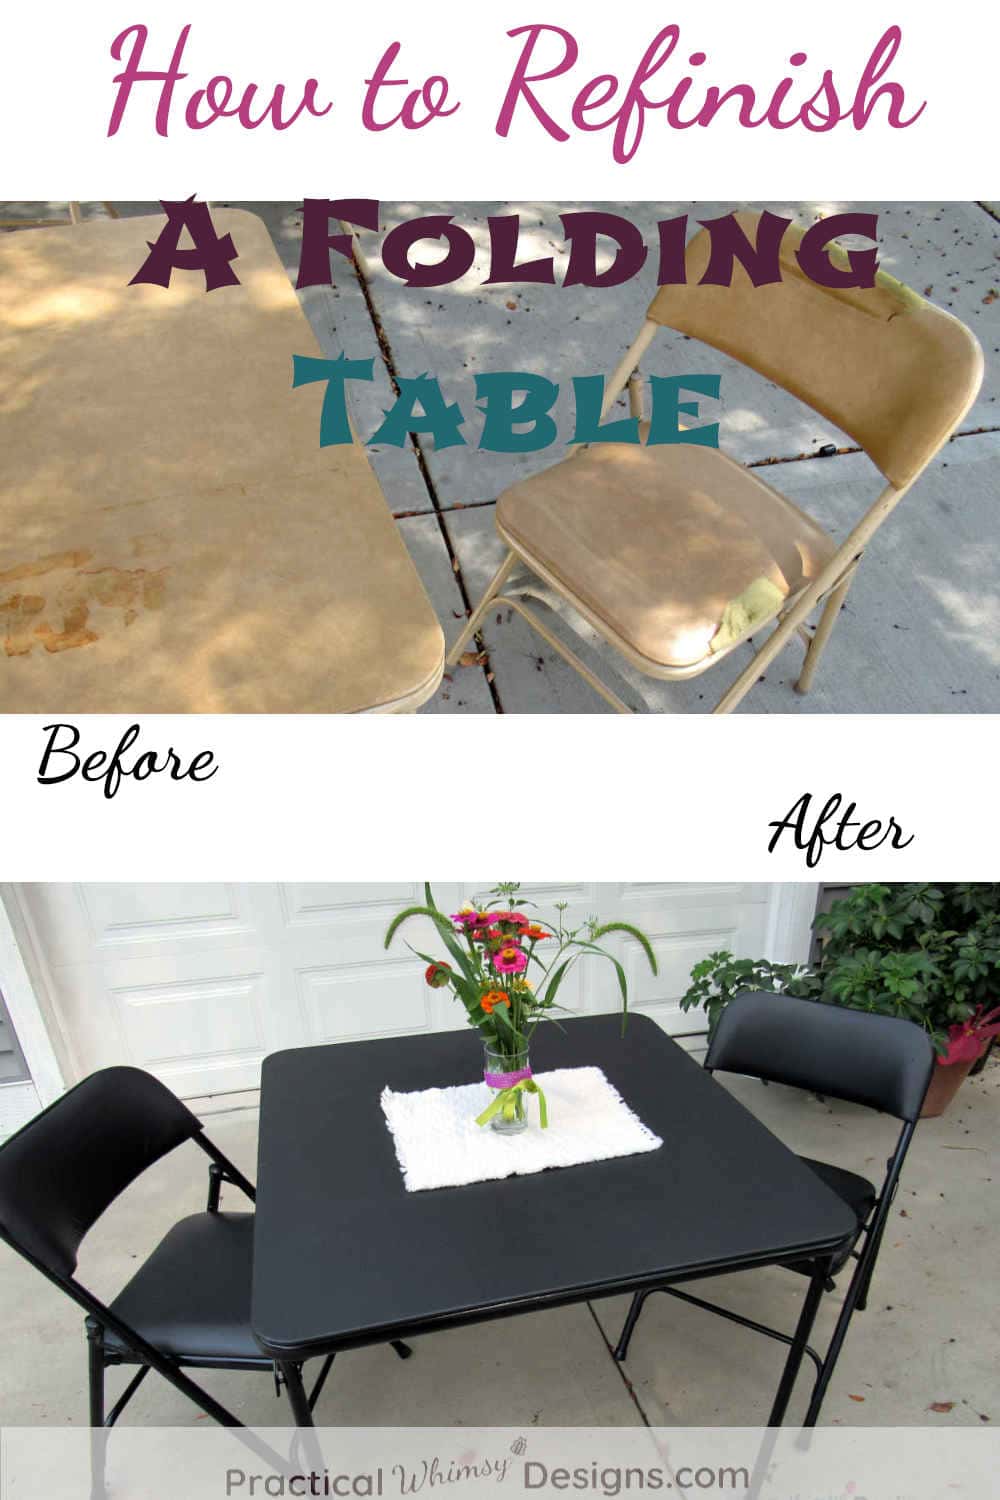
Is your card table in need of a makeover? Follow these steps to learn how to refinish a folding table and give it new life.
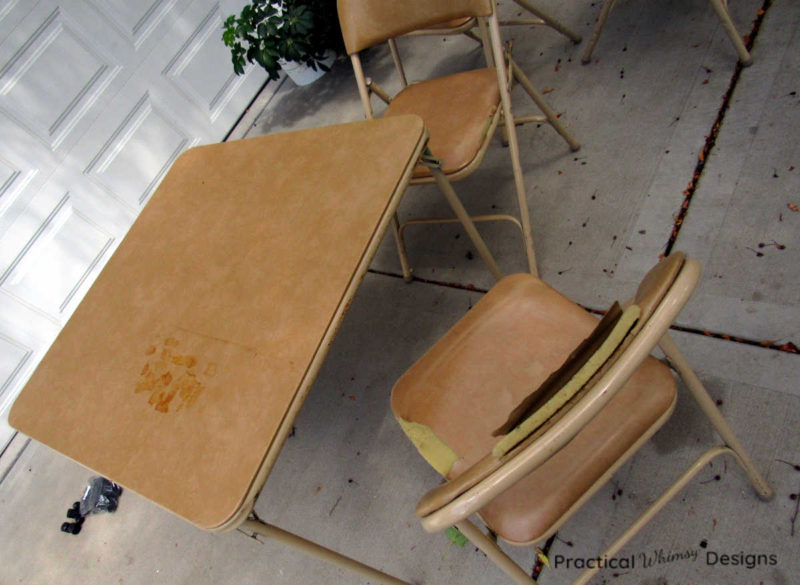
It was starting to get embarrassing.
Actually, it was already beyond the starting phase. It was embarrassing!
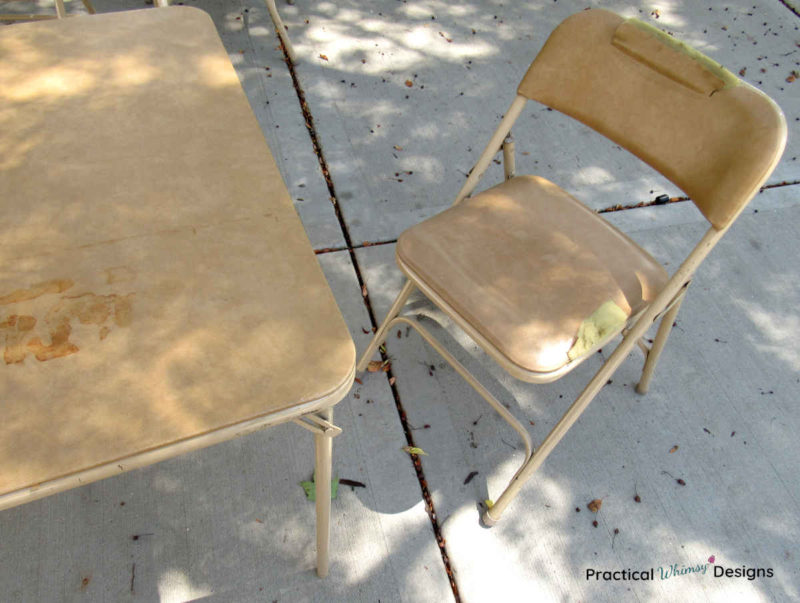
I’m talking about our early ’90s beige card table that we take out for overflow seating when we have company.
It wasn’t the color or the age of the chairs and table.
Nope.
It was the fact that the vinyl was splitting and the stuffing was hanging out.
“Here, guest. Sit in this nice comfy chair with the cracked vinyl….Mind the stuffing, you hear.“
The big rust mark on the table just added to the overall class of our guest seating situation.
To save face, I had to quickly figure out how to refinish a folding table so we could once again seat our friends with dignity.
I knew that I could transform the metal portion of the table with the techniques I learned from refinishing our metal patio furniture. And after making our DIY Fabric Headboard with vinyl, I was ready to try anything.
If your card table needs a face lift, (hopefully it’s not as bad as ours) this tutorial is for you.
This tutorial is part of the Thrifty Thursday collaboration where talented bloggers come up with fun, thrifty projects and tutorials to help inspire you to do a few diy projects too. Check out the rest of the fun at the bottom of this post.
This post contains some affiliate links for your convenience (which means if you click a link and make a purchase I will earn a small commission at no extra cost to you). Please see my disclaimer page for more information.
Materials You Need:
- Sand paper (I used 150 grit)
- Cloths for wiping down metal frame. (I used these disposable cloths.)
- Primer (I used this spray paint primer)
- Spray Paint: It took approximately 1 can per table or chair (I used this spray paint color)
- Screw driver and bits for removing screws (An electric drill is a lot easier to get the screws back in when the project is done, though I used a hand one to take them off.)
- Scissors and/or box cutter
- Vinyl: I used 2 yards of black vinyl for my table and chairs, but make sure you have enough to cover everything
- Staple gun similar to this one and Staples (I used 5/16″ staples)
- Sewing machine and thread or strong adhesive
- Rubber table and chair leg caps like these (make sure you get the right size and color for your table)
- Hair Dryer
How to Refinish a Folding Table
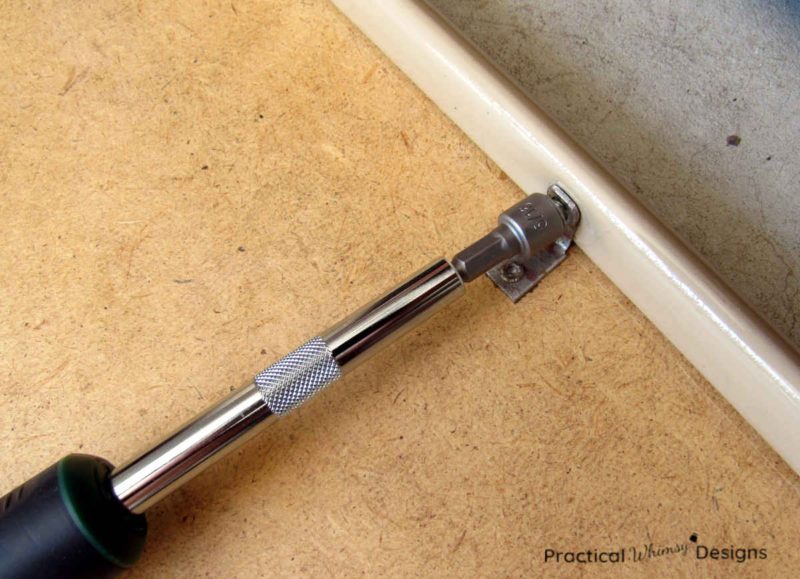
Step 1: Take It All Apart
We’ll start with the table portion of this project.
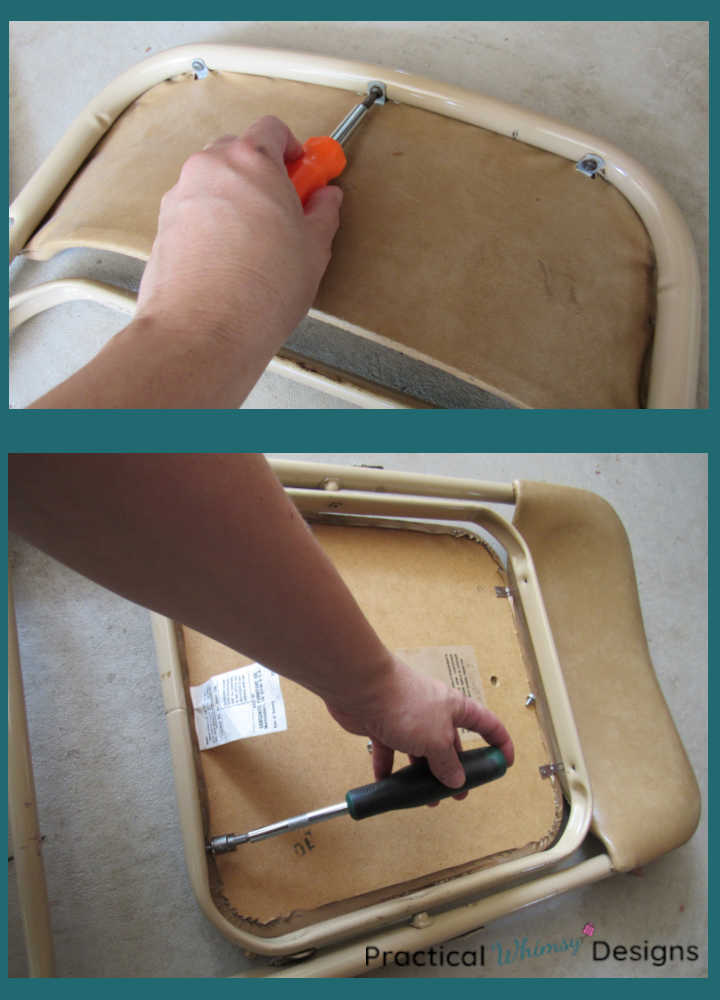
The first thing to do is take the top off of the metal frame.
Our table used hexagon bolts, but every table is different. Grab the correct tool to remove your screws and…. well, remove them.
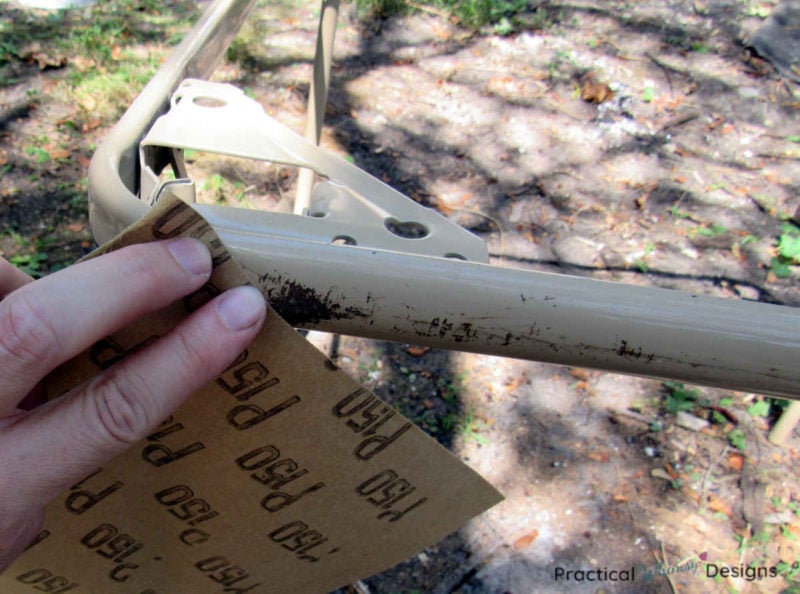
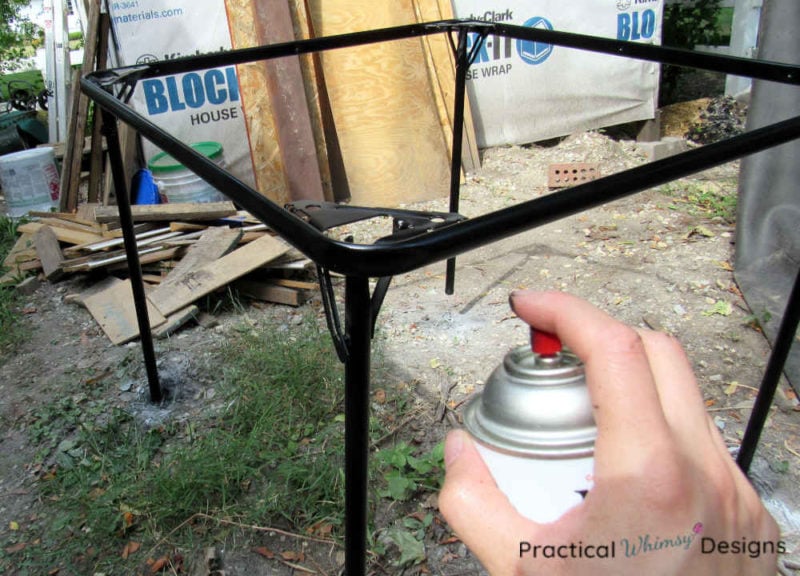
Step 2: Sand & Clean the Frame
I did not care for the beige color of our table, so I decided to do a complete spray paint treatment. If you are also into a color change, follow these steps.
Set your table frame on an area that can get paint on it (or spread a drop cloth down to catch any paint over spray).
Sand: Use sand paper to roughen up the old paint and sand out any scratches or rust. I used 150 grit sand paper and hand sanded. (Work in a well ventilated area and wear a mask to keep from inhaling dust.)
Clean: Use a damp cloth to wipe down the table legs to get rid of any dust or dirt. This cloth will get pretty dirty, so use one that you can throw out. I use towels like these.
Step 3: Prime and Paint the Frame
Prime: Prime the table. I used spray paint primer because it was easier, though it might be cheaper to use other primer. I was all about the ease on this project, though.
Tip: With spray paint always use thinner coats to keep your paint from pooling up in a big mess. With paint in general, it is always better to apply multiple light coats and allow them to dry in between. Start the spray off of your project and then move onto it to keep your paint stream smooth and even.
Paint: Use spray paint to paint multiple coats on your project. Check your paint can for ideal dry and reapply times. I chose black gloss paint like this because it matched the new vinyl I purchased. (Once again, if you have a paint sprayer it would probably be cheaper to buy black paint in a can and spray it on, but this was easier and I already had 3 cans of spray paint to use up.)
I always manage to get paint on my fingers when I spray, so if you are smart, wear a pair of gloves. Or just wear the paint on your fingers with pride, like me.
Step 4: Reupholster the Table Top
Straight Edges:
Now that your table frame is on the way to looking new again, it is time to tackle that table.
You can either measure the table and then measure the vinyl fabric and cut it, or set the table on the fabric and cut at least a 1 inch margin around the table. (Make sure there is enough to wrap over the edge and staple down.)
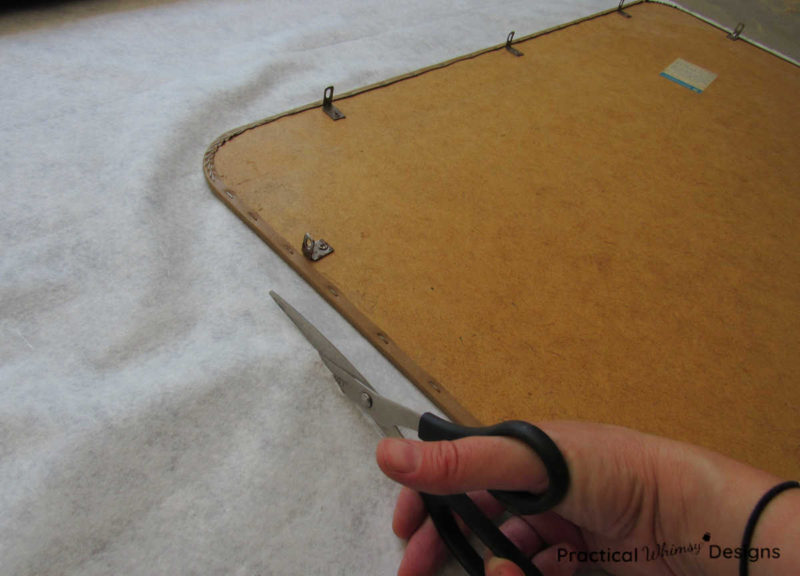
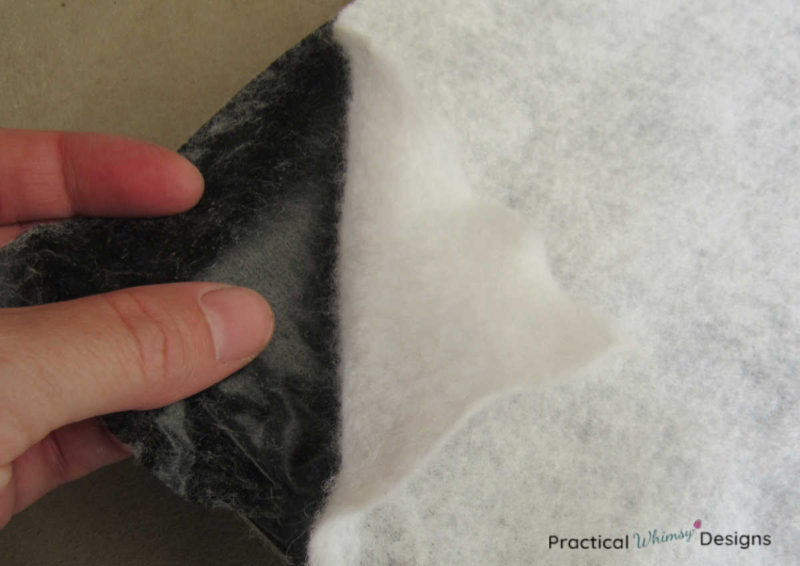
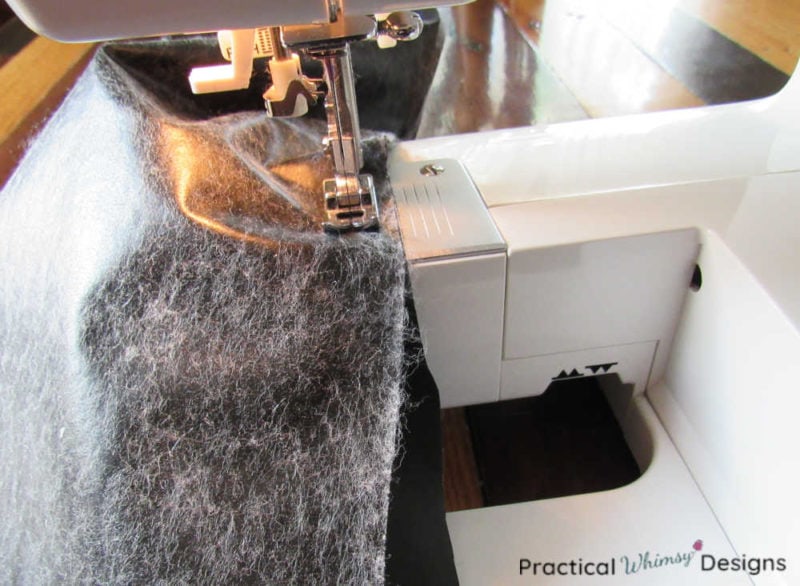
The vinyl I purchased for my table had a fuzzy backing which worked great for the chair bottoms, but I wanted my table to have less padding. Luckily, with a little work, I was able to pull the felt off the back of my vinyl so that it could stay nice and flat for my table.
The fun thing about a DIY project is you can mix and match fabric, though I would stick with vinyl for the tops of the table. Making a project your own is part of the fun of being able to refinish a folding table yourself.
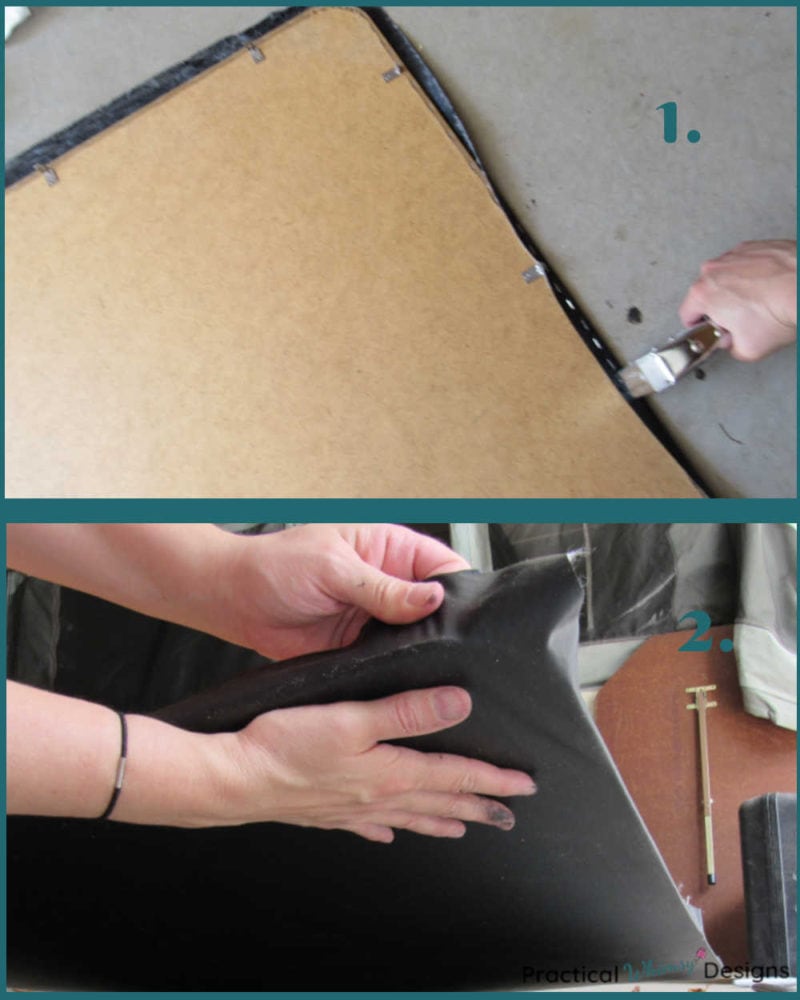
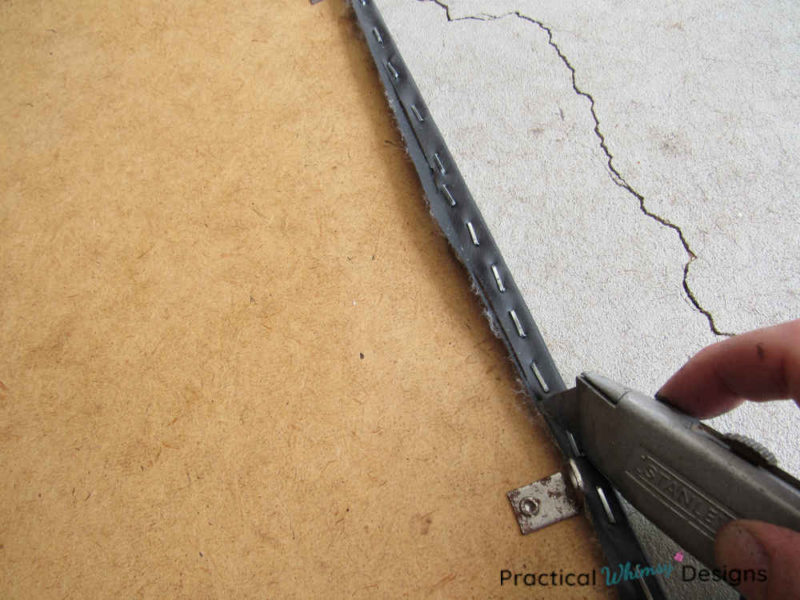
Once you have your vinyl cut out, pick one side and use your staple gun to staple the edge to the table. I used 5/16″ 8mm staples, because that is what fit in my staple gun. I recommend using the narrowest staple your gun can hold. 8mm was a little thicker than I liked, but it was what I had.
Now, use your hand to smooth out the vinyl and attach a couple of staples straight across from your stapled edge. Keep the vinyl nice and tight and keep smoothing it as you staple. Staple a few staples on each edge of the table. Once you are happy with how tight the vinyl is, fill in the rest of the staples on the three remaining table edges.
Tip: If you make a mistake, pull out the staple with a flat head screw driver or staple pull and try again.
Corners:
Now that you have stapled the edges, go back and work on the corners.
Trim the extra vinyl off of the corners so that the vinyl just wraps over the edge. If your table is rounded like mine, cut the vinyl to match the rounded edge.
Smooth the vinyl around the edge, allowing it to bunch up on the back of the table. Your goal is to get the table edge nice and smooth and keep the bunched up vinyl under the table where no one else can see it.
Repeat for the other three corners.

Once your vinyl is stapled onto the table and nice and smooth, trim off any excess with a scissors or box cutter.
Step 5: Reassemble the Table
Screw the table back onto your frame.
If you want to add new rubber leg caps to your table (ours were pretty scratched) you can do this too.
The form you have selected does not exist.
How to Refinish the Folding Chairs
The steps for refinishing the folding chairs are similar, with a few exceptions.
Step 1: Take It All Apart
First, remove the chair seat and back. Our seat had hexagon bolts again, but the back used screws. Use the appropriate tools for the job.
Step 2: Sand, Clean, and Paint the Frame
Use the same steps to paint the chair frame if you so desire.
Sand it, clean it with a cloth, prime it, and paint it. (Check out step 2 and 3 on the table instructions for more detailed explanation if you need a refresher.)
Step 3: Reupholster the Chair Seat
The seat of the chair can be upholstered in a similar way as the table. I did leave the extra padding on the seat because anything extra to add comfort to the bottom is a bonus in my book.
Start by stapling one side of the vinyl to the bottom of the chair. Then pull the vinyl tight, smoothing it as you go and staple a few staples in each of the other 3 sides to hold the vinyl tight.
Once you are happy with how your vinyl looks, staple the rest of the staples on the edge of your chair.
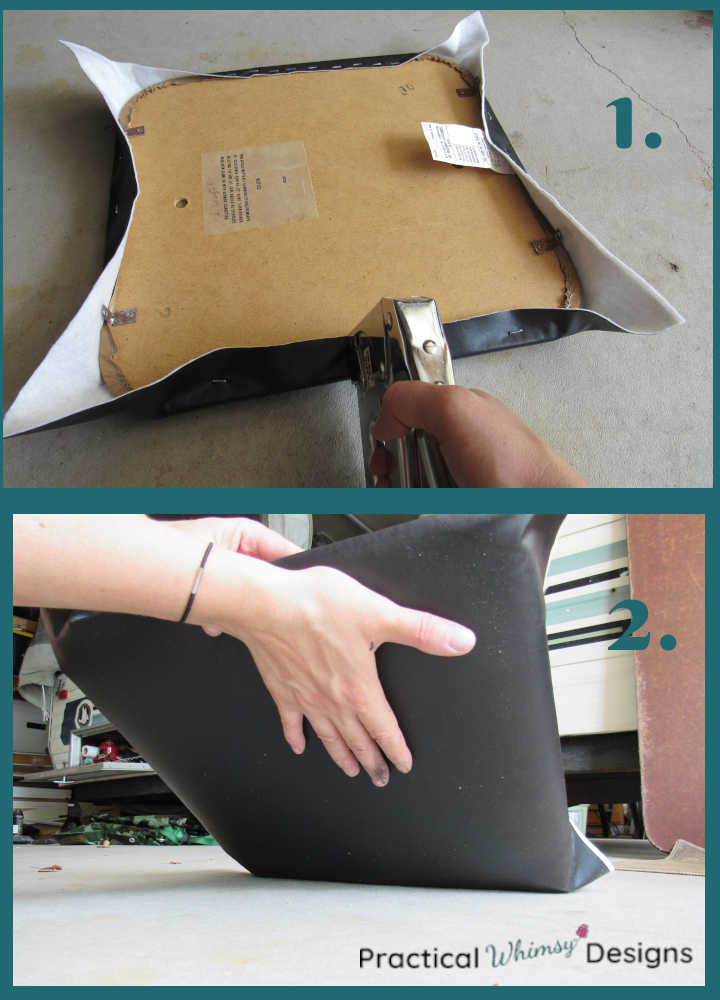
Staple the corners the same way you stapled the corners of the table.
Then trim off the excess vinyl.
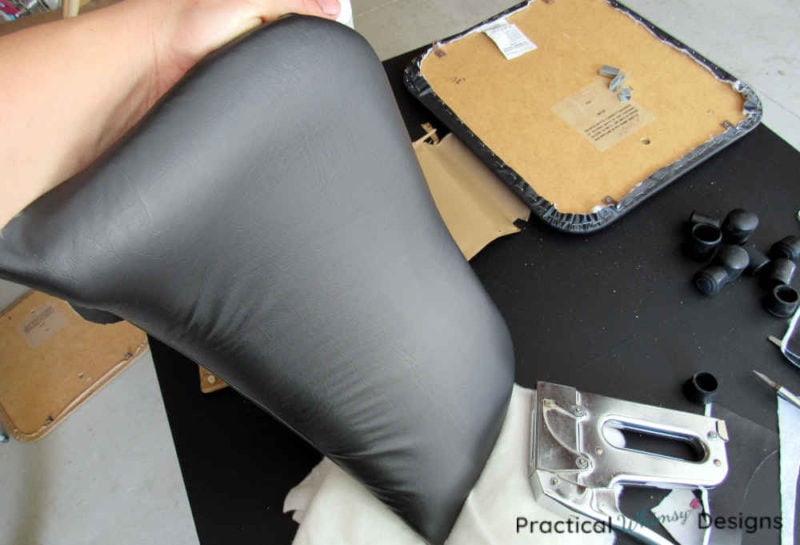
Step 4: Reupholster the Chair Back
This is probably the most difficult part of this process because it is curved and awkward. Plus you have to make both sides of the chair piece look good because you can see both the back and the front. My chair also required a little bit of sewing. Gulp!
(You might be able to glue them together, but the original was sewn, so I followed suit.)
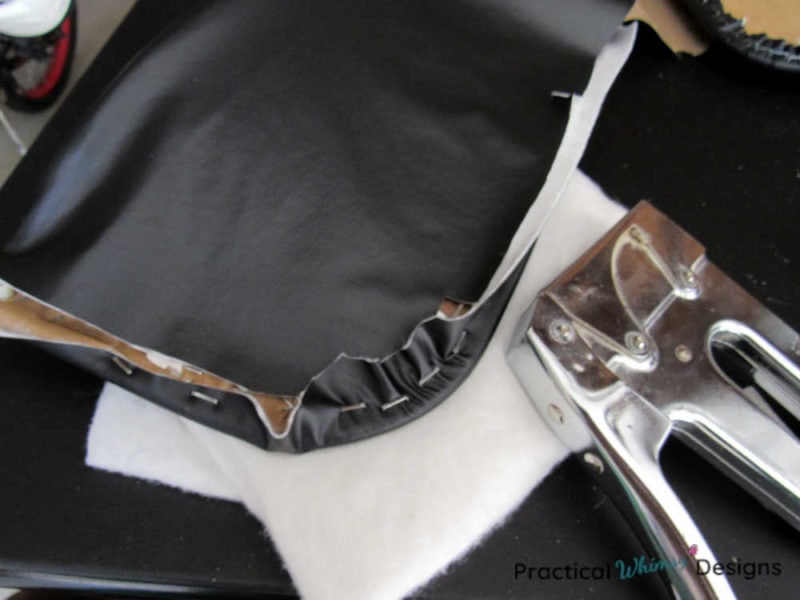
–Use the original vinyl as a template
If the back of your chair is as difficult to work with as mine, my suggestion is to take apart the original vinyl on the back of the chair and use it as a pattern to cut out the pieces you need. This makes the process so much easier.
Pay attention as you remove the pieces so you can see how they stapled them on.
I started by cutting out the two separate pieces for each of my chair backs. I tried one chair with the white vinyl backing still attached and found that it was harder to work with, so I removed the white fuzzy backing on the other chairs by carefully pulling it off with my hands.
-Sew or glue the pieces together
Then I sewed a straight line on the bottom ends with right sides together (sewing term for the nice sides that everyone wants to see). I left all of the other sides open and only sewed a single line along the bottom. This is where glue might also work, but I had the sewing supplies…. so, sewing was the route I chose.
-Staple the sewn seam to the bottom of your chair with right sides of the fabric together.
I stapled the seam of the vinyl I had just sewn to the bottom of the chair back so the right sides were still together and I secured the area I had just sewn to the chair. Then I was able to wrap the two vinyl pieces up and around both sides of the back piece and staple them.

-Staple the front of the chair
I started with the front side. Once again, I stretched the fabric across, smoothing it as I went. I then stapled it on the back to hold it in place. (Remember, there should be two vinyl flaps attached at the bottom of your chair back. We will use the back one to cover over these staples.)
Staple the edge over like you did on the bottom of the chair seat. Then trim the excess vinyl off.
-Staple the back of the chair
Now you will take the loose vinyl on the back of the chair back and staple it over the edge you just folded down. This will cover most of the seam and when you screw the back onto your chair. framer, the metal bar should cover the rest of the seam.
I’m not going to lie. Getting the vinyl to lay nice and flat took some finagling. But I finally got it to where I was pretty happy with it. There is one more step after assembling the chair that will help it lay even better. Don’t be afraid to pull out a staple or two (or ten..😬) and readjust as you work with the vinyl.
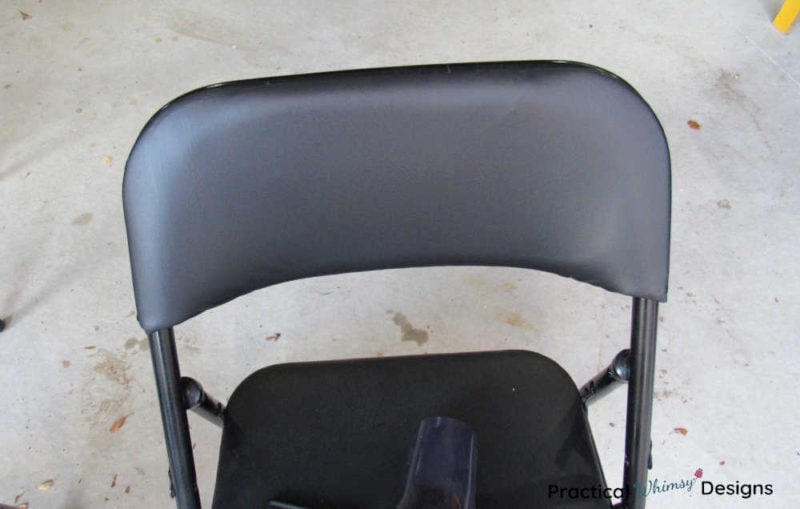
Step 5: Reassemble the Chair
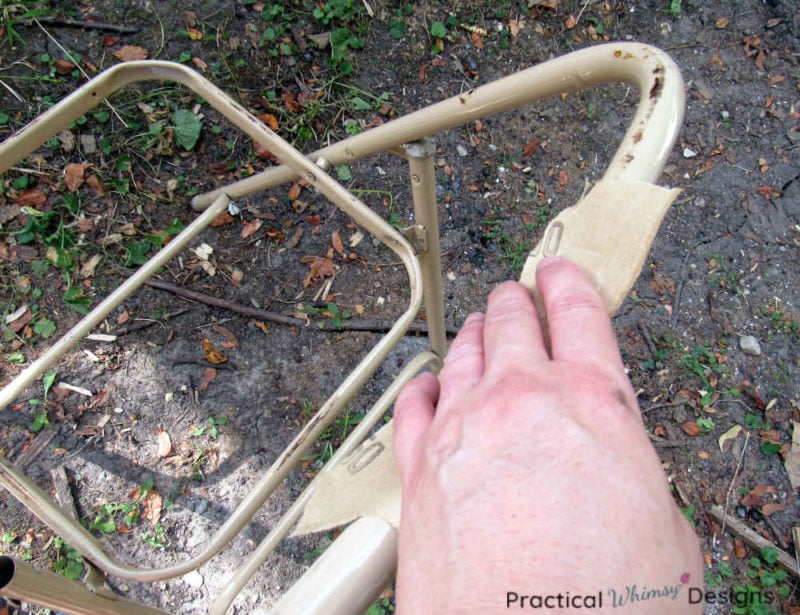
Screw the bottom and back onto the metal frame of the chair.
Some of the caps on our chairs were missing or very rough, plus they were tan, so I replaced them with new rubber leg caps.
Step 6: Blow Dry Your Chair
Yep.
You read that right.
I still wasn’t completely happy with how wrinkled the tops of my chairs were.
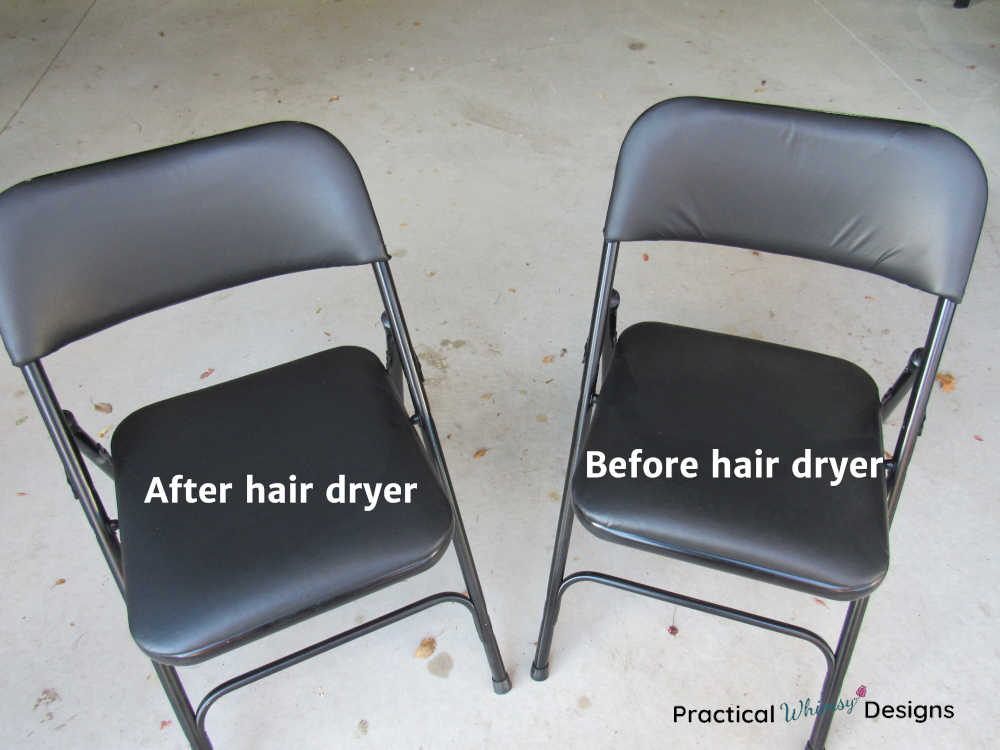
However, I was able to apply heat to my vinyl to help them mold to my curved chair backs.
Note: Always test this on a scrap piece of vinyl to make sure your vinyl doesn’t melt. You would hate to have to re-do your whole project!
I used a hair dryer and heated my vinyl.
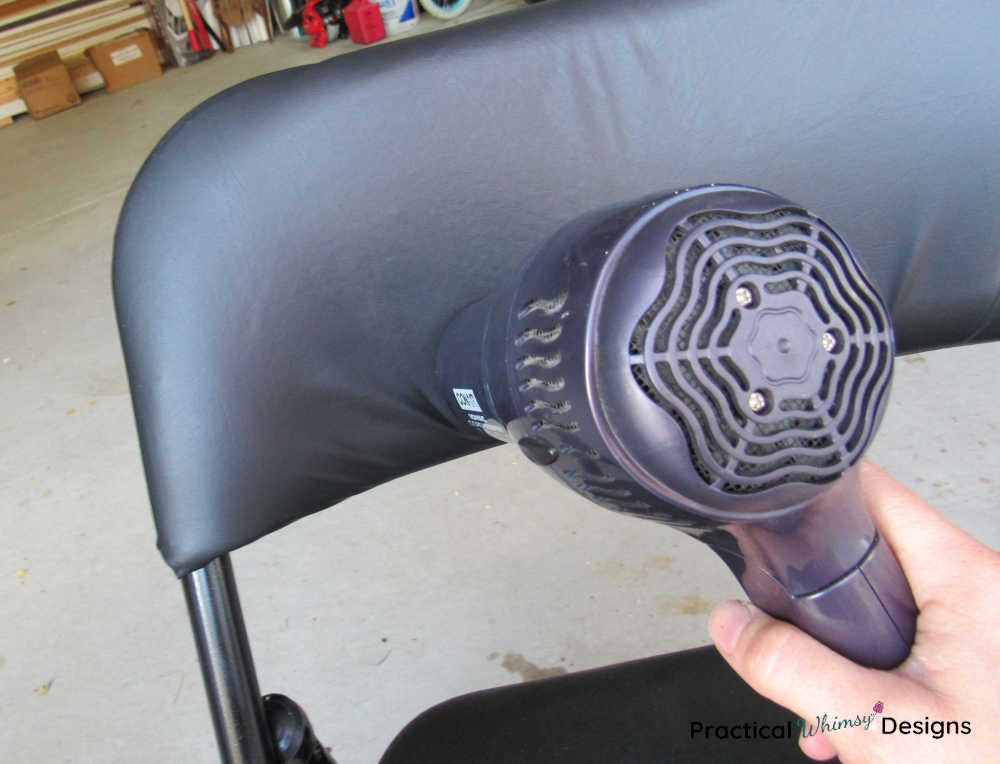
I then worked the wrinkles out with my hand, by sliding my hand across the chair back and smoothing the wrinkles towards the edges.
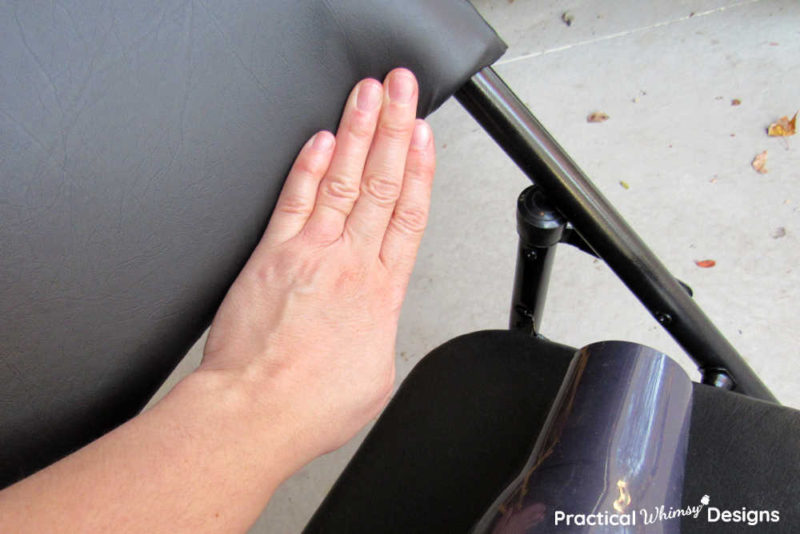
After using the hair dryer, the back of the chair was a lot less wrinkles. I also heated the other side of the chair back to eliminate wrinkles on that side too.
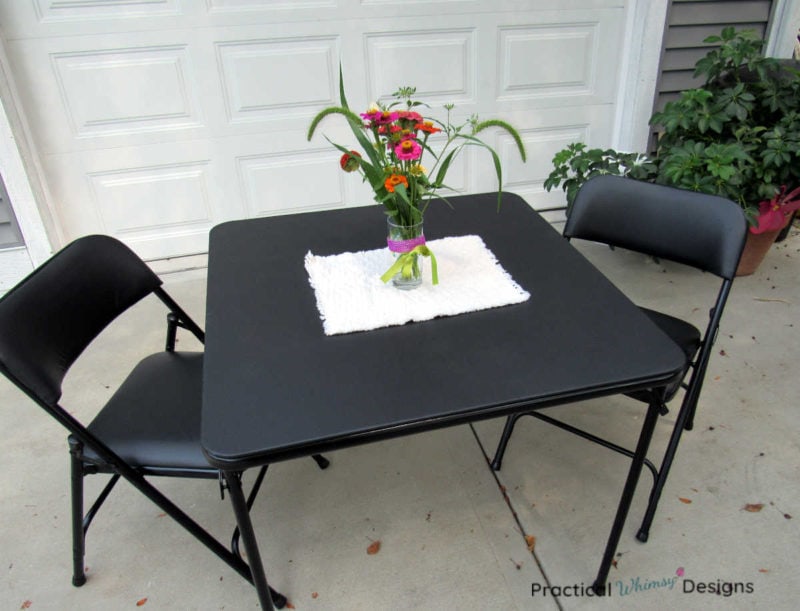
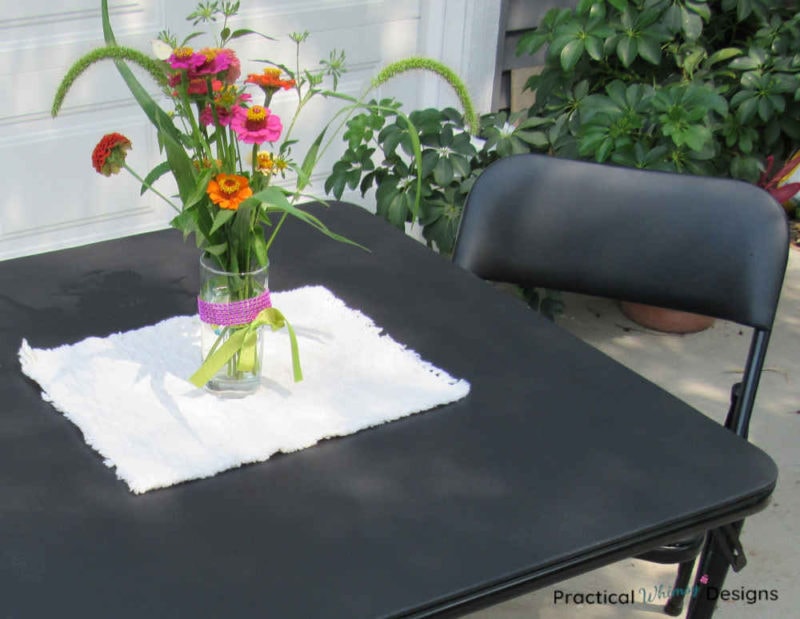
The Results: How to Refinish a Folding Table and Chairs
This may not be the thriftiest project because each element does cost a little bit. However, I was able to get everything for less than a new table and it kept it out of a land fill. And I had quite a bit of paint on hand from other projects, so that helped keep the cost down.
Here is the old table one more time.
And here it is after refinishing the folding table and chairs.
Even a little white butterfly came to admire my work.
Ok. I think it was more interested in the flowers, but it added some fun to my photos.
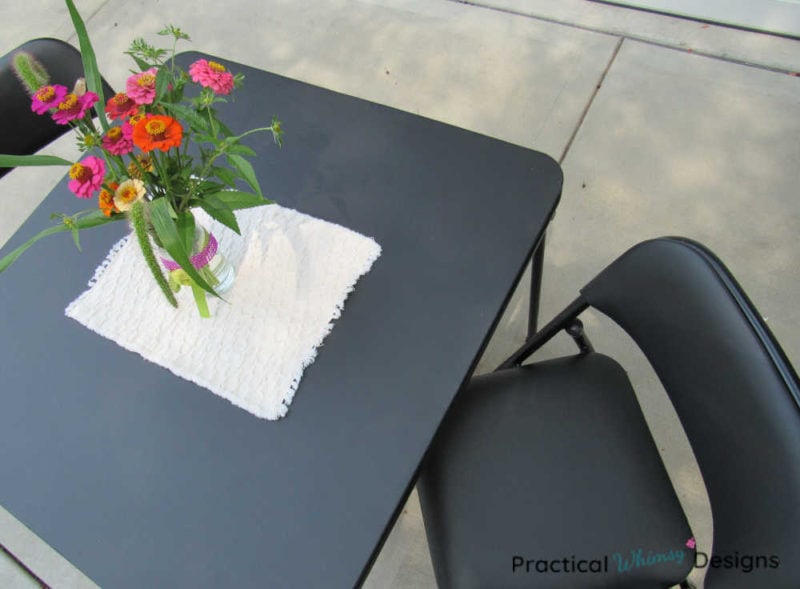

I am very happy with how this project turned out and I am glad that I can offer seating with a little more substance to my guests.
Want to remember this post? Save it to your favorite DIY Pinterest board!

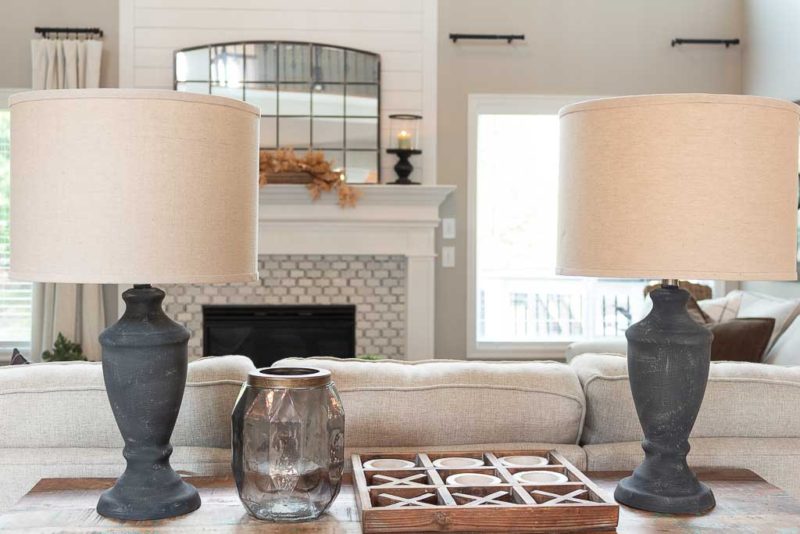
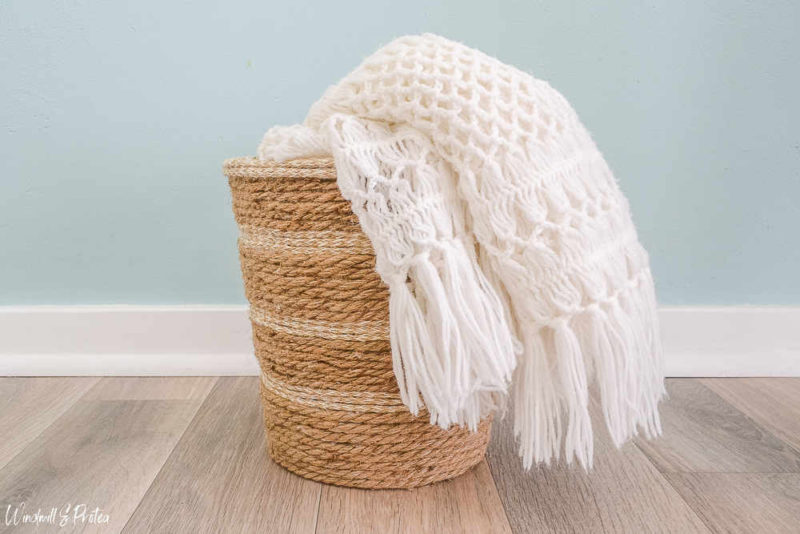
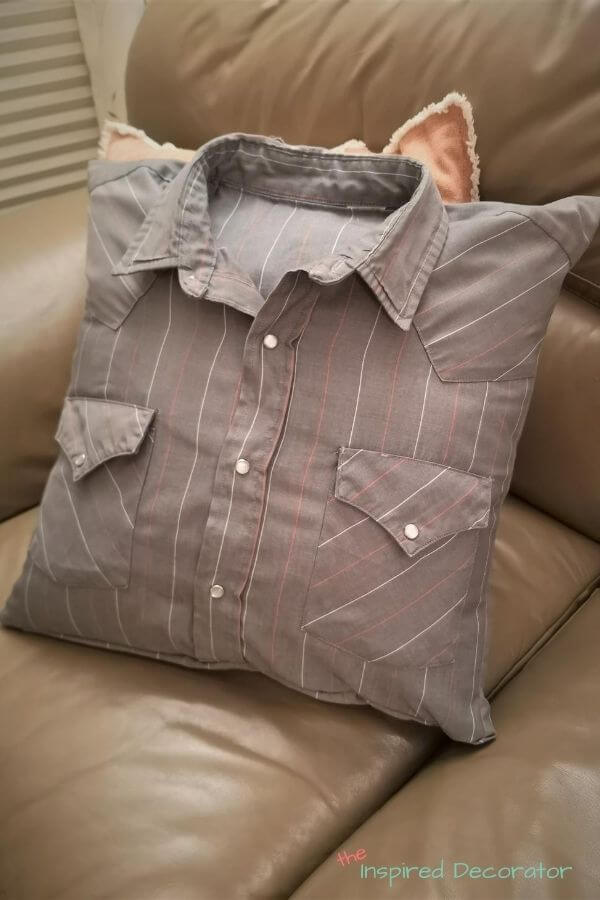
Don’t forget to check out these other fun posts from the Thrifty Thursday Collab. Martina from The Lived in Look created these fabulous rustic Pottery barn inspired lamps. Junette from Windmill & Protea made a beautiful rope basket and Sarah from The Inspired Decorator teaches how to make memory pillows from shirts.

The Lived in Look Windmill & Protea


Are we friends on Instagram?
Follow @PracticalWhimsyDesigns to see more
behind the scenes projects
I am about to recover my table. My husband had some flannel backed, black vinyl from another project I thought I would use that appears to be the same as what you used. I see you removed the flannel. I wondered if after a couple of years you are still happy with that? I understand not wanting padding on the table, but did it hold up well?
Thank you, very much!
Thank you for reaching out. So far I have been happy with how the folding table fabric has held up. We don’t use it heavily, but it has been set out for kids to eat at and as a table for them to color at as well as other events and it has not had any trouble with wear. It does have a little scuff on the side because I accidentally slid it against the sharp side of a piece of trim when I was pulling it out of storage, but it is not too noticeable.
Keeping the flannel backing on the table makes it too soft and the original vinyl on my table did not have any of the backing on it.
I hope that helps.
This looked like a big undertaking. And you nailed it! You make upholstering look easy
I love the result of your folding table and chairs! Turned out very classy looking!
Thank you so much. I am so happy with how nice they look too.
Wow, Erin, you really went through a lot of trouble to refinish the table & chairs. They look amazing! I’m sure you’ll be using them for years to come.
Ha ha. Yes. It was a project, but I love how it turned out and it kept the table out of a landfill. So that is a win in my book.