
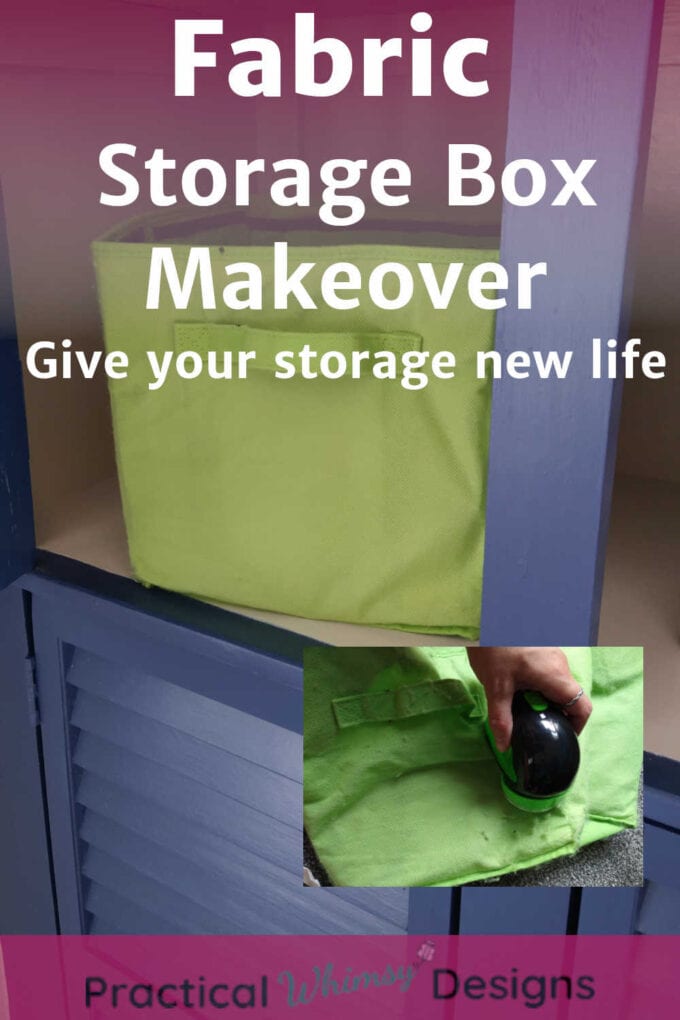
Give your cloth box a face lift with this tutorial. You can easily repair fabric storage boxes to give them new life in your home.
Storage.
One word with so much power in your home.
Keeping a room clutter free is one of our family struggles. With 6 people in our household, there tends to be a lot of stuff that needs to find a home.
That means coming up with the right kind of storage to make our home feel more organized and contain the messes.
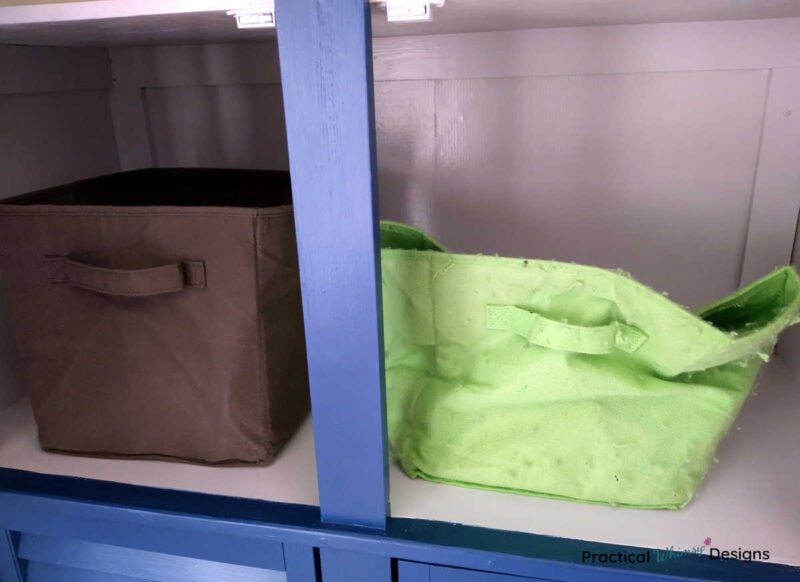
One of my favorite ways to manage bulky items and make them look a little nicer is fabric storage boxes. They create an opportunity to add color to your room.
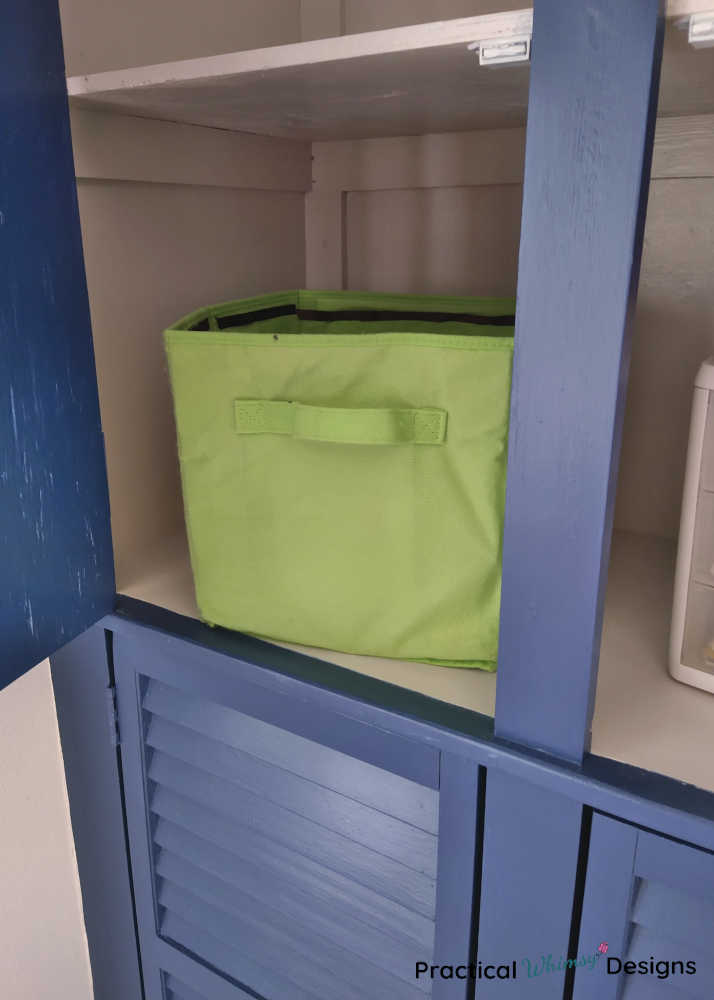
We have used fabric storage boxes in our master closet to create more versatile storage space and I have used them to hold my kids’ toys since they were toddlers.
However, over time those fabric boxes have started to look a little run down and floppy. I had the choice to either restore these storage cubes or purchase new ones for my boys’ Lego storage in their new video game themed bedroom.
Since I am all about reusing as much as I can and keeping things out of the landfill, I took on the challenge of trying to make these boxes look new. I also wanted to add a little support to them to give them a longer life.
This post contains some affiliate links for your convenience (which means if you click a link and make a purchase I will earn a small commission at no extra cost to you). Please see my disclaimer page for more information.
Materials You Need:
- Fabric shaver
- Craft knife
- Hot glue gun and glue sticks
- Old wire hangers or crafting wire
- Pliers with wire cutter, opt.
- Cardboard or poster board (or even an old cereal box)
- Ribbon
- Scissors
How To Repair Fabric Storage Boxes
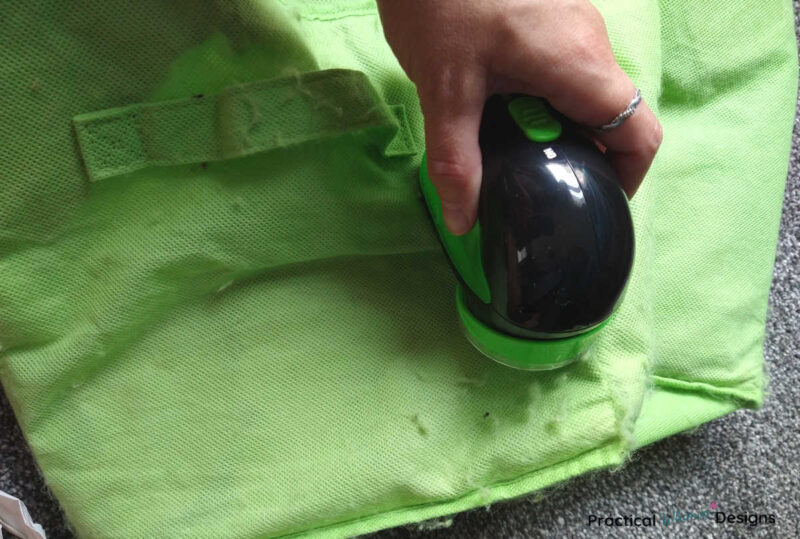
Step 1: Restore Your Fabric
The fabric on my storage boxes was looking pretty sad after their 10+ years of life. They definitely needed a little help.
There are two ways to restore the fabric on your storage cube or bin.
- You can choose to re-cover your fabric bin. This method is a great option if you no longer like the color of your fabric storage bin.
- Or you can use a fabric shaver to shave off any pills to restore the original fabric and use soap and water to spot clean any stains. This is the method I used.
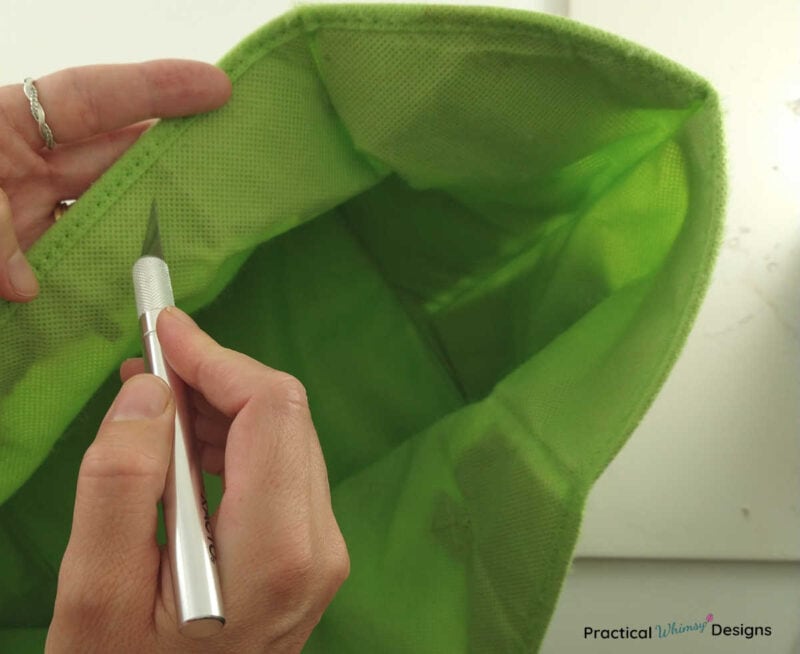
Step 2: Reinforce the fabric storage box
Once you have the fabric restored on the outside of your cloth box, you can move on to the task of reinforcing the structure.
The majority of fabric storage boxes are reinforced with a thin paper insert. After time, this insert folds, bends, and crumples, leaving you with a floppy storage box.

To replace this paper:
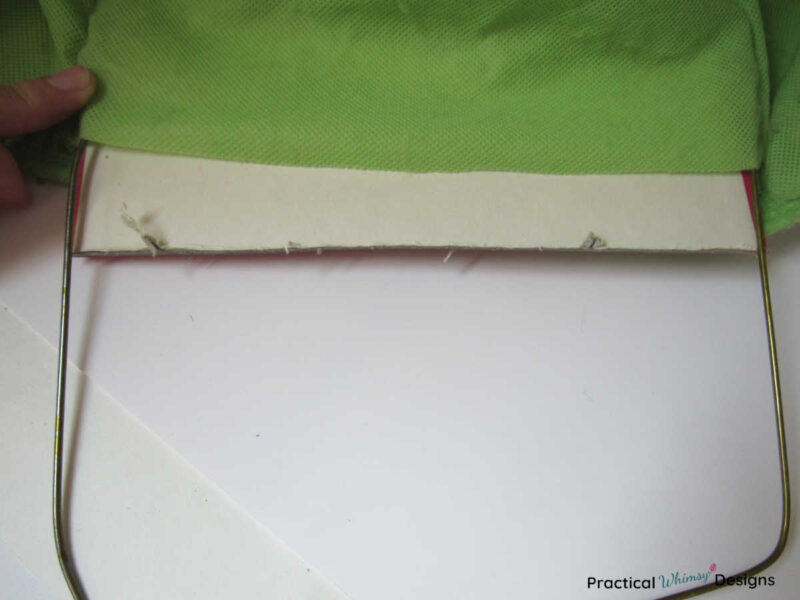
Carefully cut the top of the inside of your box open with a craft knife. Only cut deep enough to get through the inside layer. Don’t cut all of the way through.
Pull out the old crumpled paper.
Cut a piece of poster board, cardboard, or cereal box to fit inside the two layers of fabric.
Note: Make sure that you measure the space you have and cut a piece to fit the side of the box you are working on.
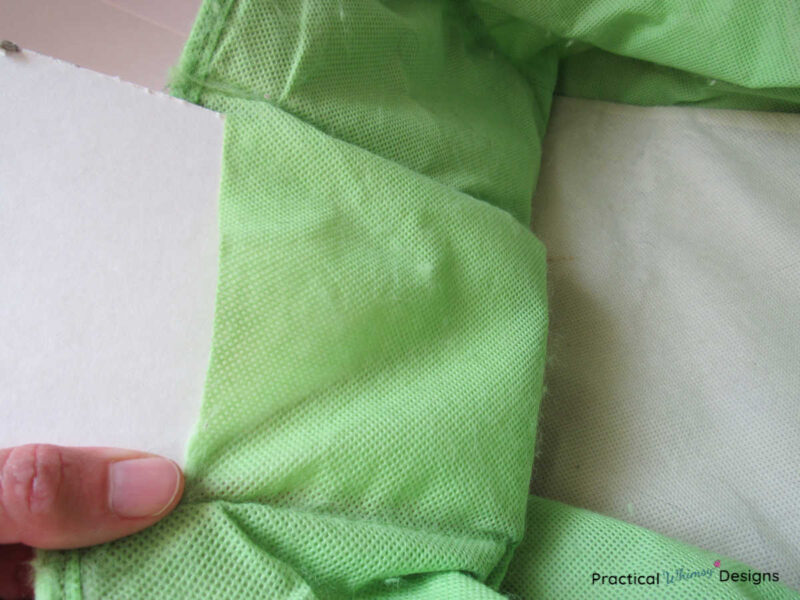
For example: The back of my box required a full square of poster board. Since my cloth box was designed to fold down to be flat for easier storage when not in use, the sides of my box required two half squares. The front of my box had a handle sewn through two layers, so I cut slits to go around the handles.
Take the time to reinforce as much of the box with poster board or cardboard as you can.
Step 3: Optional – Add Wire to your cloth box
If you want to keep your box stronger longer use wire to reinforce the front and back of your fabric storage container.
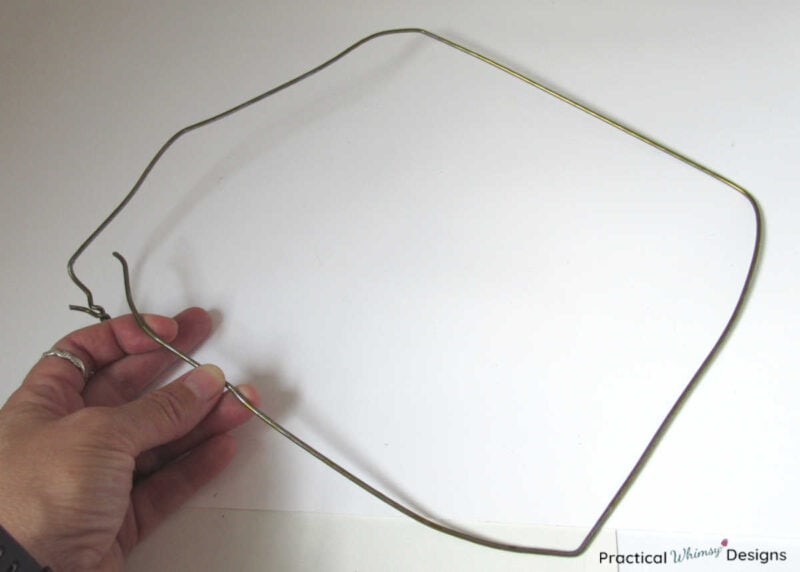
Since I have somehow accumulated a ton of wire hangers I am always looking for ways to use them in projects (like this DIY wire pumpkin). These wire hangers worked great to reinforce my boxes or you can use a heavy gauge craft wire.
The goal is to create a frame around the outside of the front and back of the box so that there is less pressure put on the newly inserted cardboard. Don’t worry too much about being a perfectionist on this. You just need a simple frame to take some of the strain off of the sides of your box.
To use wire hangers:
For the back of the box:
Place one hand next to the hanger hook and the other hand in the center of the long flat part on the hanger. Pull the hanger out until it forms a square.
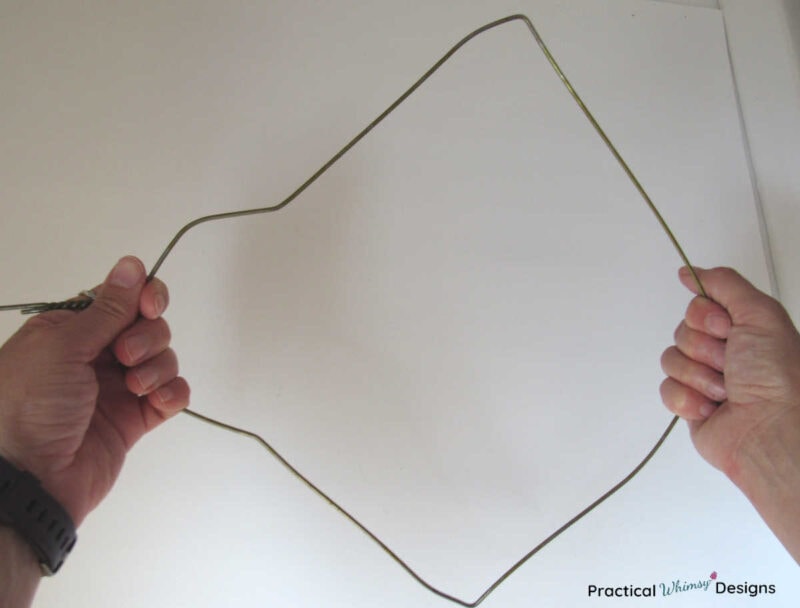
Twist the hooked hanger end around the closest edge of the square to keep it from poking a hole into the fabric.
Notice that this is not a perfect square by any means.
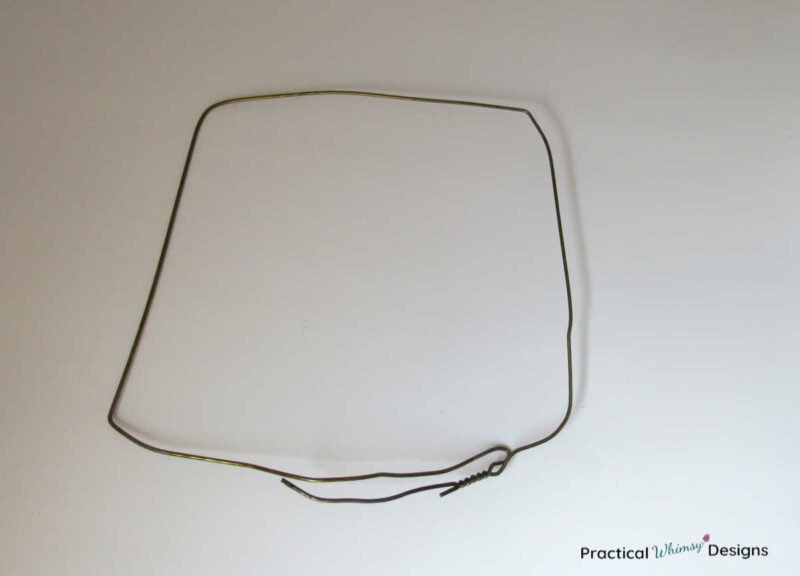
Insert the square hanger into the slit you cut into the box fabric earlier with the paper or cardboard insert you made.
For the front of the box:
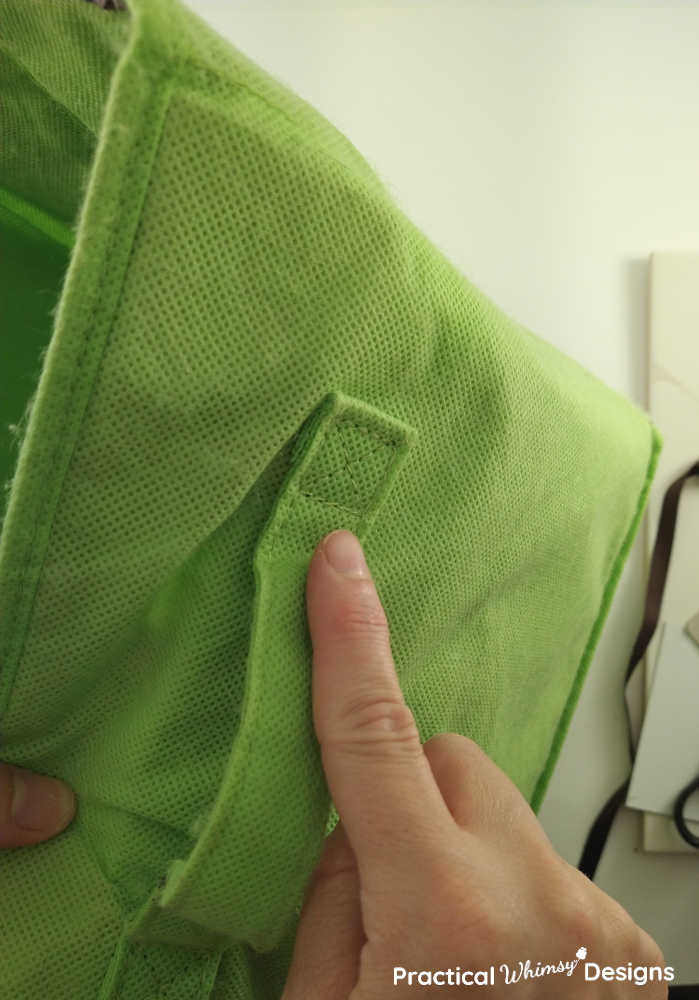
If your box has a handle, like mine, then twist open the hanger so that the hanger has open ends. (You may need a pliers to help you twist and cut your wire.) Bend the wires into a square that fits into your box. The two open ends should overlap each other.
Insert one of the open ends of the hanger into the box and work it around the handle until the open end is at the bottom of the box. Work the other end of the hanger around the other handle.
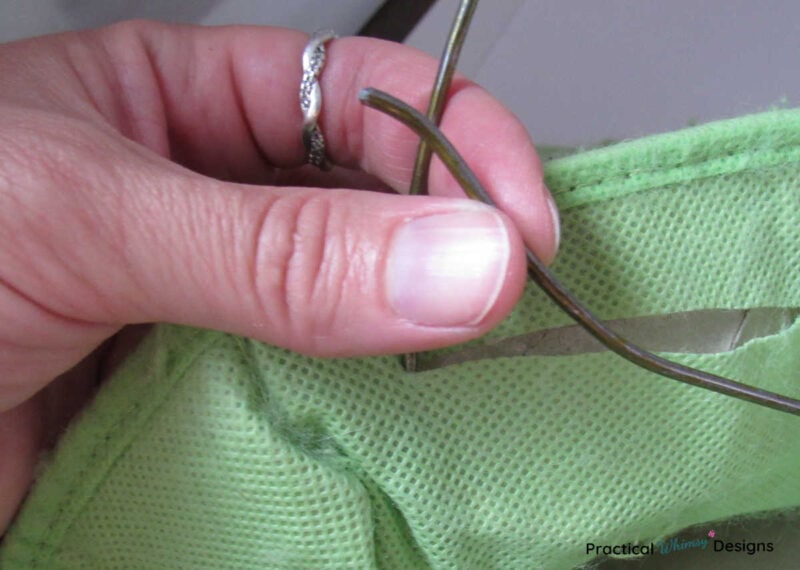
You should end up with a square frame with the two open ends overlapping at the bottom of the box.
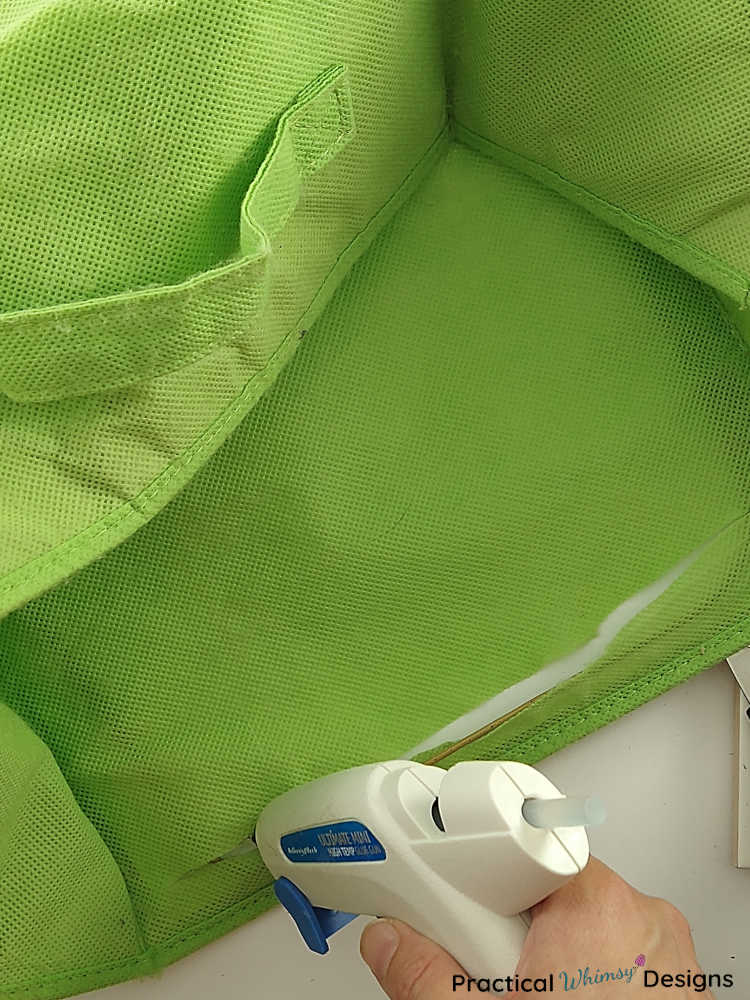
Step 4: Close up the slits on the fabric box
Use a hot glue gun to glue together the slits you created with your craft knife.
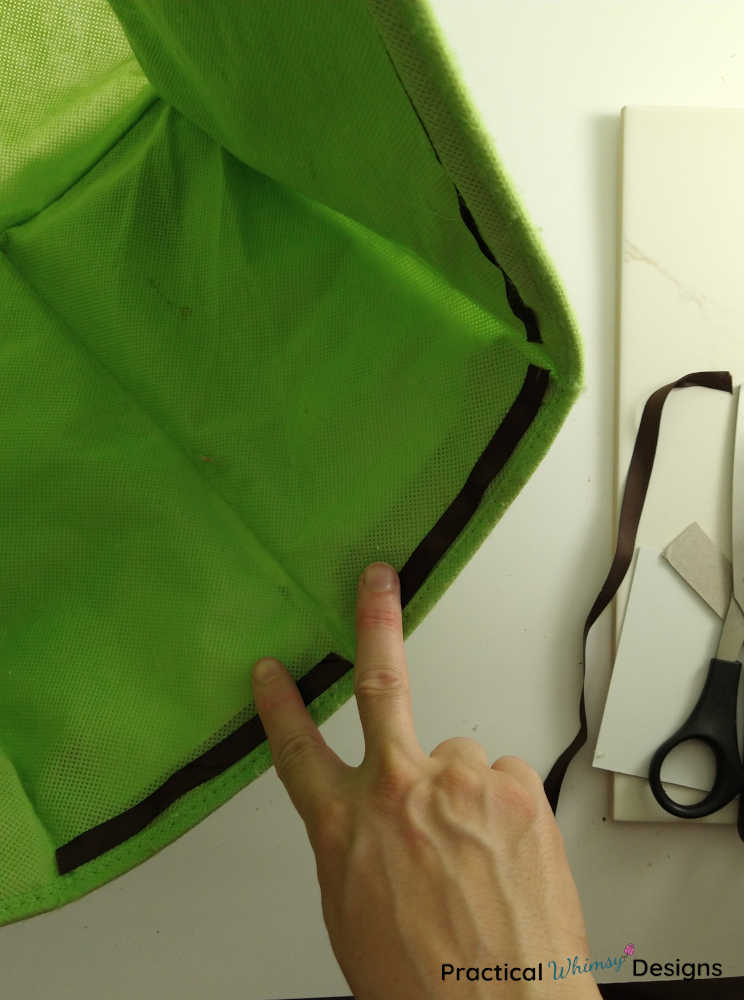
To make the area look better, cut a ribbon the length of the top of your box and glue it across the slit. This will also help reinforce the area you cut open.
Proudly Display Your Repaired Fabric Storage Box
It is crazy how much of a difference this little tutorial can make for your storage boxes.
What about you? Do you have any fabric storage boxes that might need a facelift?
Want to remember this idea? Save it to your favorite DIY board on Pinterest.
Want More Great Ideas? You Might Like These..


Are we friends on Instagram?
Follow @PracticalWhimsyDesigns to see more
behind the scenes projects
This was a lifesaver seeing as my bins were looking terrible (in my opinion) this gave me all the tools and ideas I needed to restore them