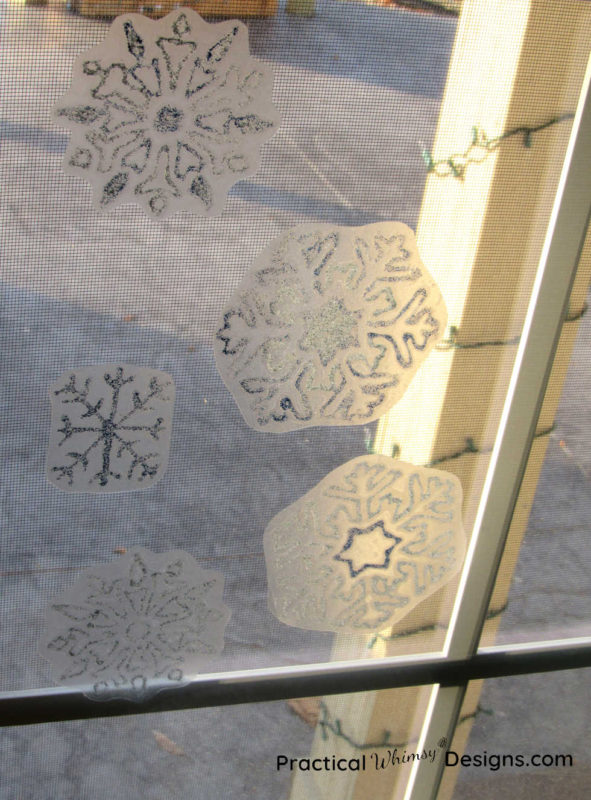
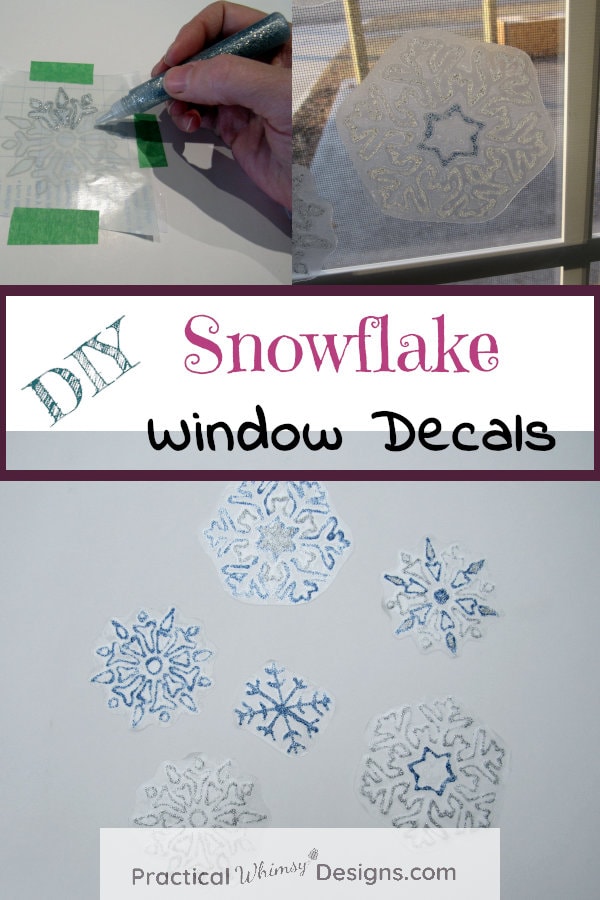
These sparkly Snowflake Window Decals are an easy winter project that even kids can make. Plus they add a fun element to your winter decor.
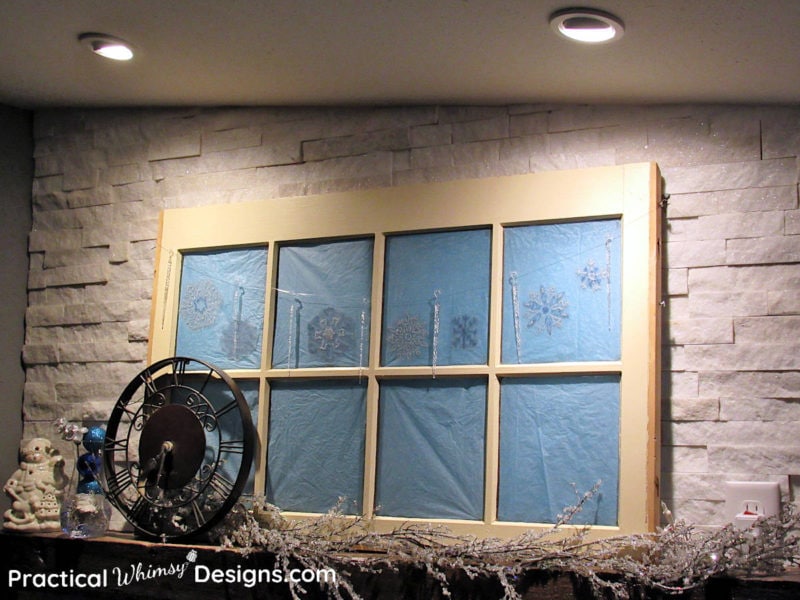
I wanted some snowflake decals to put on a window that sits on my mantel to complete my easy winter decorations I put up after Christmas.
I didn’t want to buy them, though. So, why not make them?
These are easy enough that your kids can help make them and are a fun winter project that helps brighten up your windows. (Especially since we haven’t had much real snow yet this year)
What you will need:
- Contact paper
- Glitter glue
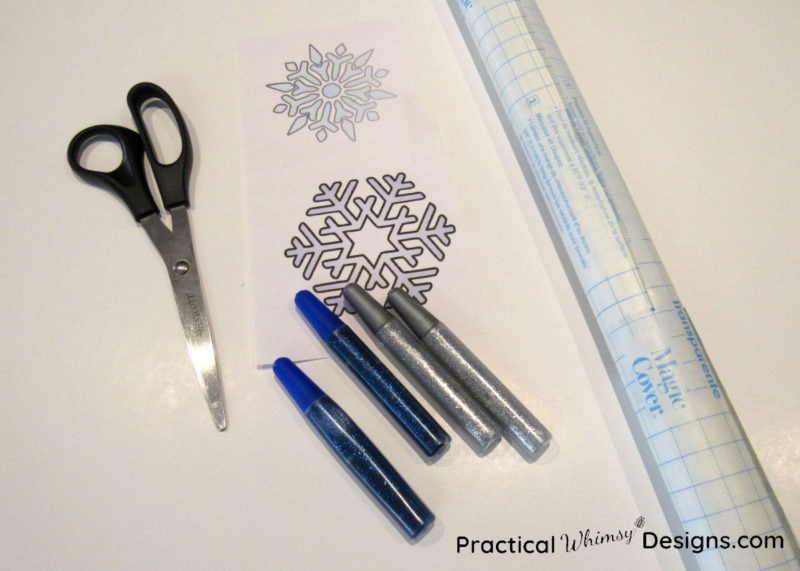
- Scissors
- Tape (to tape down the contact paper while you are gluing)
- Snowflakes print out to use as your template (opt.)
Note: Since making this tutorial I have made a snowflake template that is in my resource library which is available to my email newsletter subscribers. Not a subscriber yet, but want to be? Sign up at the bottom of this page.
Steps for Making Snowflake Window Decals
Step 1: Print out snowflake designs from the web.
You can free hand the snowflakes and I did do that on a couple of them, but my lines don’t always stay as straight and symmetrical as I’d like. I definitely would recommend finding a few snowflake pictures and using them as your template.
Look for ones with thick and simple lines that are easy to follow with glue.
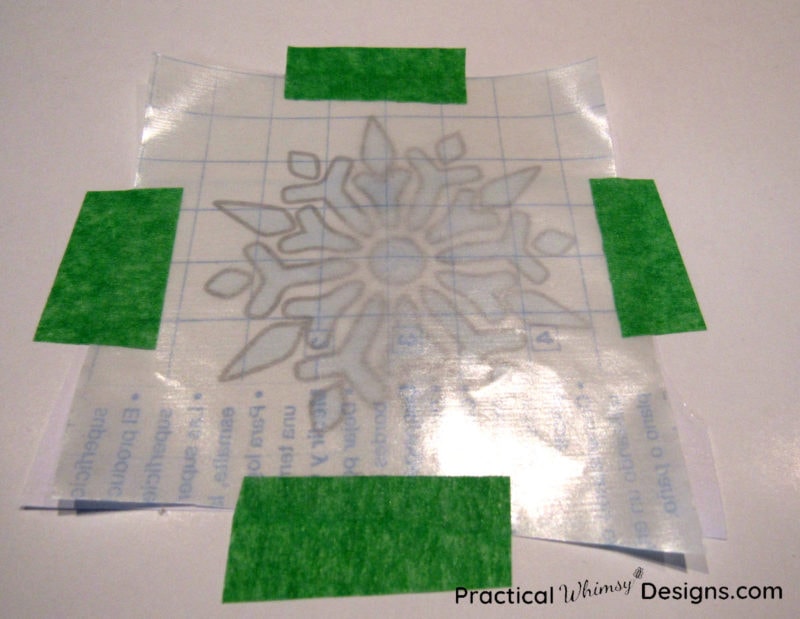
Step 2: Prepare the decal.
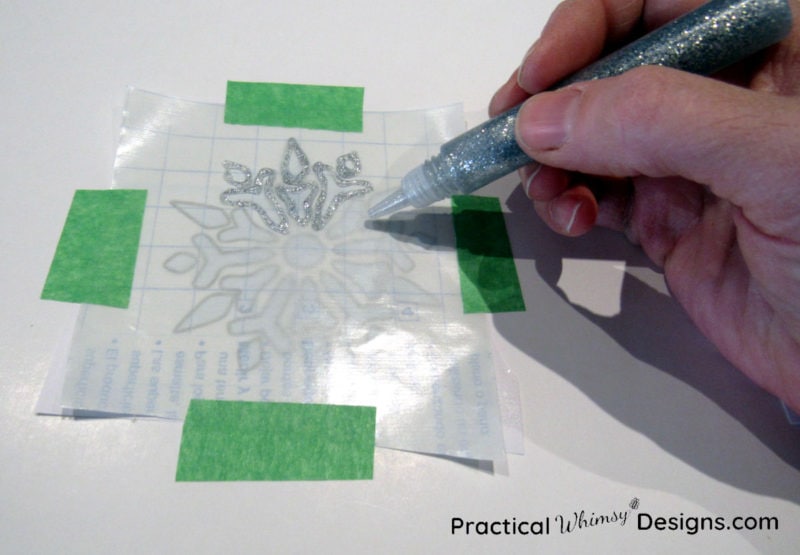
Cut out enough contact paper to go over the top of your snowflake design. Use tape (I used painters tape because it is easy to remove later) to tape the contact paper down on the surface you are working on.
Now, if you have younger children helping on this project, you may want to find a piece of cardboard that you don’t mind getting a little glue on to go under their snowflake. This will provide a hard surface to tape to while still giving a little protection to your table or counter.
Step 3: Glue the design.
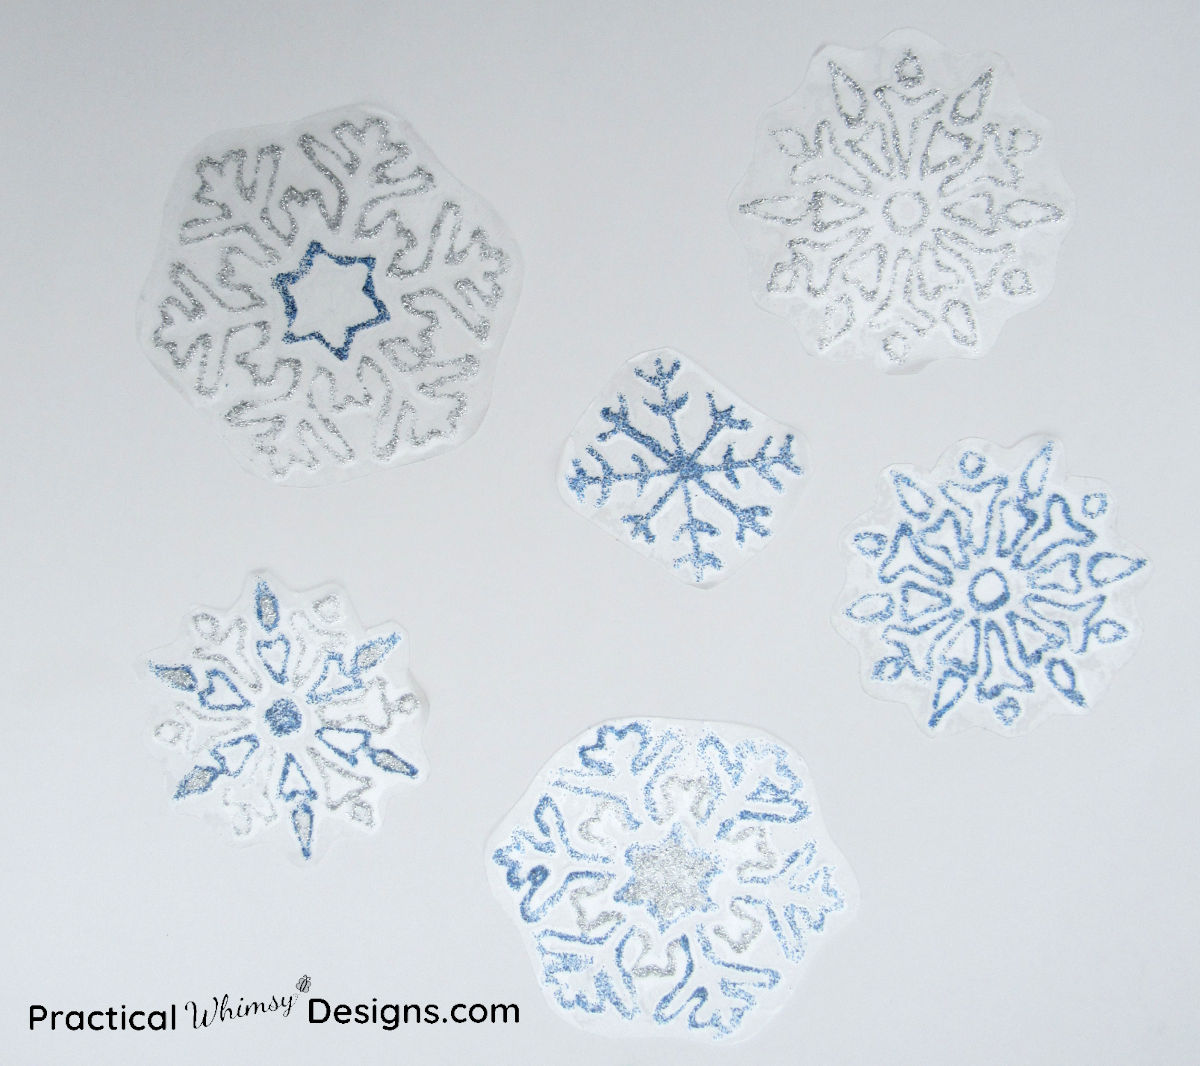
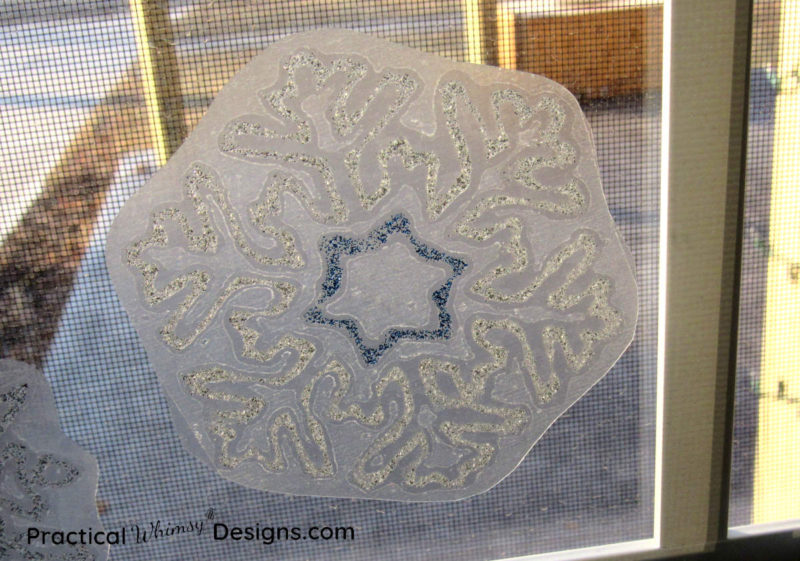
Use glitter glue to glue along the snowflake design. I stuck with the silver and blue because that is the color scheme I was going for, but have fun with this. It is totally up to the artist. 🙂
Step 4: Wait, and wait, and wait….
Ok. So this is the not so fun part. Glue does seem to take a while to dry, especially when you watch it. So, set it aside for a while and go do something else. I let mine sit over night and it was more than ready by the next day.
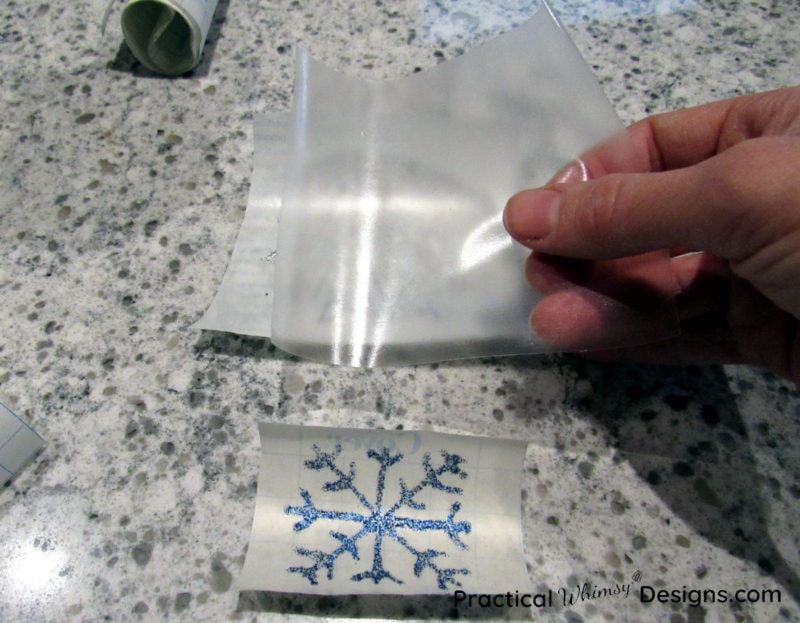
I kept the snowflake taped down until the glue had fully dried because contact paper has a tendency to roll. I would hate to have all of that hard work smudged by a stubborn piece of paper.
Rollin’, Rollin’, Rollin’…. Nope. NOT going to let that happen! Tape to the rescue!
Step 5: Cover the glitter.
After the glue has fully dried, you can take the tape off the snowflake. Cut another piece of contact paper the same size as your snowflake and stick it over the glitter glue, sandwiching the snowflake decal between the two pieces of contact paper. Once the glue dries, it doesn’t stick very well to the contact paper, so this keeps your snowflake where you want it.
Use the back of your scissors or another hard object, to stick the contact paper firmly down and rub out any bubbles.
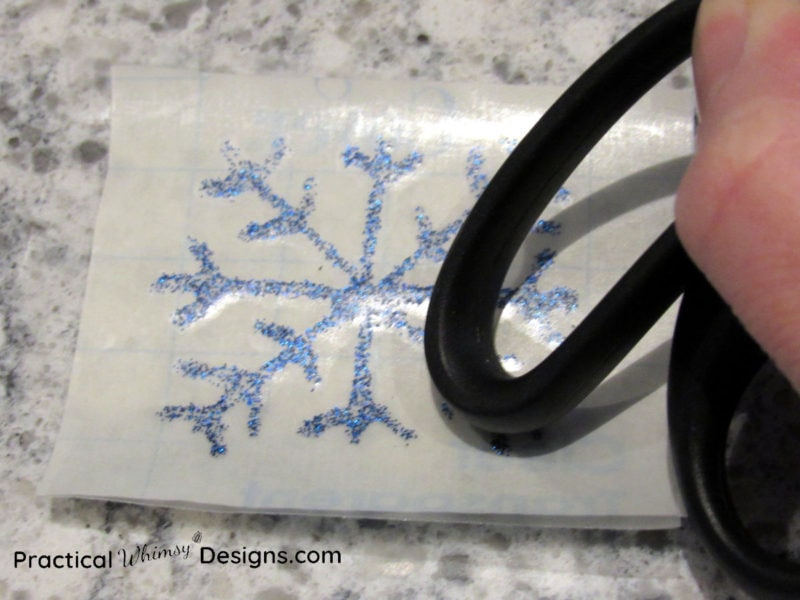
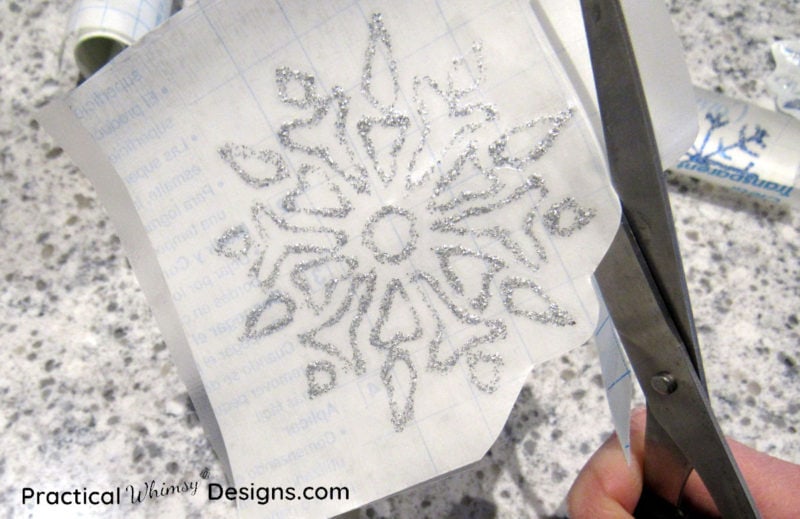
Finally, trim around your snowflake with your scissors to cut off the excess contact paper.
Step 6: Decorate the windows with your new Snowflake Window Decals
Your decals should be ready to go! Just peel the backing off of the contact paper and stick to your desired window. These can easily be moved from window to window and when you are done with them, stick them on wax paper or plastic and re-use them again later.
This simple project is a fun way to add a little decoration to your home. It’s also a great way to let your kids be creative and join in the decorating.
Happy winter! 🙂
The form you have selected does not exist.

