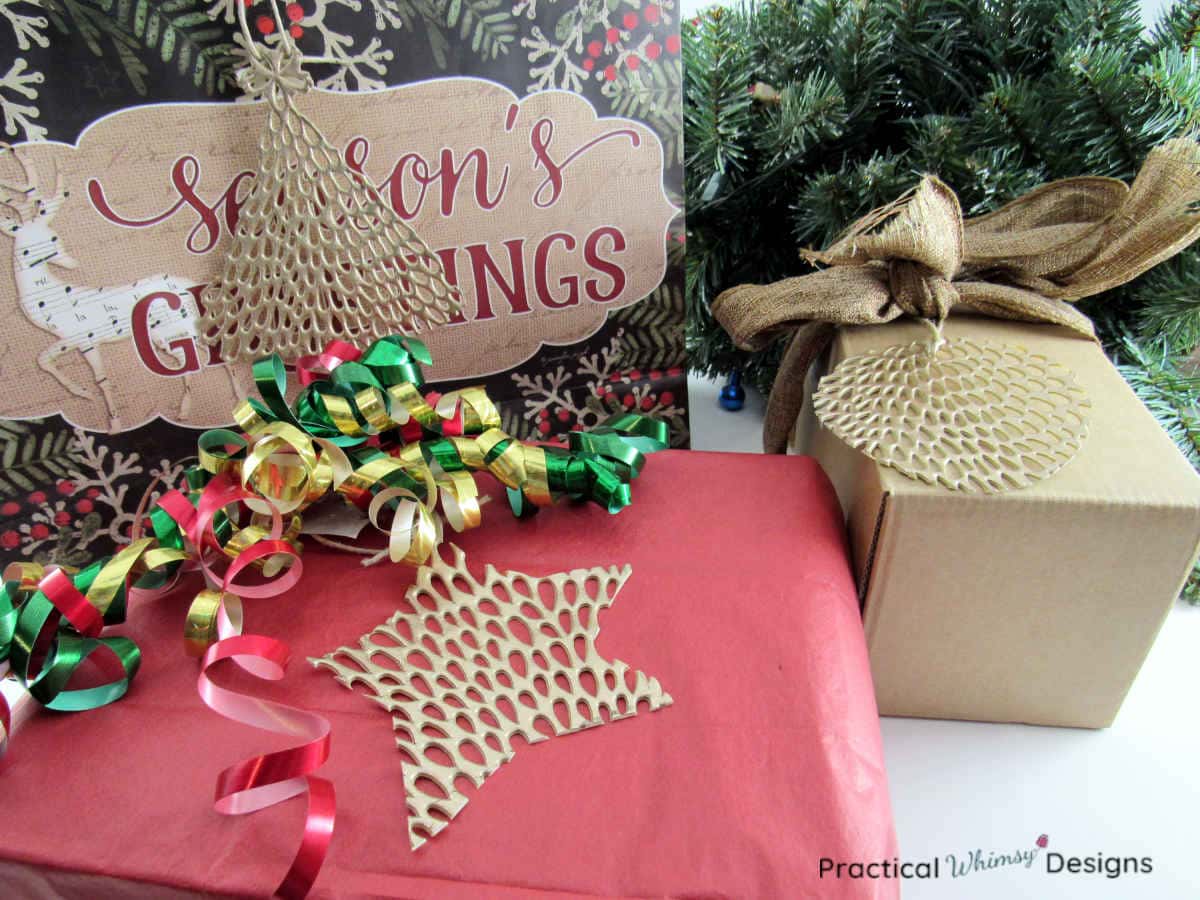
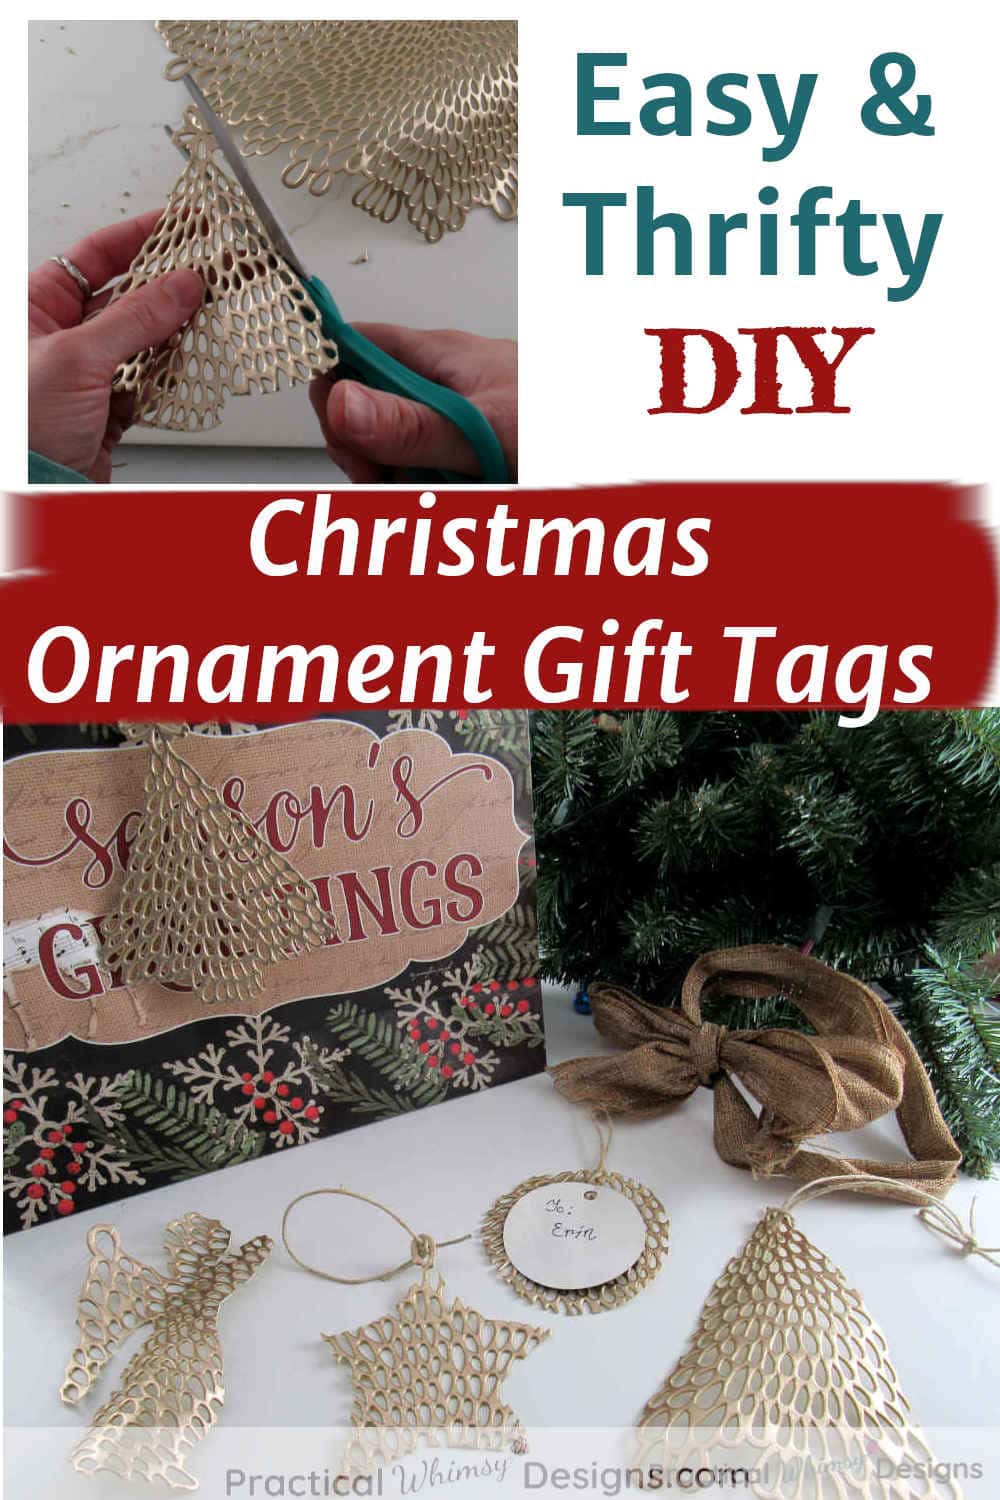
Make your wrapped gifts beautiful with a diy ornament gift tag. They are an easy way to create a unique and stunning addition to your gift wrapping.
Struggling with finding the perfect paint color for your home? My design guides are available for free to my newsletter subscribers. Grab my Free Paint Guide and FINALLY pick a wall color that you love!
I know wrapping presents isn’t always everyone’s cup of tea, but I love it. There is something my creative self enjoys about making the presents look beautiful.
I love carefully selecting paper, ribbon, and bows.
I guess it is another way to be creative and artistic, even though I know the paper will all get ripped off to reveal the hidden treasure underneath.
This year I made these fun ornament gift tags to go along with my Christmas presents. They are a beautiful way to add a little bit of elegance and originality to your gift wrapping.
And they can be used for an ornament after they are done making your presents pretty.
This post is part of the Less is More-Thrifty Thursday collaboration where a group of talented bloggers create thrifty decor ideas that you can diy to decorate your home. Take a look at the other great projects at the bottom of this post.
This post contains some affiliate links for your convenience (which means if you click a link and make a purchase I will earn a small commission at no extra cost to you). Please see my disclaimer page for more information.
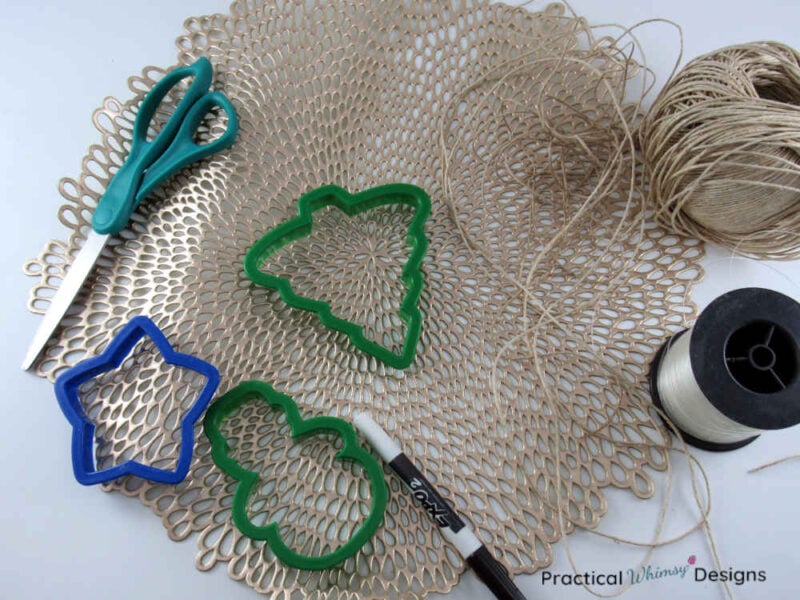
Materials You Need:
- Gold placemat
- Cookie cutters(these are the ones I have) or stencil for tracing
- Dry Erase Marker
- Scissors
- Hemp cord or fishing line
Steps to Make a DIY Ornament Gift Tag
Step 1: Trace your ornament
Use cookie cutters or a stencil to trace out the shape you want your ornament to have on the gold placemat.
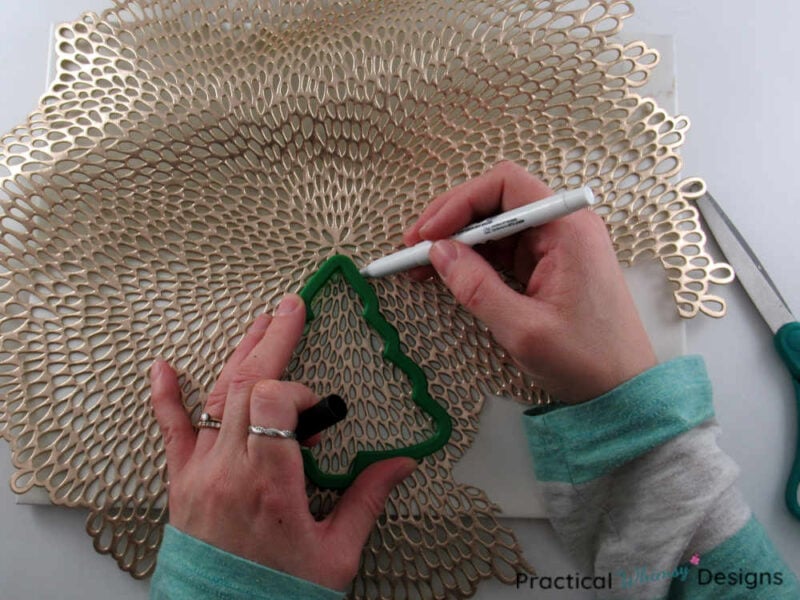
I used a dry erase marker on the front side because it wiped right off. You can also trace it on the back side if you don’t have a dry erase marker.
Step 2: Cut out your ornament
Once you have your ornament design traced, cut it out with your scissors.
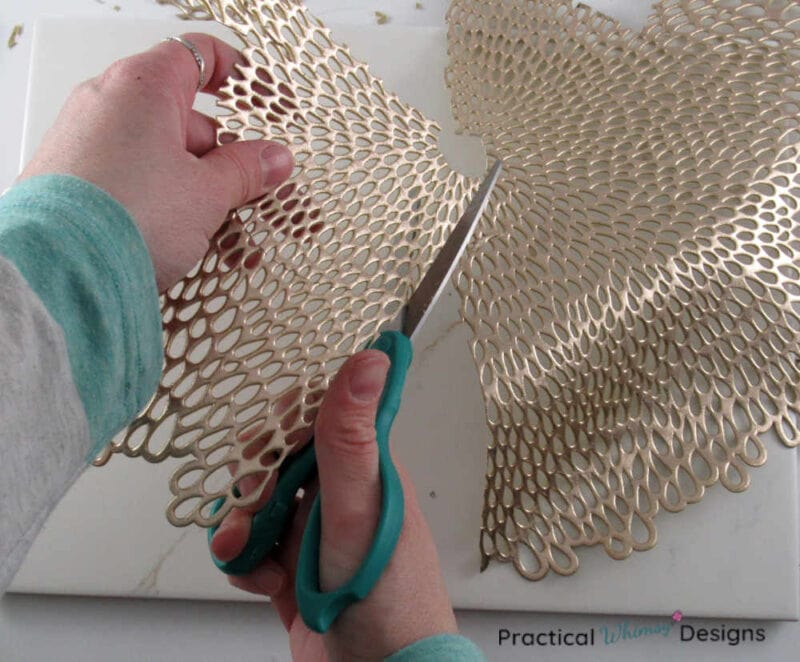
The holes in the placemat I used make the ornament look beautiful, but they can create a little challenge when you are cutting out your lines as they may look a little funny. Trim your ornament until you like the way it looks.
Use the holes and loops to your advantage to add texture and character to your ornament gift tag.
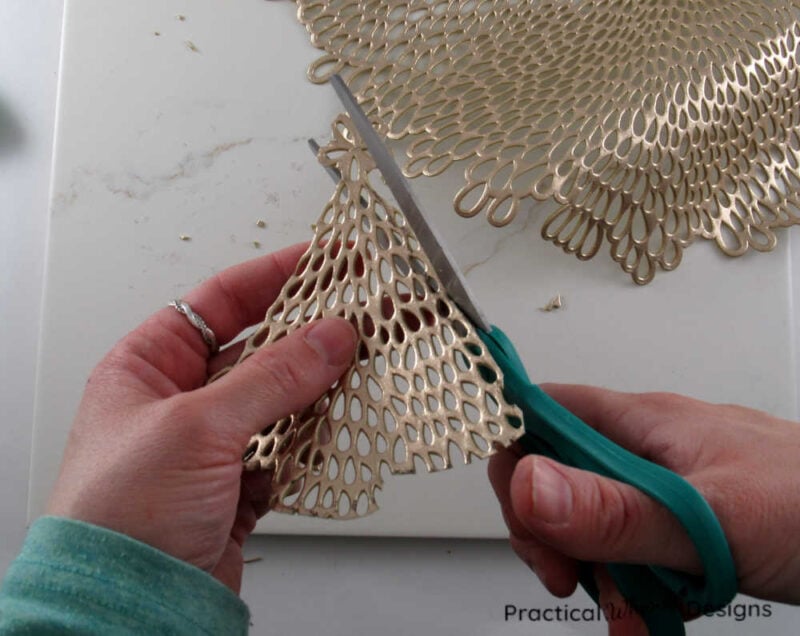
I tried to use the natural loops in the placemat to create a top loop for my ornament to put the string in later.
Note: Make sure to keep your placemat in a flat area. I let mine get a little folded and bunched and the ornaments weren’t laying as flat as I had planned. If this happens to you, set a heavy book on them and they should flatten again.
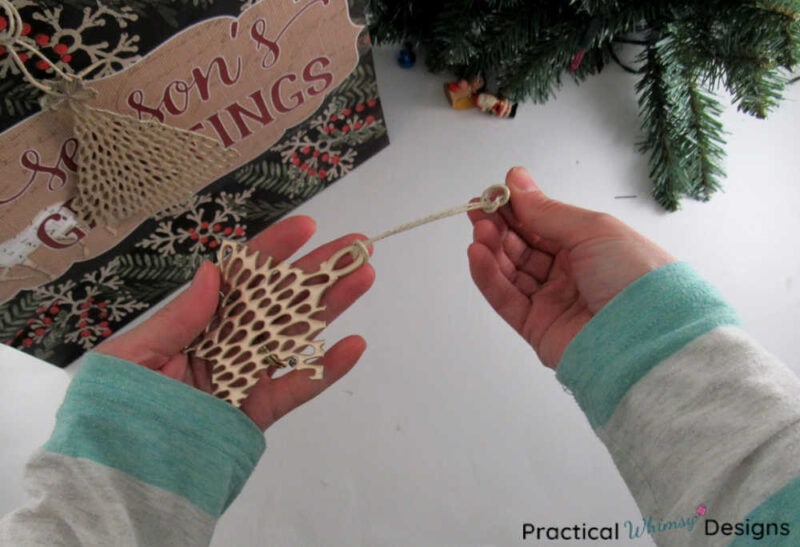
Step 3: Tie an Ornament string on
You can use fishing line or hemp cord to make a loop so that your ornament can be hung on a tree. This also is a great way to attach it to your present.
An easy way to tie your hemp cord on your ornament is to make a loop, tuck the two ends into a hole in your ornament, then bring them back through the loop you created with your hemp.
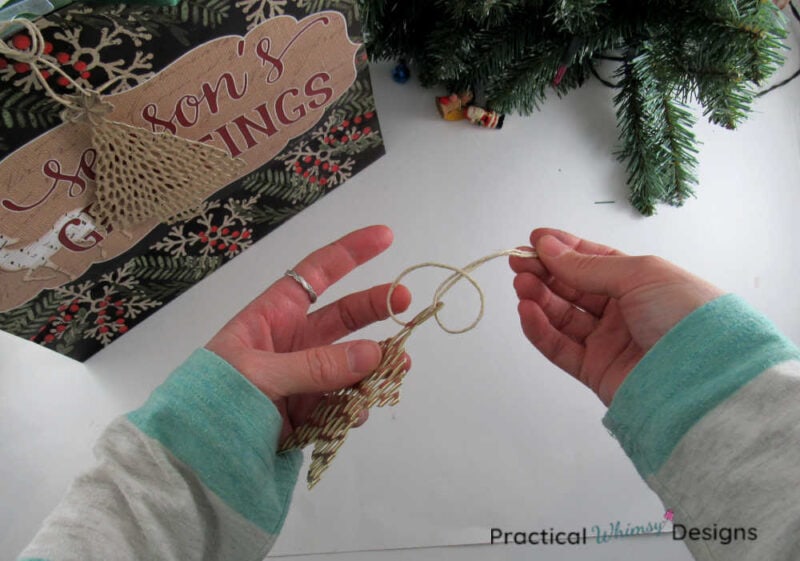
Then tie your loose ends in a knot or bow to form a loop.
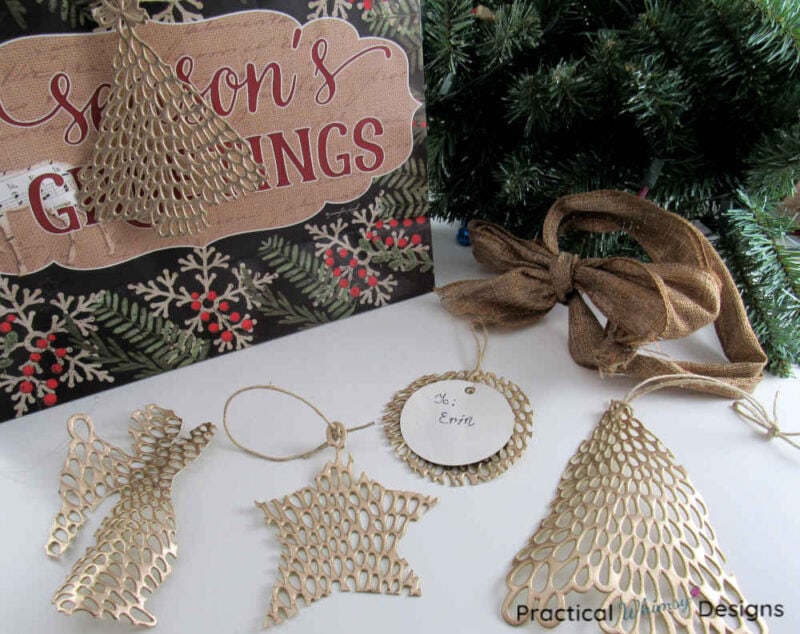
Ornament Gift Tag
There are so many options you can create. I love the big box of cookie cutters I have because I could play around with all kinds of fun Christmas shapes.
The box also includes ornaments for other seasons. You could easily make these into hearts for valentines day or flowers for spring decorating.
Now that you have made some fun shapes, add them to your gifts to give them a beautiful and elegant look. For a less permanent gift tag, tape a piece of paper and write the name and message to the loved one you are giving your gift to.
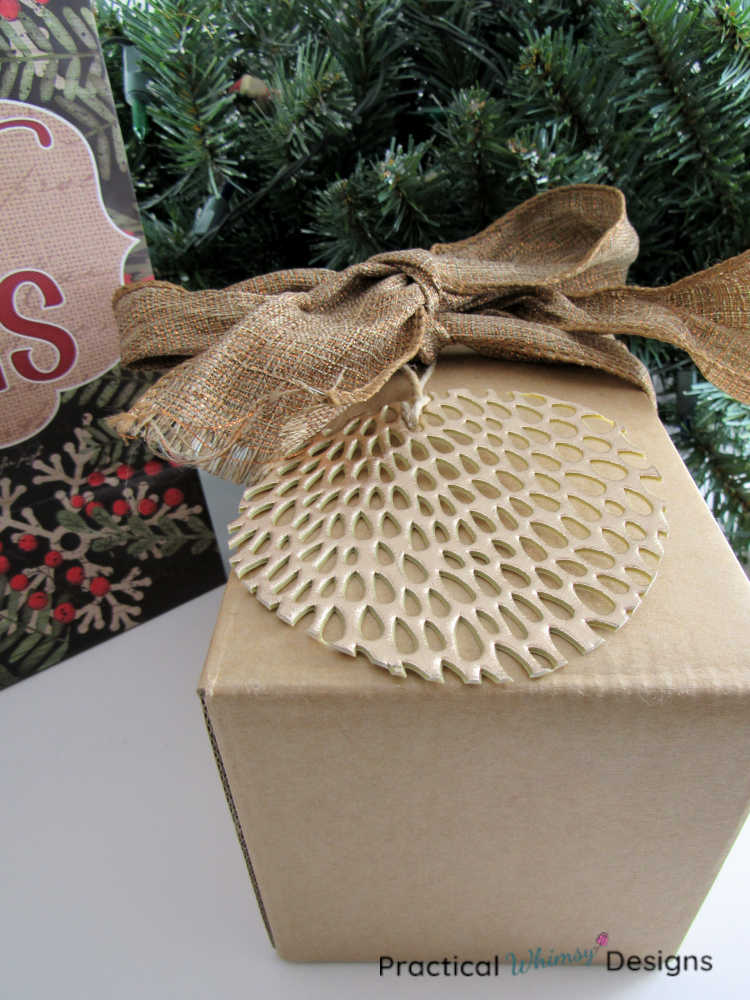
For a more permanent option use letter stickers on the front of the ornament to spell out the name of the one you are giving the gift to.
I made 6 ornaments and still had enough placemat left over for probably four more. This is an economical and fun way to make unique ornament name tags for your gifts and add a little personality to your wrapping.
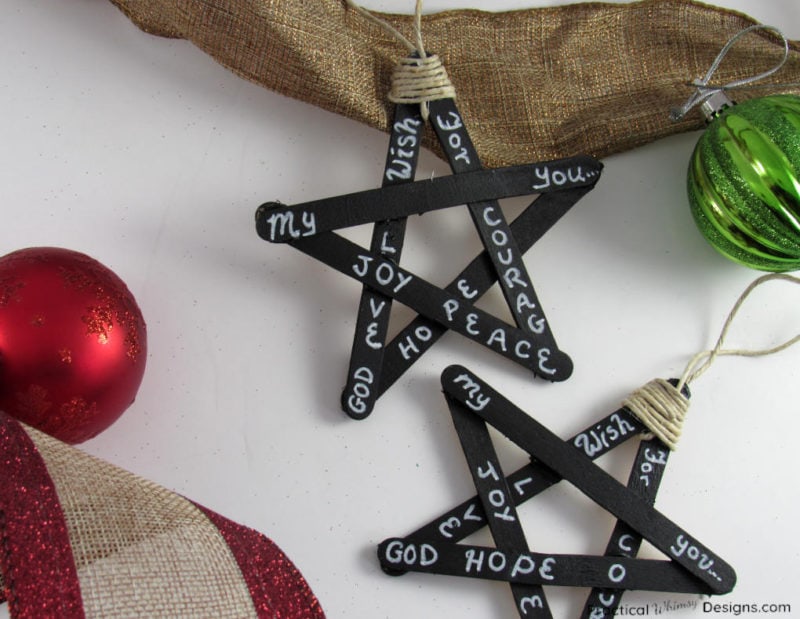
If you are looking for another DIY ornament idea, try these DIY blackboard star ornaments.
Want to remember this project? Save it to your favorite DIY board on Pinterest.
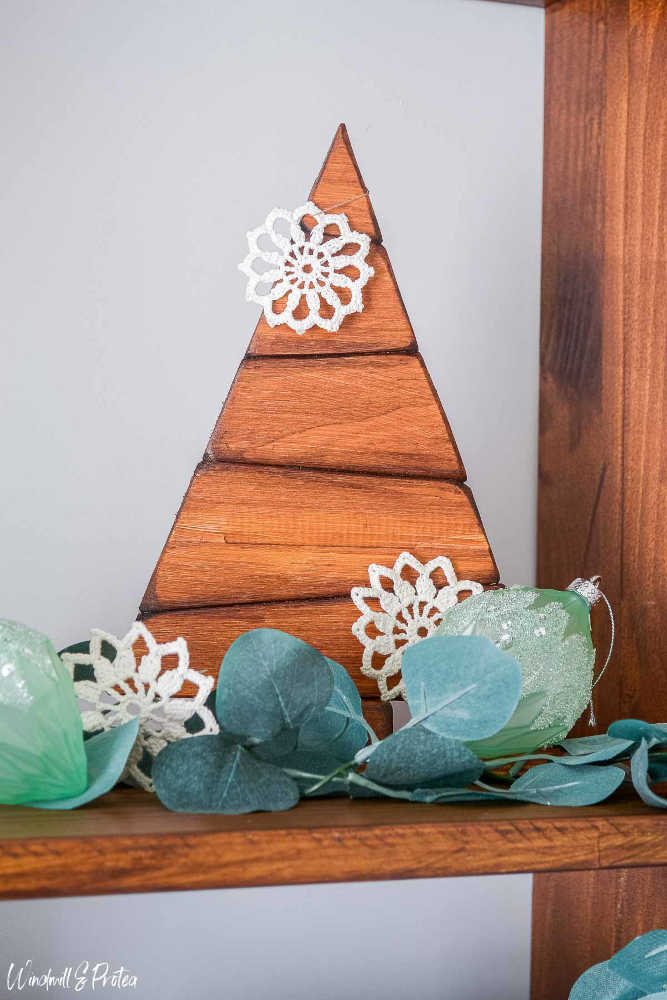
Don’t forget to check out these other great thrifty Christmas projects. A metal tray gets transformed by Sara from the Inspired Decorator. Junette from Windmill & Protea shows how to create this beautiful wooden Christmas tree. Martina from The Lived In Look has a tutorial that teaches you how to flock your Christmas tree. Make sure to take a look!

Want More Great Ideas? You Might Like These..


Are we friends on Instagram?
Follow @PracticalWhimsyDesigns to see more
behind the scenes projects
This is such a neat idea! I’m going to have to try it this year for all of my wrapped gifts. Thanks for sharing Erin!
Thank you! I love how they add a little extra to the presentation.
This is so creative and fun! What a great idea for a craft with the kiddos too!
Thank you. Yes it is such a simple yet elegant edition to gift wrapping and even my kids can help make them.