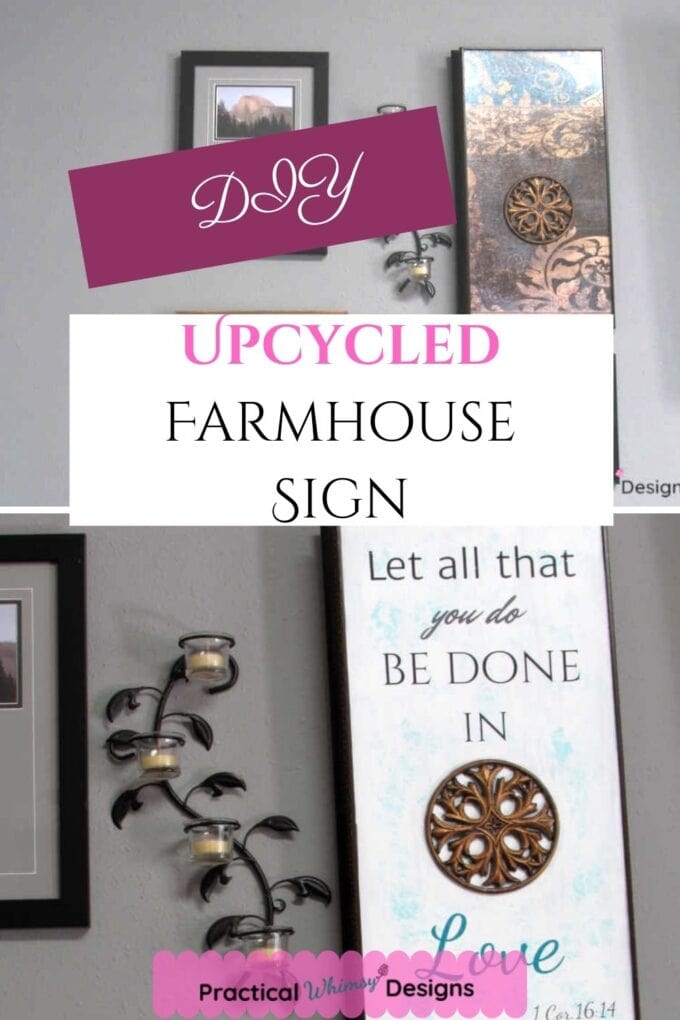
Love repurposing things? Use a Cricut cutting machine to make a DIY upcycled love sign and turn old art into something new with paint and vinyl.
One of the best ways you can save money on home decor is to transform old thrift store finds into something new that fits the style of your home.
Whether you found it at a local thrift store or it’s been sitting in your basement for a couple of years because it is outdated, flipping an old picture frame or wood sign and turning it into a modern work of art can be a satisfying and rewarding challenge.
A great way to do this is with acrylic paint, a Cricut machine or other cutting machine, and vinyl lettering. With just a little bit of creativity, this combination can completely transform your old art into a beautiful sign or decoration.
Using a cutting machine turns you diy projects into a professional looking piece of art and it is an easy way to add lettering or stenciling to your upcycled project.
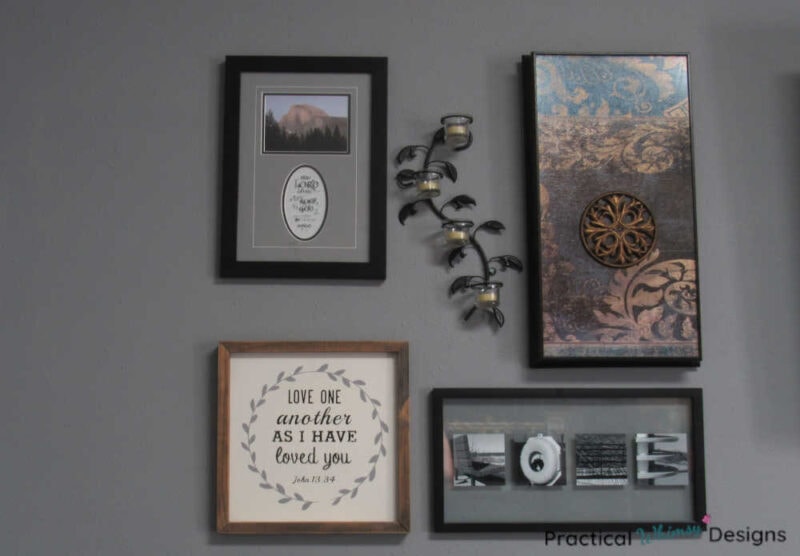
Here is the before picture of a piece of art I had found at a garage sale and decided to update to fit the look of my gallery art display.
This post contains some affiliate links for your convenience (which means if you click a link and make a purchase I will earn a small commission at no extra cost to you). Please see my disclaimer page for more information.
Materials You Need:
- Old art in need of updating
- Acrylic paint (I used white paint and mixed white with this turquoise paint to create a light turquoise color)
- Painter’s tape
- Foam paint brush and/or small craft brush
- Piece of paper towel
- Acrylic Paint Sealer
- Cricut Maker, Cricut Explore, or Cricut Joy (or other cutting machine)
- Permanent Vinyl (I like getting a vinyl variety pack like this.)
- Standard or Light cutting mat
- Weeding tools
- Scraper tool
- Ruler
- Transfer tape
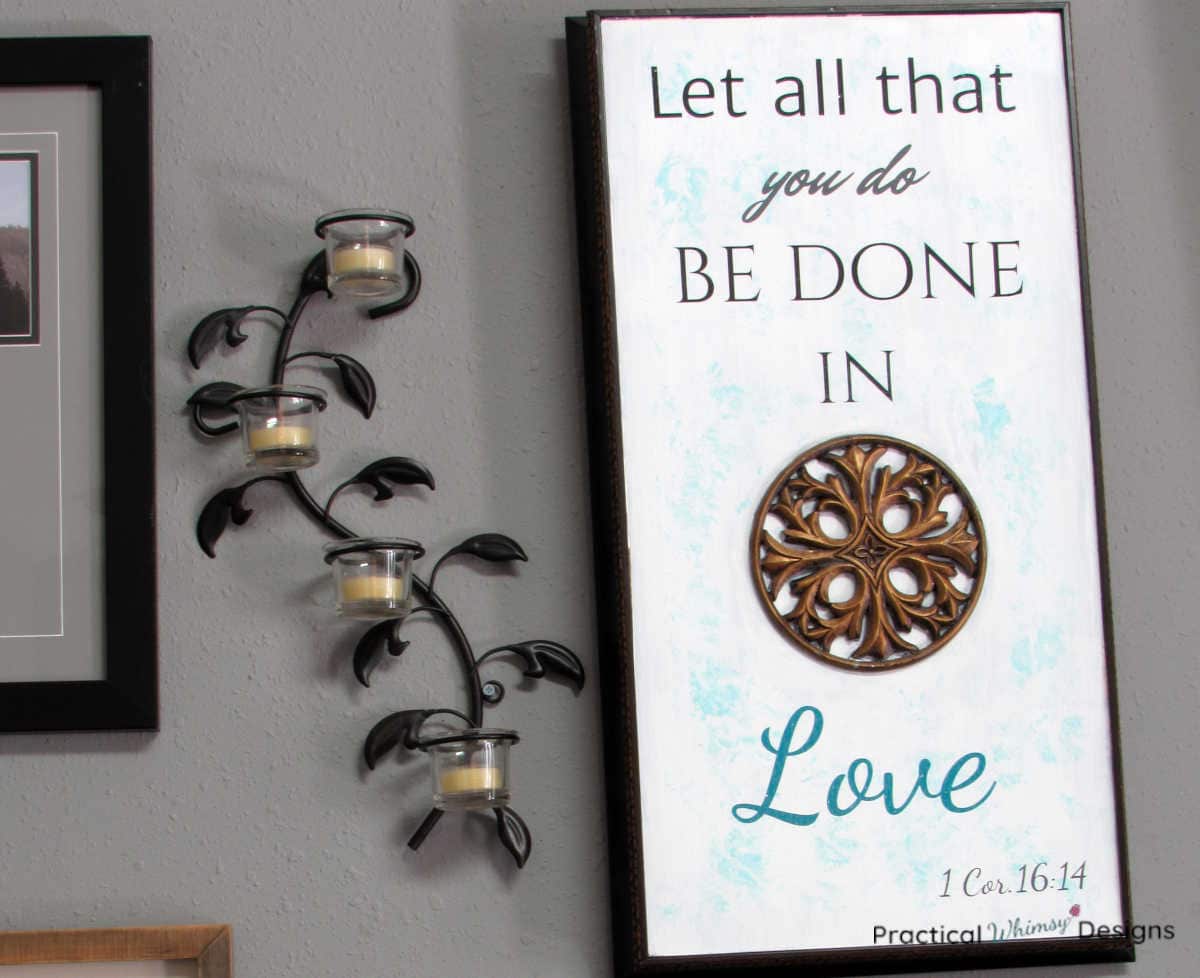
How to Make a DIY Upcycled Love Sign with a Cricut Machine
Step 1: Prep the sign
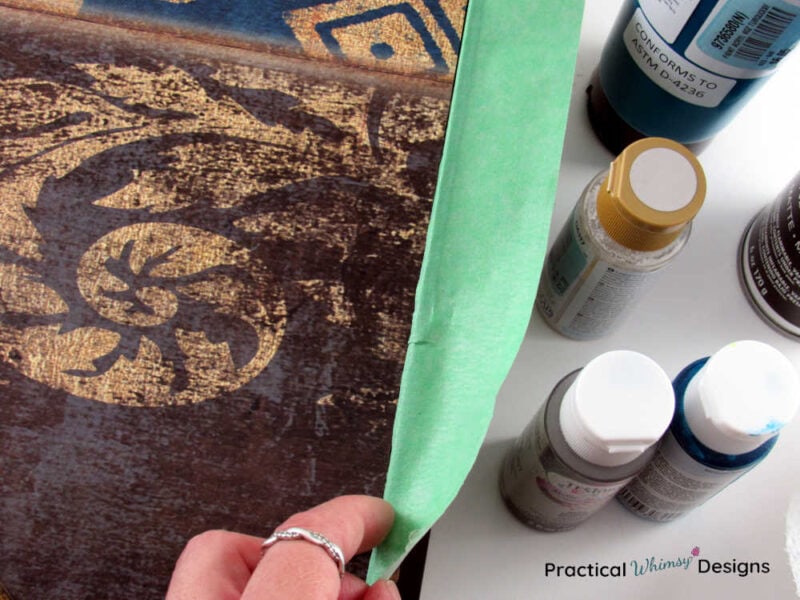
The first thing you need to do is decide what you want to paint on your sign. Use painter’s tape to tape around the edge and protect anything you don’t want painted.
Step 2: Paint
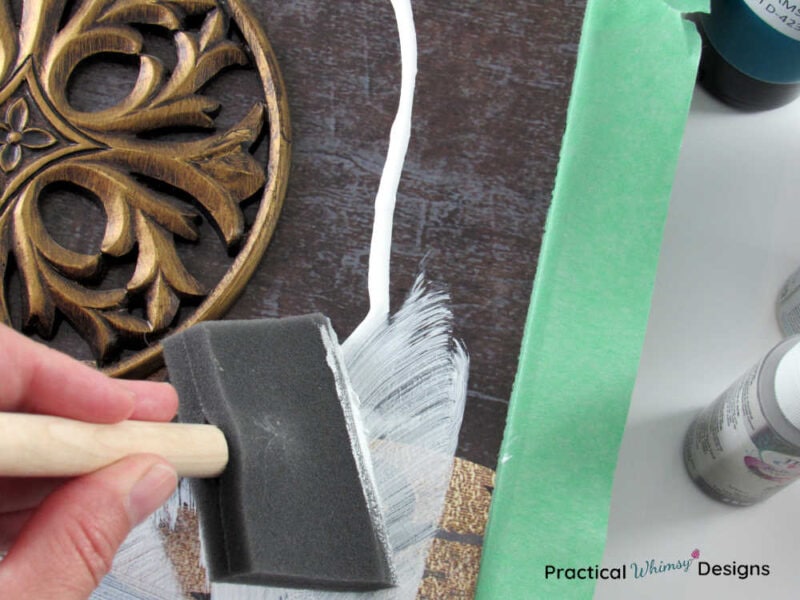
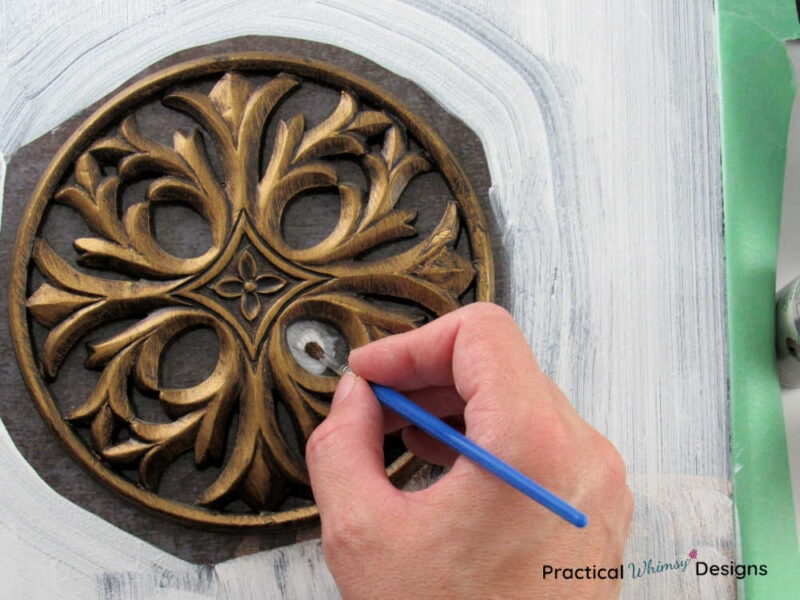
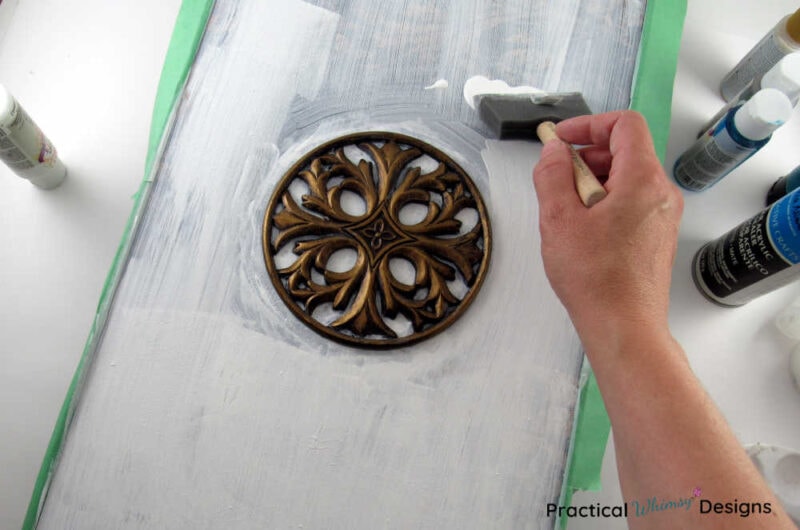
Use acrylic paint to paint your sign. I used white paint to cover over the background of my sign. I painted the larger areas with a foam paint brush and used a small craft brush for the detail work.
Hint: Use a wet q-tip to remove any paint mistakes that you make on your frame or details on your picture.
Paint multiple coats, letting each coat dry in between, until the old background is covered. It took three coats before I was satisfied with the color of my sign.
Add any other colors or detailing you want with your paint.
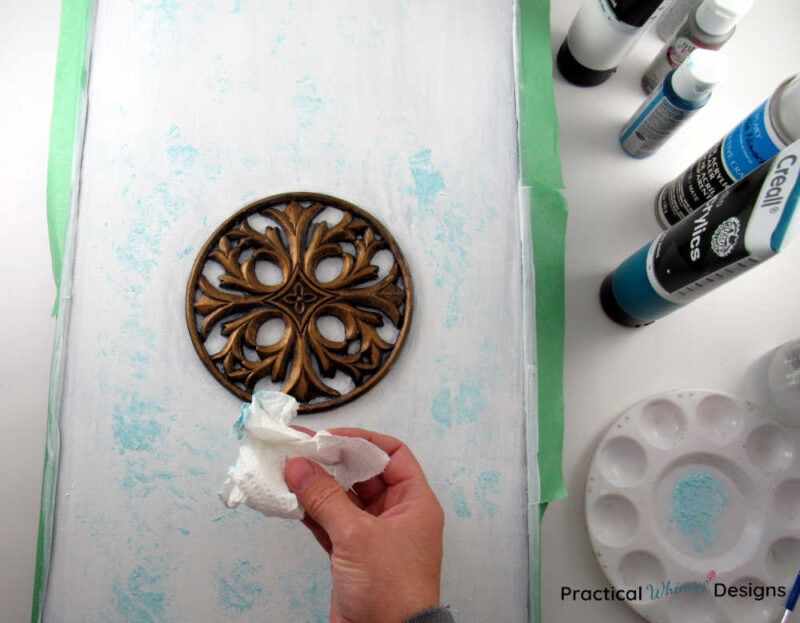
After the white paint was dry, I came back in with light turquoise paint (I mixed white and this turquoise paint together) and dabbed it on with a piece of paper towel to create a mottled effect.
Step 3: Finish the Painting
Carefully pull the painter’s tape off of your frame.
Make sure your paint is completely dry.
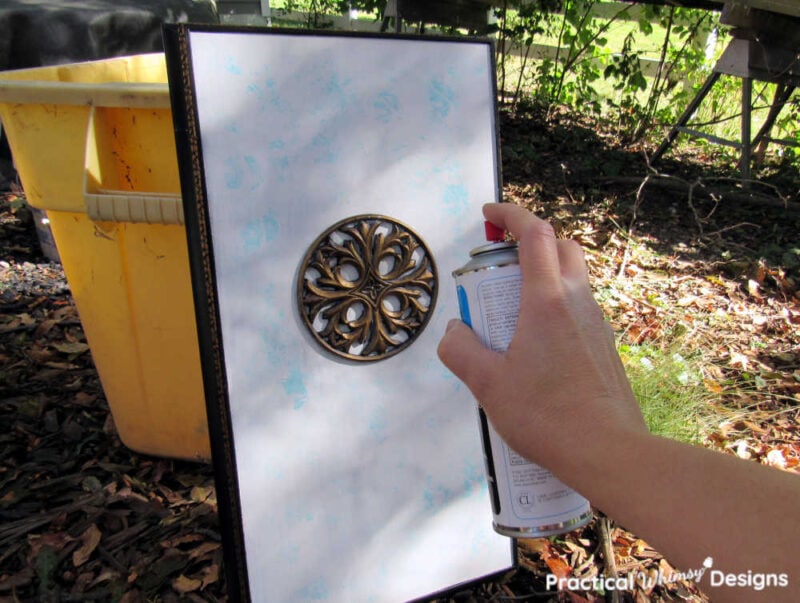
If you want to add an extra layer of protection, spray the paint with an acrylic paint sealer and let it dry. Make sure to spray it in a well ventilated area.
Before applying any vinyl, I recommend letting the painting sit for at least 24 hours to make sure that the paint is completely dry and won’t peel as you are working with it.
Creating Vinyl Love Sign with Cricut Design Space
There are many free svg files that you can find online. You can also buy a cut file from many Etsy shop owners.
However, if you are just creating text out of your vinyl, you can easily create your own design and fun saying with Cricut Design Space.
Want to get my free SVG files? Learn how at the bottom of the post.
Step 1: Create Your Text or Image in Cricut Design Space
Open Cricut Design Space.
Select the New Project button in the left corner.
Select the text button on the left and type your saying.
If you want to add different fonts to different parts of your saying, you will need to create a new text box for each font style.
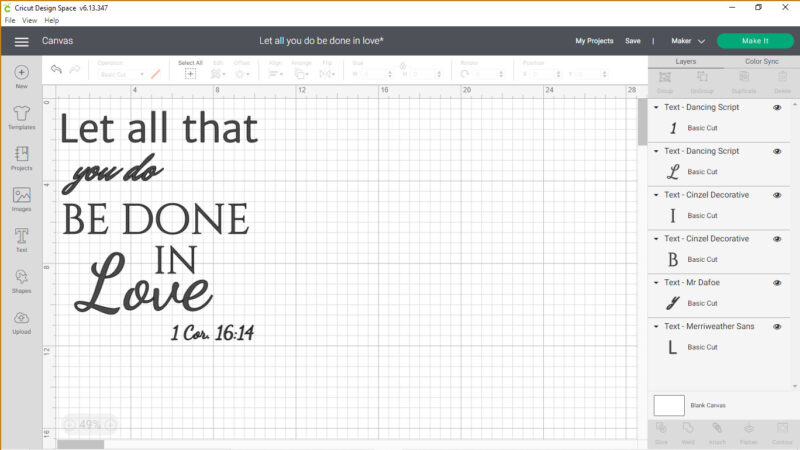
You can purchase fonts through Cricut Design Space or other font stores online. You can also use free fonts.
I used free fonts from Google fonts that I loaded onto my computer for my design. You can go to the Google fonts website to find and download them. Just make sure to read any licensing information before using fonts.
Here are the fonts I used for each area of text:
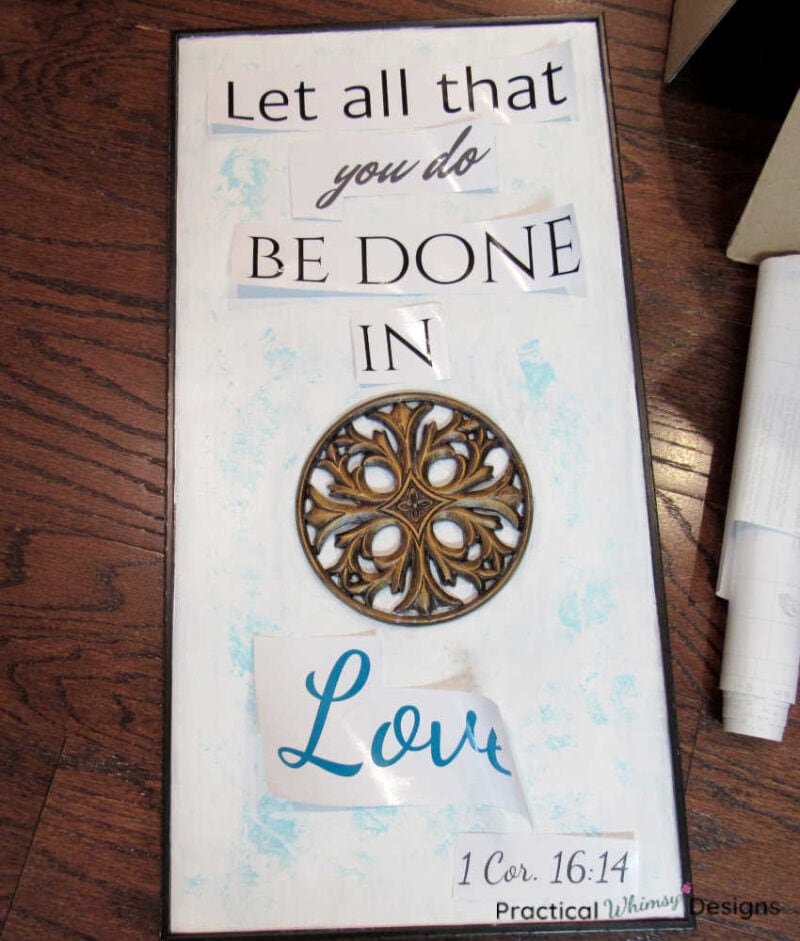
- Let All That = Merriweather Sans Font = 9.45″ x 1.5″
- You Do = Mr. Dafoe Font (You will need to select the text and hit weld on Cricut Design Space so that the text cuts as one) = 5″ x 2″
- Be Done = Cinzel Decorative Font = 9″ x 1.5″
- In = Cinzel Decorative Font = 2″ x 1.4″
- Love = Dancing Script Font (You will need to select the text and hit weld on Cricut Design Space so that the text cuts as one) = 6.7″ x 3″
- 1 Cor. 16:14 = Dancing Script Font (You will need to select the text and hit weld on Cricut Design Space so that the text cuts as one) = 4″ x 7.3″
I used the WEB version of 1 Corinthians 16:14 for my words: “Let All That You Do Be Done in Love.”
Note: The sizes of your fonts will vary depending on the size of your picture. These are just the sizes that worked for my picture.
I recommend cutting out paper or cardboard shapes the size of your desired words and laying them out to see how large you want them. Move them around and resize them until you have the layout you want for your text or cut image.
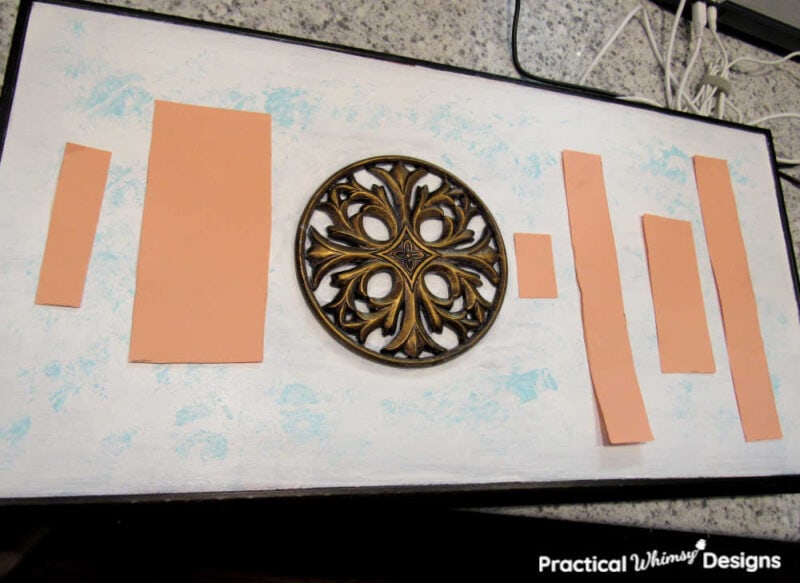
Use the sizing of your paper templates to determine how large your words should be cut on Cricut Design Space.
Step 2: Cut out your Cricut designs or text with your cutting machine.
I use and love the Cricut Maker for all of my decor crafts, though this could easily be made with the Circut Explore, Cricut Joy (with the correct cutting mat and material) or other cutting machine as well. The tutorial here is based off of Cricut products for the Cricut Maker.
Determine what colors of vinyl you plan to use for your art.
Next, select Make It in Cricut Design Space. Your text may be all over the place, but that is ok. This gives you the freedom to move the different text boxes around to best utilize the space.
If you are planning to use different colors, click on each text box and move them until they are grouped by color.
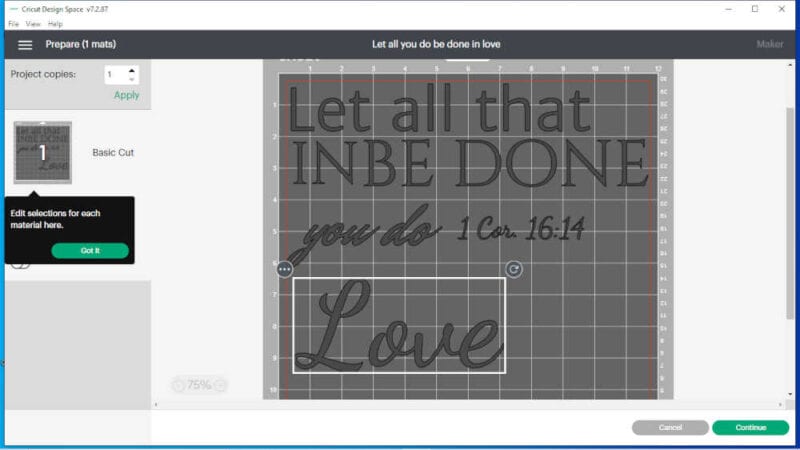
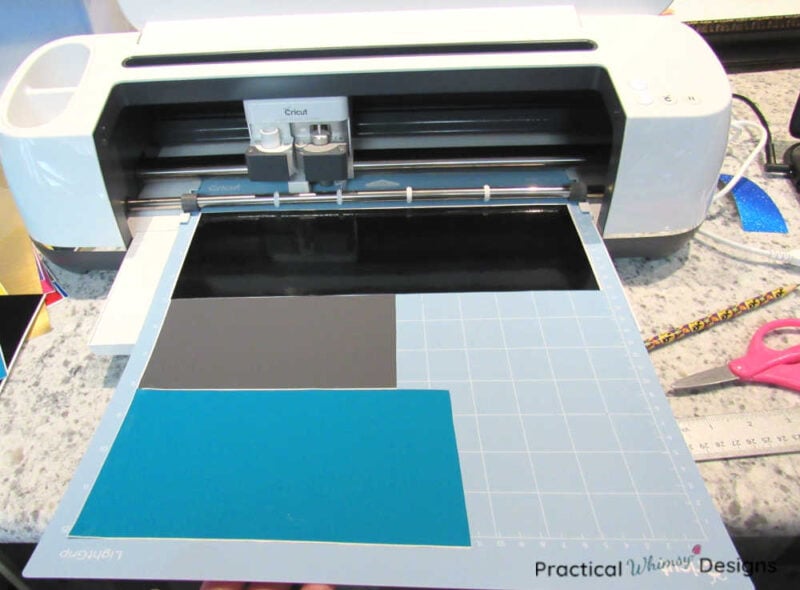
Place the different vinyl colors on a standard or light grip cutting mat to coincide with the letters you plan to cut out in each color. This will save you time so that your words will be cut out all at once instead of having to load separate mats for each color.
Click continue.
Select vinyl, load mat, and click the button on your Cricut to cut out the vinyl.
Step 3: Weed and Transfer the Vinyl
The next step is to use a weeding tool to weed the pieces of vinyl out so you are left with just the words on the backing.
Cut out each phrase or word and lay them on your picture to make sure that it looks right before you take everything off the backing and stick it to your art. Make any changes you need to before moving on.
Cut a piece of Cricut transfer tape the size of your largest phrase or word.
Use transfer tape to transfer the vinyl lettering onto your image. I like to reuse the transfer tape for multiple vinyl transfers if I can so that I don’t waste it.
Set a ruler or straight edge under your lettering to keep your words straight while you are transferring them.
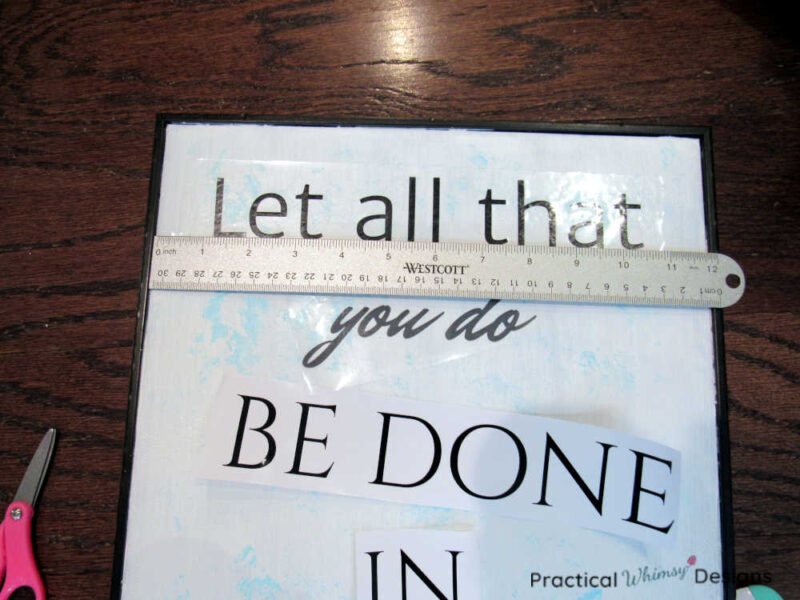
Smooth the vinyl onto your picture with a scraper tool.
Note: Do not seal over the vinyl lettering. This may cause it to peel. Your permanent vinyl should stick to your paint without any seal over the top.
How to Paint Lettering on the Upcycled Sign Instead
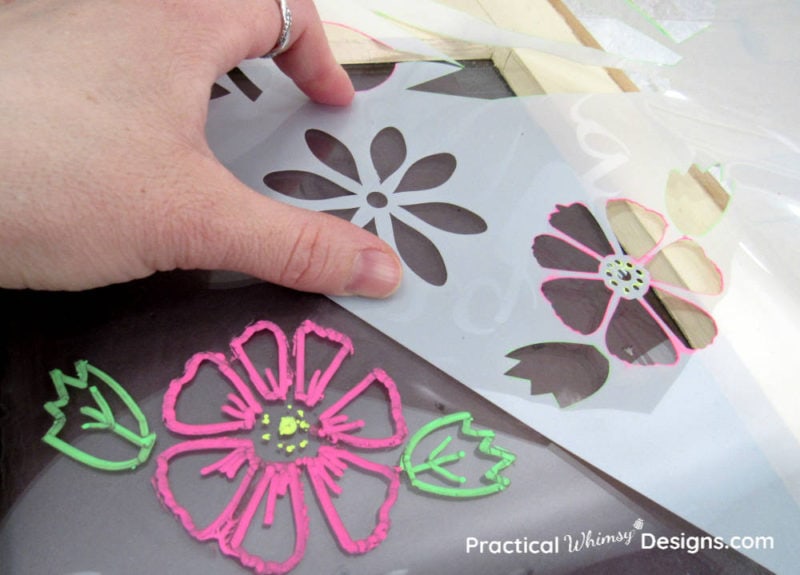
You can also use stencil vinyl and create a painted stencil on your upcycled art project if you are looking for a hand painted finish.
To do this, cut out the vinyl the same way, but instead of weeding the outside of the letters, weed the inside instead. This should create an outline for your lettering.
To get a crisp edge on your stencil, paint mod podge over the edge of your stencil and let it dry. Then paint your stencil. After the paint has dried, remove your stencil.
What Kind of Art Can I Upcycle?
You can use acrylic paint on almost any type of art, including wood, canvas, cardstock, and glass. With glass you will want to use an acrylic sealer before and after painting to make sure the paint doesn’t chip off.
The picture I used for this project had a glossy paper backing and needed a few extra coats of paint, but it worked well.
Upcycled Love Sign with Cricut
This easy craft is the best way to give new life to an old picture. All you need is a little paint, some permanent vinyl, a cutting machine and some creativity to produce meaningful art out of something old.
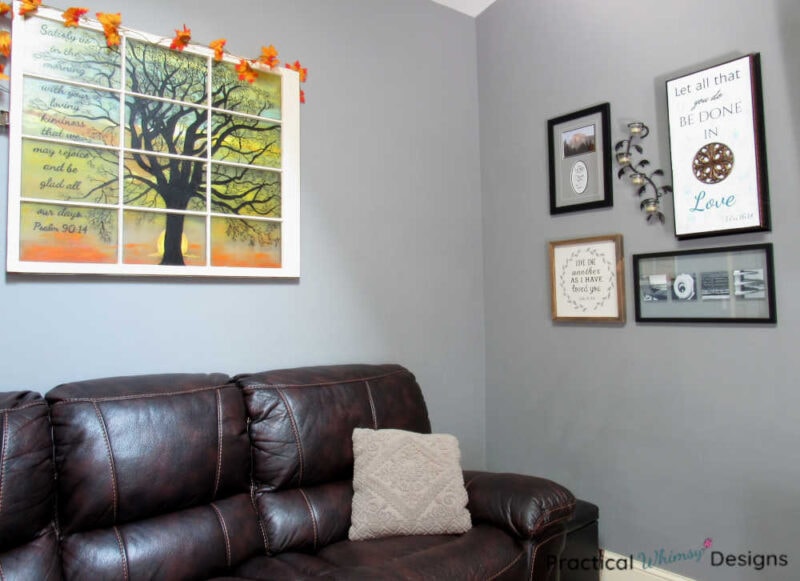
These upcycled pictures also make a great gift!
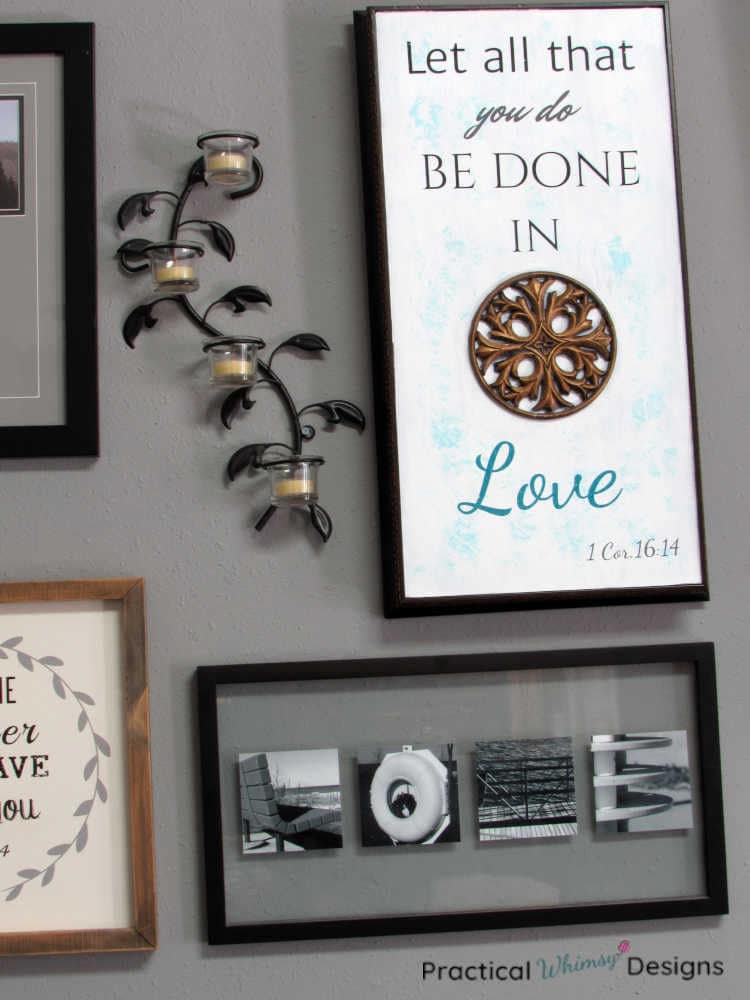
Use it in a simple themed collage or anywhere you need wall art in your home.
Love to DIY art for your home? Try making a faux stained glass art silhouette out of an old window or create simple birch tree canvas art with this easy tutorial.
Looking for free SVG files for Cricut projects and Cricut tutorials? Sign up for my newsletter and as a bonus, gain access to my resource library with free SVG cut files and other design resources.
The form you have selected does not exist.
Want to remember this idea later? Save it to your favorite DIY Pinterest board.
Want More Great Ideas? You Might Like These..


Are we friends on Instagram?
Follow @PracticalWhimsyDesigns to see more
behind the scenes projects
I really need to look at getting a circuit! So cute!!! Love the texture on this piece. xx
I love my Cricut and I have yet to scratch the surface of it! I highly recommend it. 🙂 Thanks so much for the compliments.