
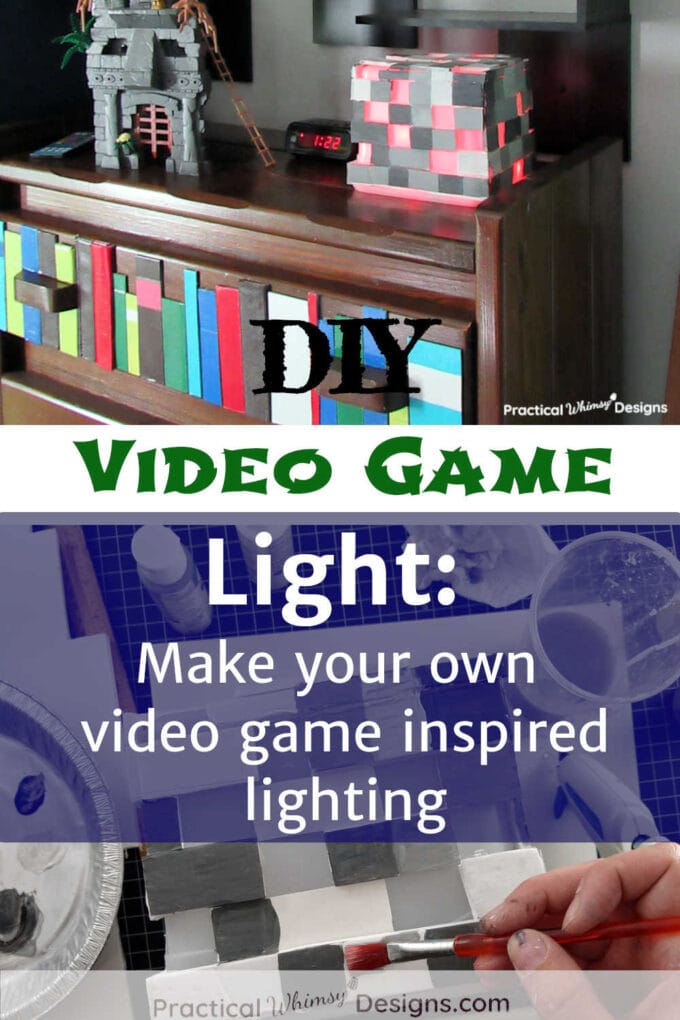
Our boys’ bedroom design had to include cool lighting. Take a look at this tutorial and make a video game light of your own.
Lighting is such a fun part of any room that you design in your home. It allows you to give your space a new look just by turning on a light switch or plugging in a lamp.
Lighting Principles in Your Home Design
Use of lighting in your space is such an important way to create an atmosphere that feels like home. There are different ways to add great lighting into your room, depending on the time of day and your desire to create the right mood in your space.
When we design a room in our home, we are always trying to look at the best ways we can add lighting into each room we remodel. A variety of good lighting options is our favorite way to create a unique atmosphere, especially in a small room. This includes directional light, ambient lighting, and mood lights as well as keeping in mind the natural lighting in the space.
Struggling with finding the perfect paint color for your home? My design guides are available for free to my newsletter subscribers. Grab my Free Paint Guide and FINALLY pick a wall color that you love!
DIY Real World Video Game Pixelated Lighting
When we remodeled our boy’s bedroom, they wanted decor based on one of their favorite games. So I set out to create a themed video game room with their decorations.
Of course, enhancing the space with fun light sources was part of the challenge.
I wanted to add elements to give the feel of a real life video game in their small space and, at the very least, create a lighting effect that would transport their imaginations into a game environment that could help enhance their creativity. So, finding the right lights for the room was a must.
This post contains some affiliate links for your convenience (which means if you click a link and make a purchase I will earn a small commission at no extra cost to you). Please see my disclaimer page for more information.
I was able to buy this light for the center of my boy’s bedroom (I think it looks like a ladder from a video game world), but I wanted a cheaper option for the mood lighting in the room.
The good news is that I came up with a DIY video game light inspired by the pixelated bricks that frequent the type of games my boys enjoy playing as a fun and cheap lighting option. It also is a way to upcycle an ice cream bucket.
Materials You Need:
- Empty square 1 gallon ice cream bucket (If you don’t have one at home, this gives you a good excuse to go buy ice cream and eat it. 😁)
- Black permanent marker
- Craft knife
- Sand paper, acetone, or soap and water. (Depending on the label on your ice cream bucket)
- Self-healing cutting mat (opt., but amazing to have)
- Pencil
- Ruler
- Foam craft board (I used white, though you could get grey)
- Poster board (I used white, though you could get grey)
- Hot glue gun and glue sticks
- White and black acrylic paint and/or different shades of grey acrylic paint
- Small paint brush
- Paint tray for mixing (I used an old pie pan this time, but I usually use and really like this paint tray too.)
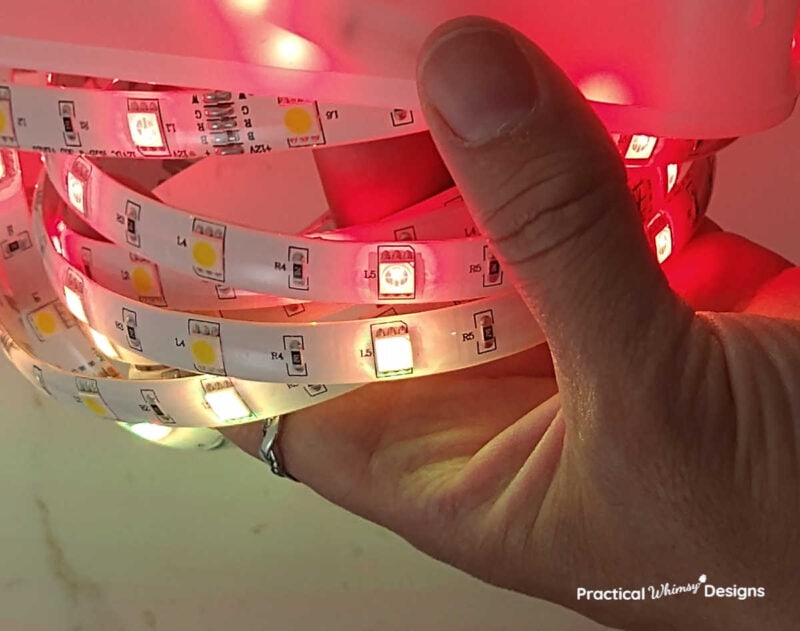
- Led light tape (preferably one that changes color like this)
How to Make a Video Game Light
Step 1: Cut a hole for the plug
Remove the cover from your ice cream bucket and flip your bucket over so that the flat bottom is facing up.
Use a small circular object to trace a hole at the old bottom of your bucket (just above where the cover attaches to the bucket) large enough for the plug of your LED light to fit through. I used the top of a white acrylic paint bottle, and traced around it with the permanent marker.
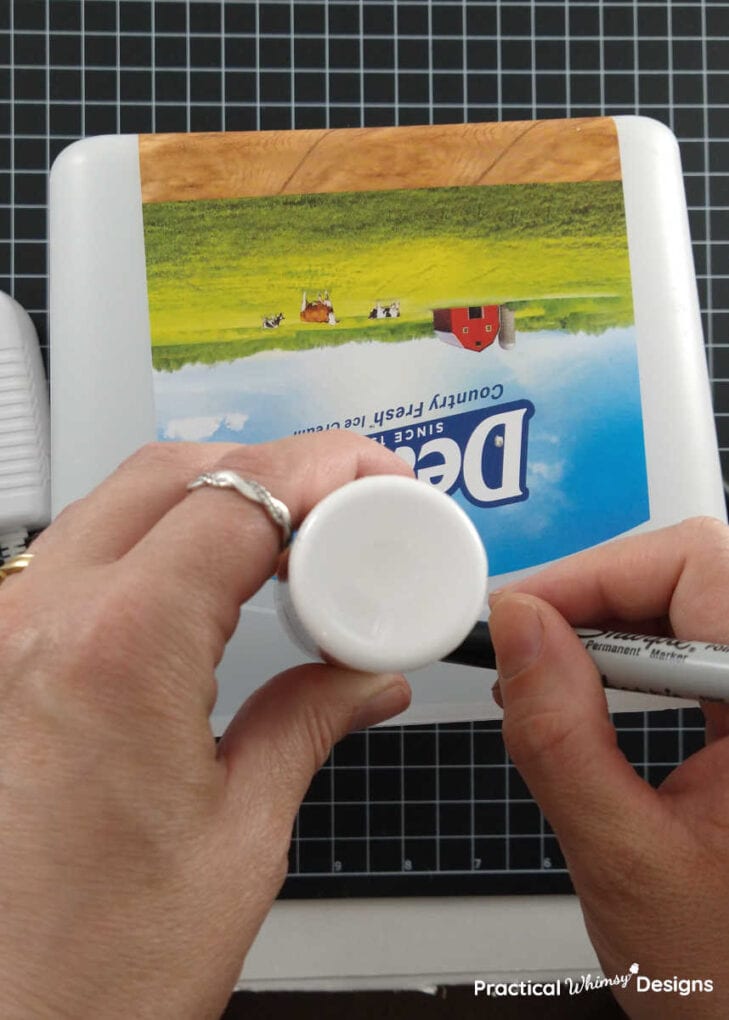
Use a craft knife to cut the hole out of the ice cream bucket.
Step 2: Prepare the bucket
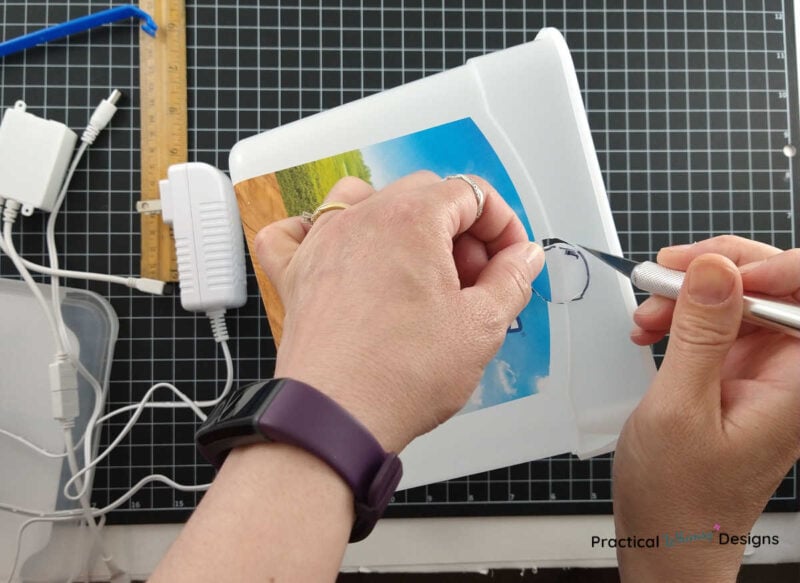
Remove any labels from your ice cream bucket.
The way you remove the label will depend on the type of label on your ice cream bucket.
- For a sticker: Soak in warm water and soap until the label peels off. (You my need to work a little at it.)
- For a printed label: Use acetone on a cotton ball to rub the label off
- If neither of these methods work: Use a fine sand paper (~220 grit) to sand the label off. (This is the method I had to use to remove the printing on my ice cream bucket.)
I recommend trying to remove the labeling before adding anything onto your bucket. I waited until afterwards and it was a lot harder to get the label off without damaging the foam board I had added onto the light.
Step 3: Cut strips of board
Use the ruler and measure one inch wide strips of both the poster board and foam board.
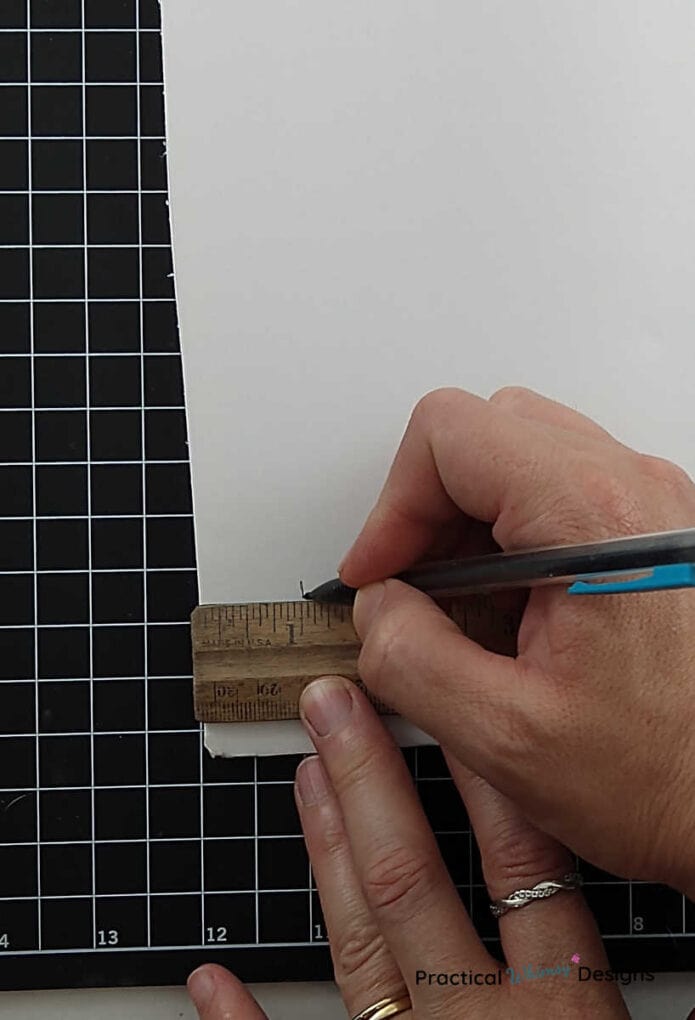
Cut the strips out with your craft knife. I love cutting out things with my craft knife on a self-healing cutting mat. It keeps the blade from getting dull as quickly and can help you cut straighter if you line up the foam with the cutting guide lines.
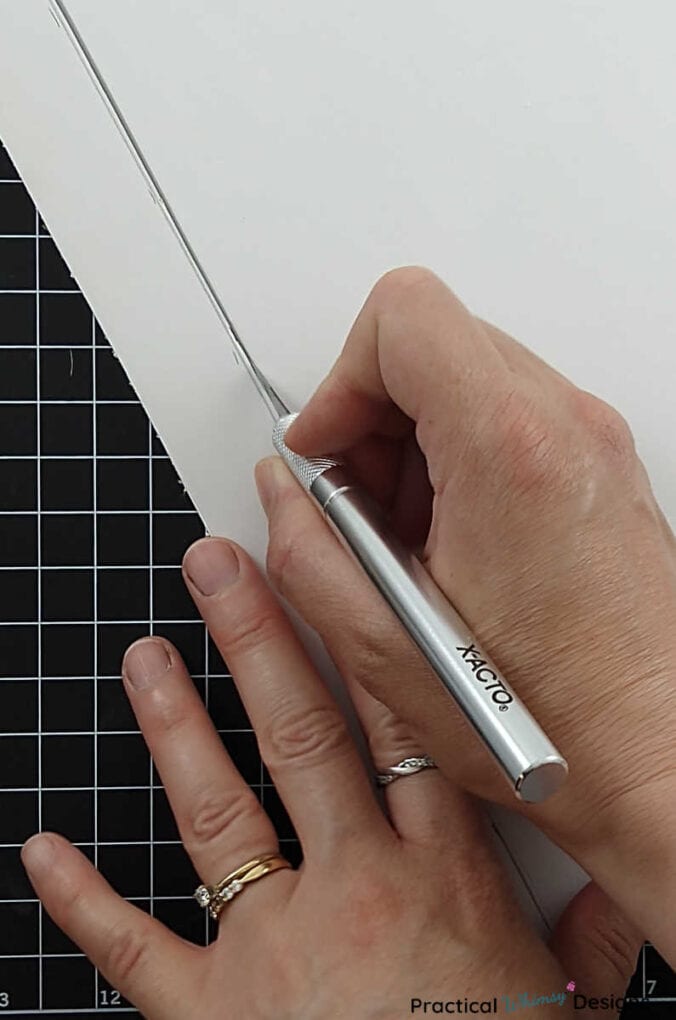
Don’t worry about the length. You will be cutting down the strips to fit your box as you apply them.
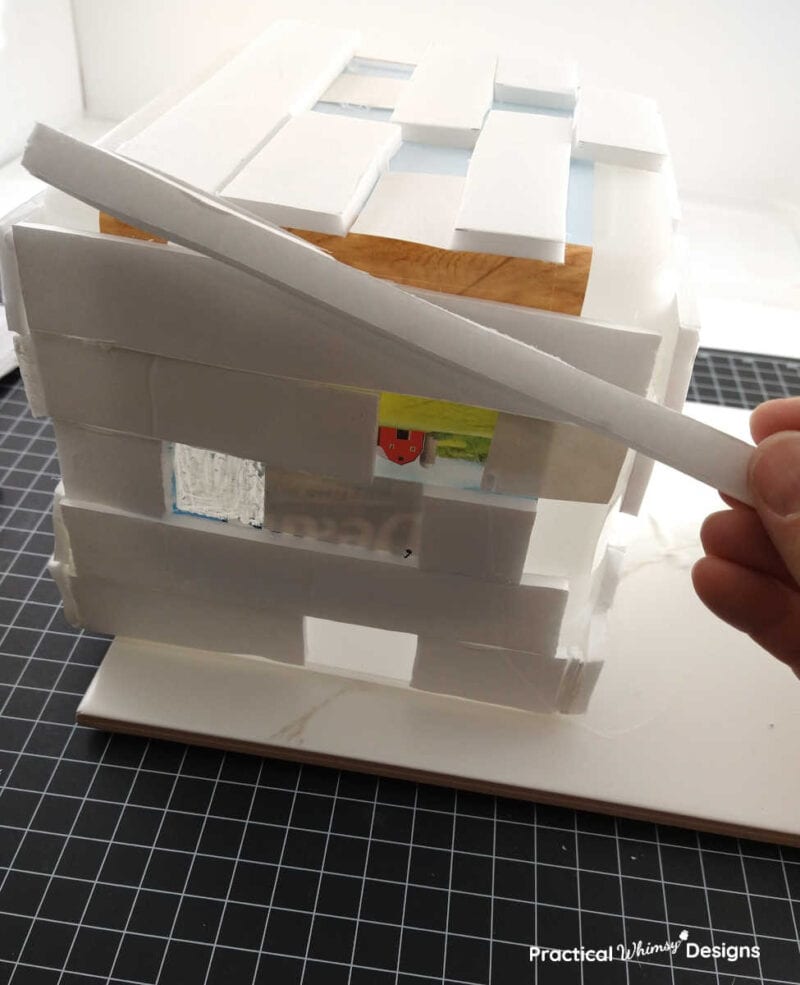
Step 4: Glue the boards onto your light box
Stick the cover back on your ice cream box. (I failed to do this and my box doesn’t close completely because the foam is in the way. I am still able to set my box in the cover, but it doesn’t latch. Making sure the cover can close and open gives you easier access to the lighting inside the box in case you need to change it out later.)
Cut your 1 inch strips of board into various lengths to create a staggered look of covered and open squares on your ice cream box. Make sure to leave gaps in a random pattern to allow light to shine through. I measured as I went, so I could cut the lengths the way I wanted them.
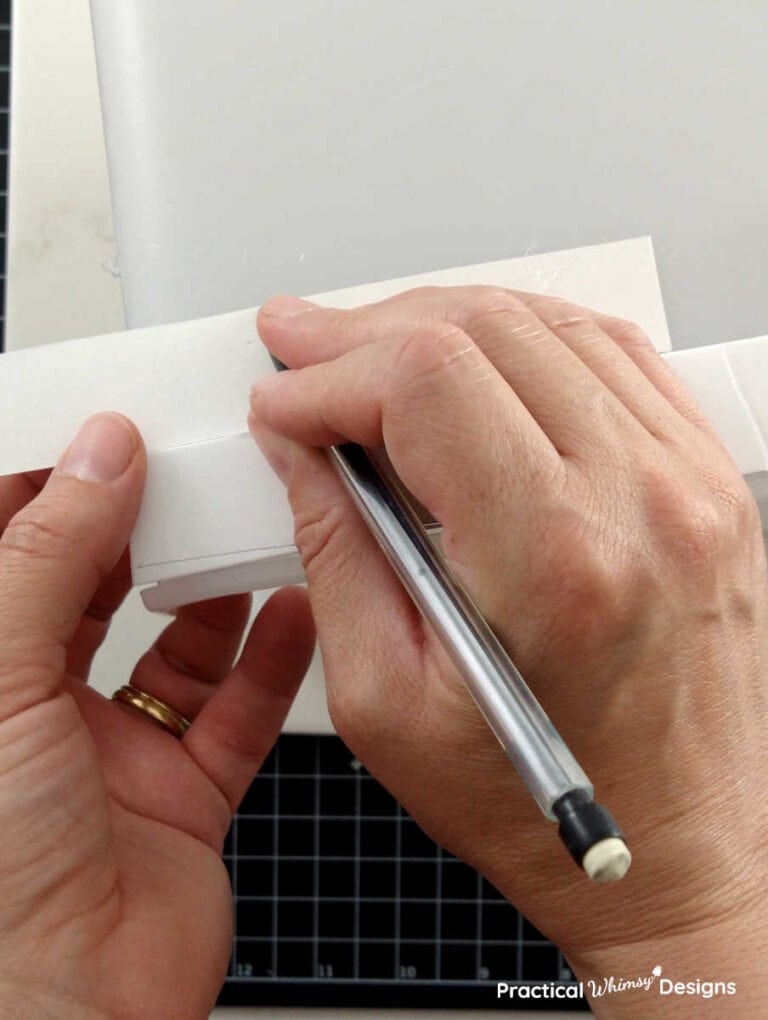
Use a hot glue gun to glue the strips to the side of your ice cream bucket. Glue both foam and poster board onto the side of your bucket in a random pattern. This gives the block light a varied texture.
Repeat for all 4 sides and the top.
I had to cut one of the 1 inch foam pieces into a narrower piece to fill in the top of the light, so depending on the size of your bucket, you may have to alter the width of your foam and poster boards. I did this last strip at the end so that I could measure the width I needed easier.
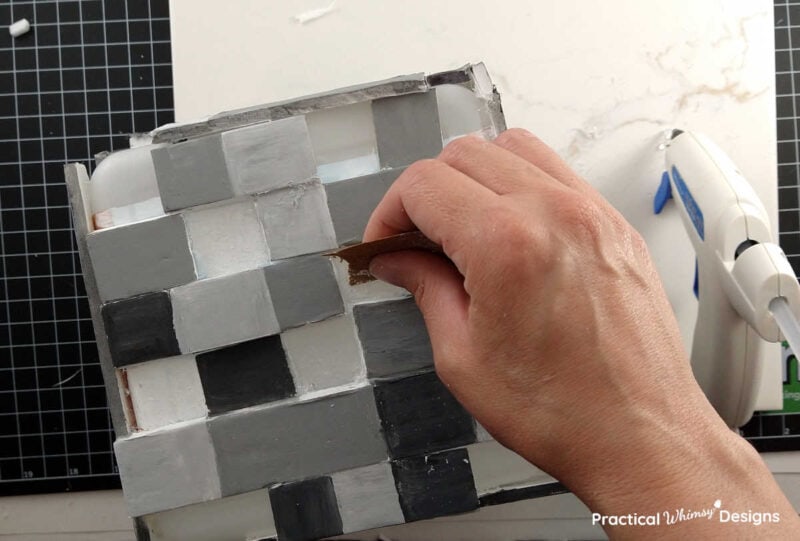
Step 5: Paint the foam and poster board
Once all of the sides have poster and foam board glued in a random, pixelated pattern, it is time to paint them different shades of grey. I started with white boards to have the most flexibility with changing the color.
However, if you start with grey boards, you may not have to paint as many coats. I painted a total of 3 coats of paint on my boards to make them dark enough so I couldn’t see the light shinning through underneath.
Gather grey, black, and white acrylic paint.
Mix different shades of white, black, and grey or purchase different pre-mixed shades of paint.
Paint the foam and poster boards light, medium, and dark grey in random patterns. Once again, you want to create a random look to each side so that it doesn’t look like a set pattern. Paint all 4 sides and the top.
Allow the paint to dry in between coats.
Step 6: Add the lights
Add the LED color changing tape lights into the box, inserting the plug through the hole you cut earlier.
Attach the cover back onto the box.
If it doesn’t latch for some reason, you can use hot glue to glue the lid on. However, it will be more difficult to adjust or replace the lights later as you will have to peel apart the glue.
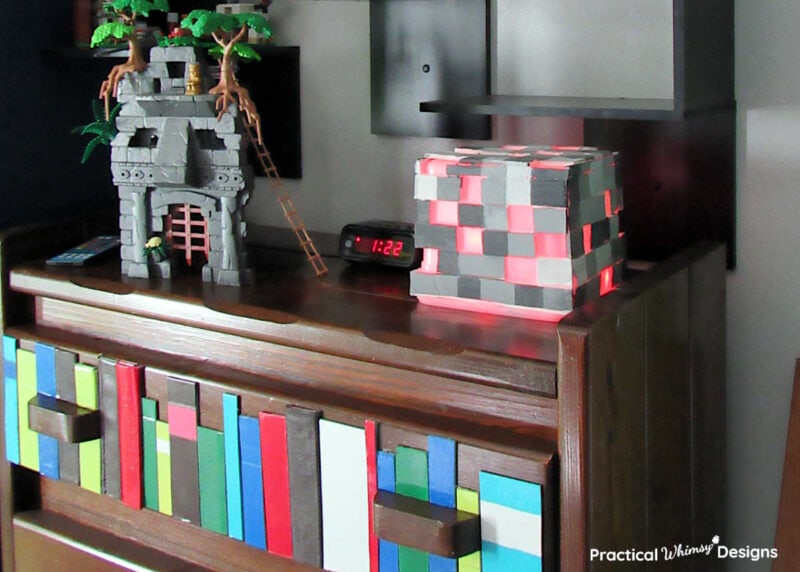
Completed Pixelated Video Game Light
Once your light is finished it’s time to set it up on display to help create that feel of a new world in your space.
We set ours on the DIY faux bookshelf dresser we made, but any existing cabinet or table close to an outlet will do. It is ideal to set the light somewhere you can see it from different angles to get the full affect of the light.
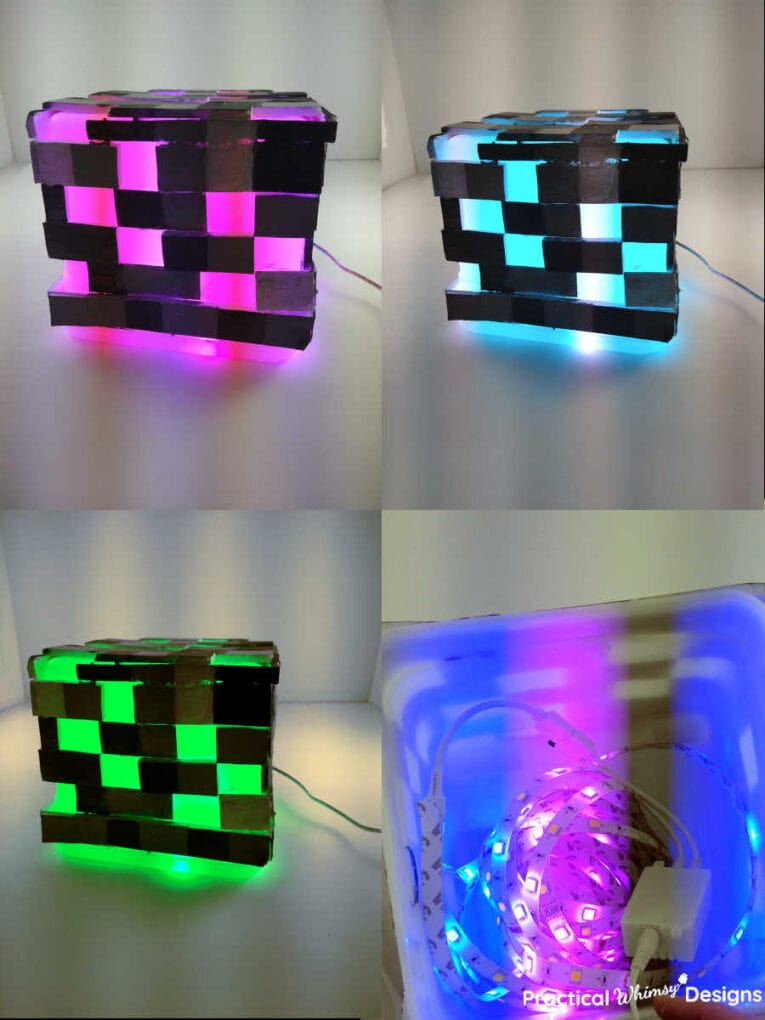
My favorite features of this light are:
- The variety of color I can achieve from the LED light changing strip. This allows my boys to pick some of their favorite gaming colors and try to match the light to the games they see on the television screens.
- And I also love that this light looks fun from many different directions, allowing my boys to enjoy it, no matter where their bed is in the room.
Hopefully this project will inspire you to create fun lighting in your home for less.
Looking for some more lighting ideas? Take a look at these unique sconce ideas that are fun and affordable.
Want More Great Ideas? You Might Like These..


Are we friends on Instagram?
Follow @PracticalWhimsyDesigns to see more
behind the scenes projects