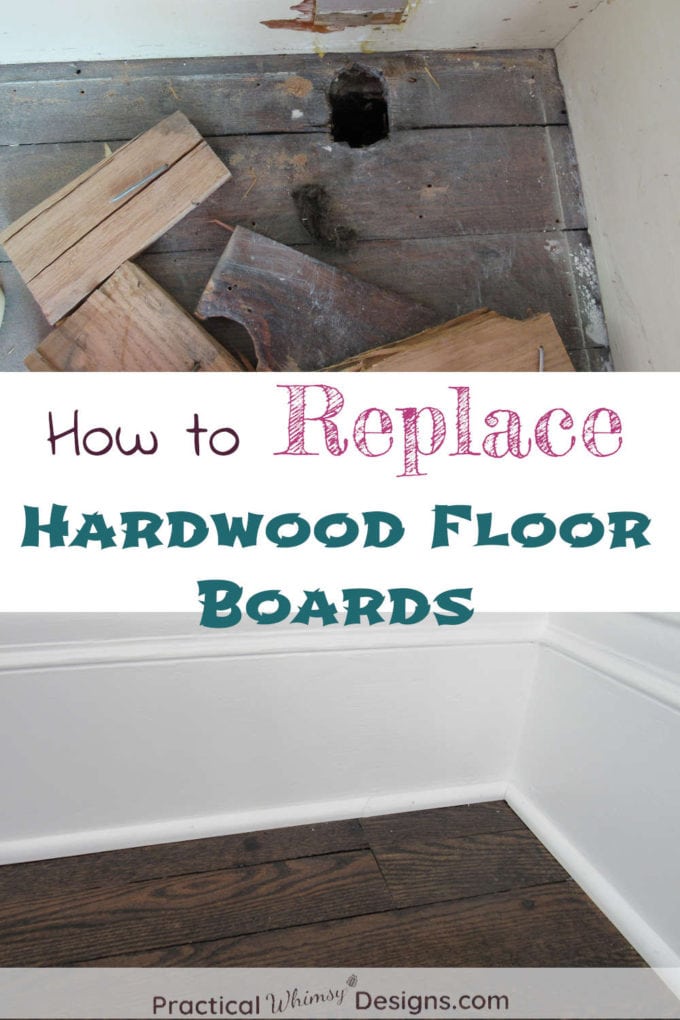
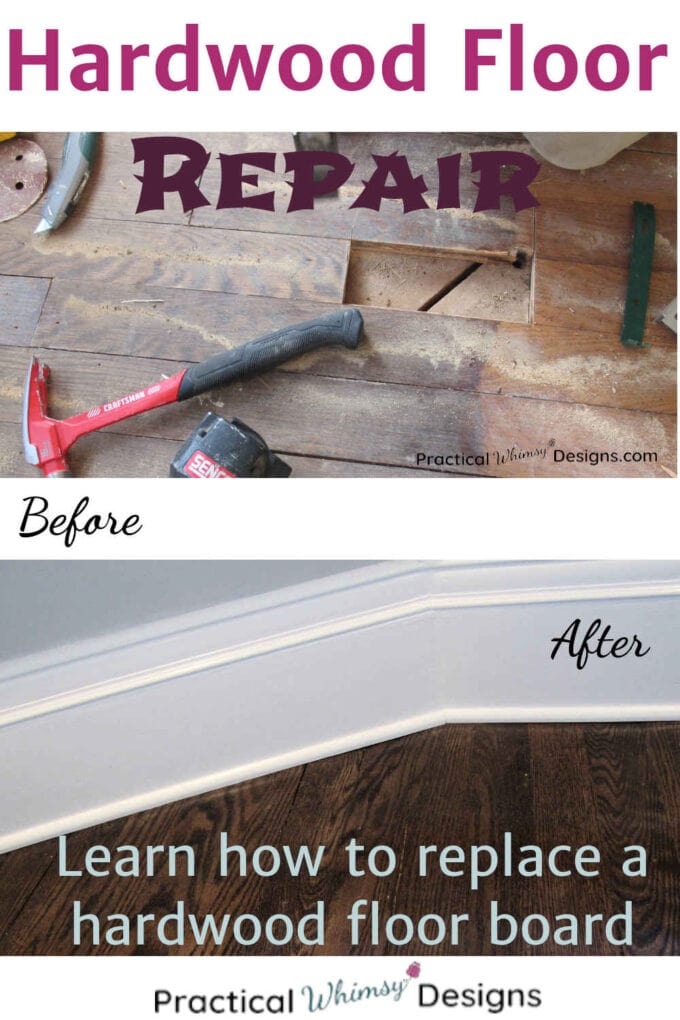
Wondering how to patch a hardwood floor? This tutorial teaches you how to replace hardwood floor boards so you can save your flooring.
Struggling with finding the perfect paint color for your home? My design guides are available for free to my newsletter subscribers. Grab my Free Paint Guide and FINALLY pick a wall color that you love!
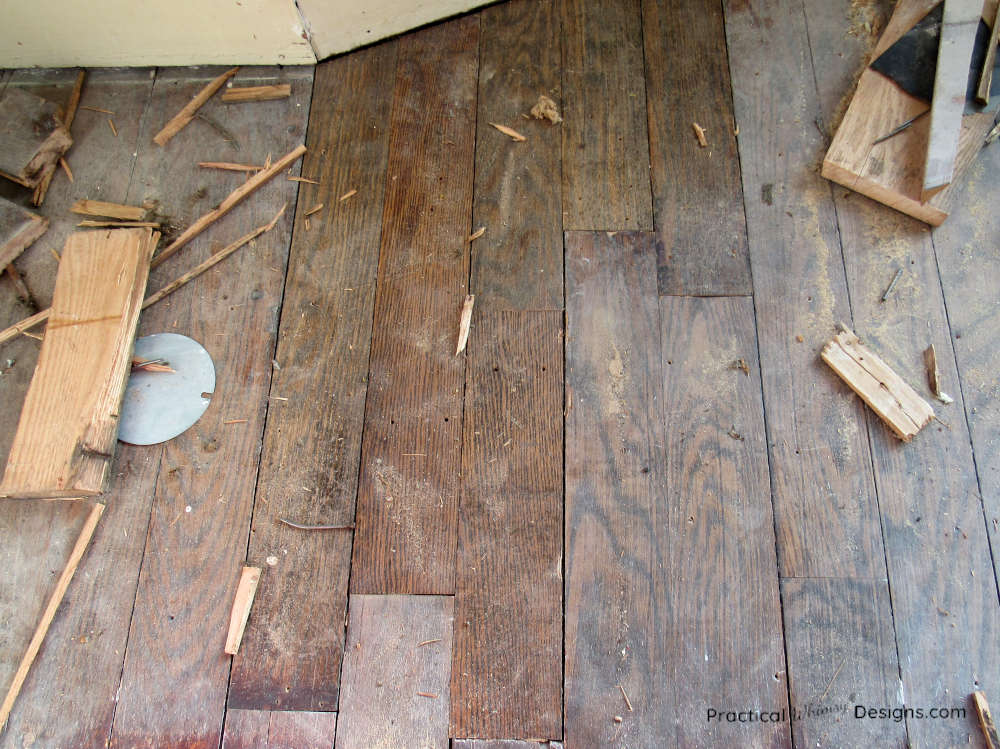
What is one of the most sought after features of an old house? Something that you hope for when you remove dingy carpets and old linoleum?
You guessed it! Hardwood flooring!
But often you will find that your hardwood flooring has a few flaws. How do you replace boards on a hardwood floor?
More than likely, if you have an old home, you will encounter this problem at some point. But don’t worry. You can replace your damaged floor board with a few steps.
Note: This method is best for small repairs. If your hardwood floor is extensively damaged, replacing it might be a better option.
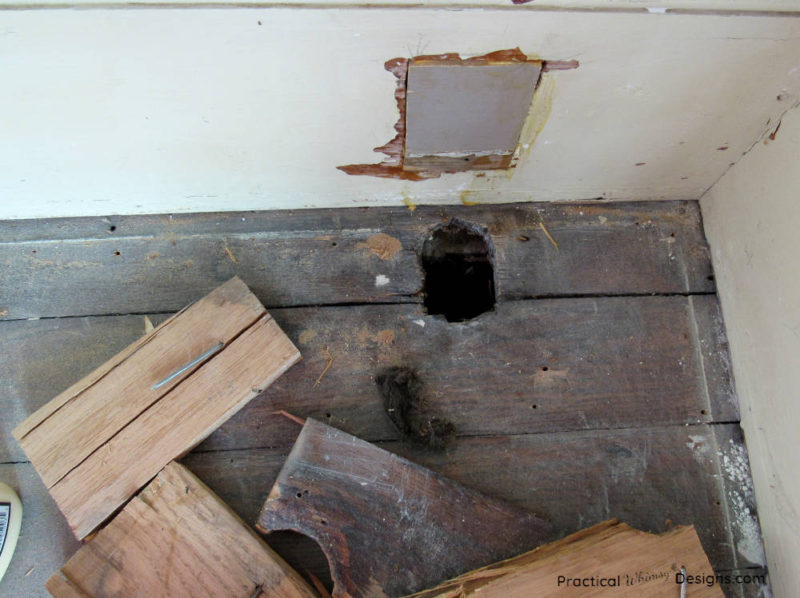
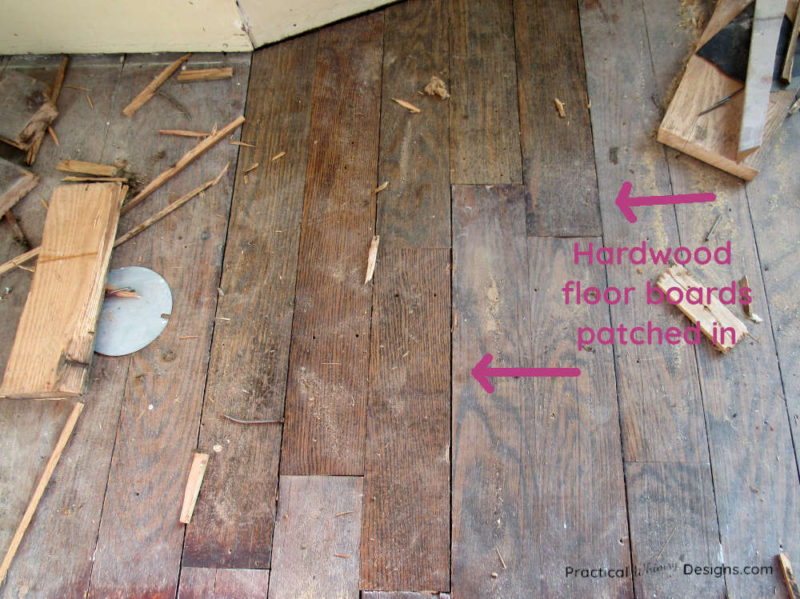
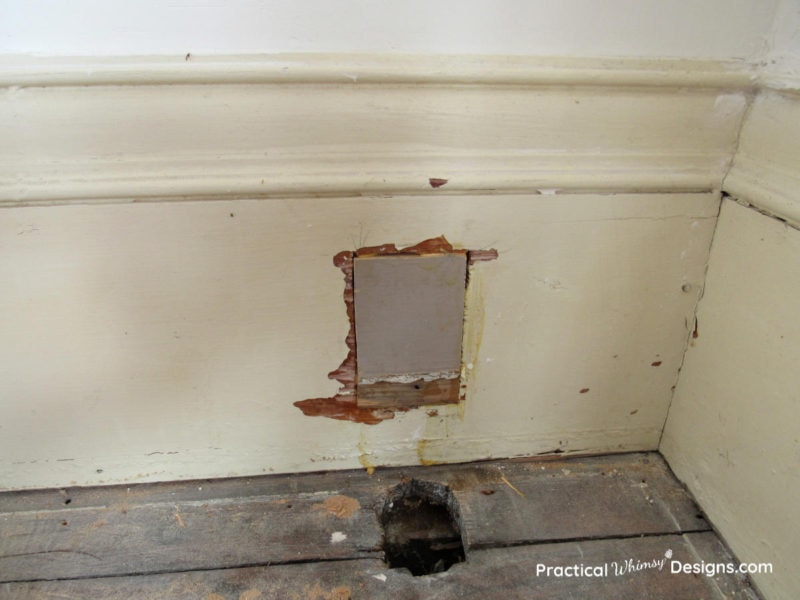
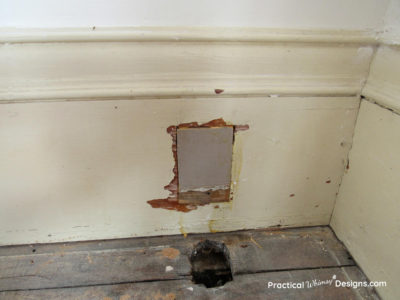
We had a couple of areas we had to fix in our master bedroom where the old radiators used to come up through the floor. Those radiators had been removed before we bought the house, but the holes remained. We removed the carpet and wanted to restore the hardwood so those holes had to go.
This post contains some affiliate links for your convenience (which means if you click a link and make a purchase I will earn a small commission at no extra cost to you). Please see my disclaimer page for more information.
Materials You Need:
- Hammer
- Screw
- Screw driver or drill
- Small flatbar or painter’s tool
- Replacement flooring (It is best to use the same age of flooring and the same type of hardwood.)
- Tape measure
- Hand held circular saw
- Oscillating multitool with flat saw blade
- Nail gun and nails
Steps to Replace Hardwood Floor Boards
Disclaimer: This post is for informational purposes. There is always a risk when using power tools and certain safety recommendations to follow. Get help from an expert if you need it.
Step 1: Cut Out the Old Flooring
Note: These steps were used to replace sections of a tongue and groove floor.
First, determine how far you need to cut to replace the damaged area on your board.
Use a saw to cut around the flooring that is damaged. For safety, never cut towards any part of your body.
You will need to cut around the floor board to cut through the nails holding down the floor board as well as the tongue and groove.
We used an oscillating multitool with a flat saw blade to cut through the nails that were holding the floor down. Choose a blade that is only as deep as your flooring so that you don’t cut into the subfloor. You can use a handheld circular saw to do the job as well.

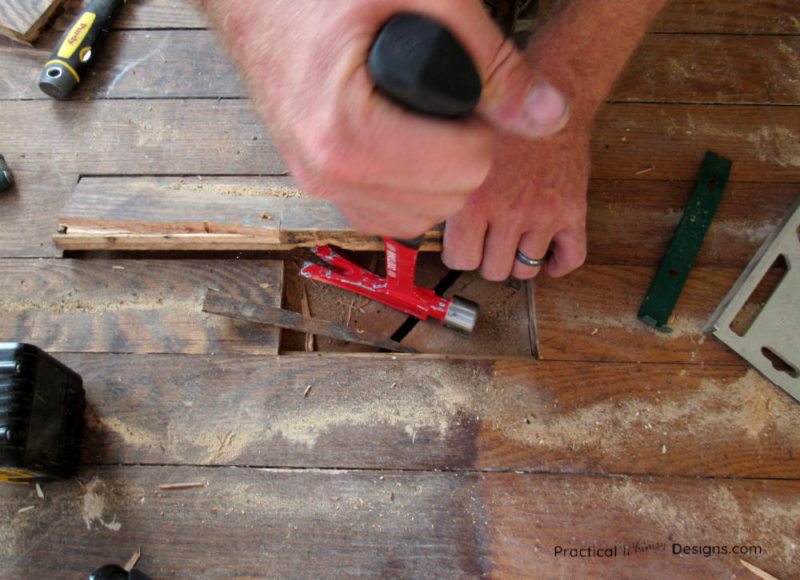
Step 2: Remove the Old Flooring
Removing the first floor board can be tricky. Here is the easiest way to do so.
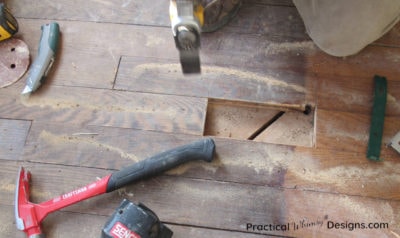
Once you have cut around each floor board, use a screw to screw down into one of the boards you are removing. Take the hammer and pull up on the screw to work the board out from between the flooring.
Now that you have your first floor board removed, take your flatbar or painter’s tool and hammer it under any additional boards you need to remove. Use them to pry out the rest of the damaged boards that you have cut around.
Step 3: Replace the Hardwood Floor Boards
Now it is time to measure the area you pulled up and cut replacement floor boards to fit.
Use a tape measure to figure out how long to cut your replacement flooring. Cut your flooring into correct lengths with a circular saw.
You will also need to remove the tongue and groove on one side and possibly both sides of the boards you are inserting in order for them to fit into the flooring space.
The absolute best type of flooring to use as a replacement is flooring of the same type and age as the flooring in your house. That is the only way to guarantee it will pick up stain like the rest of your floor. If you mix old and new wood, the boards may stain lighter or darker and the repair will be very noticeable.
The second best option is to find a store that sells reclaimed wood flooring of a similar year and type (i.e. maple, oak, etc.) This is hard to do, but could be worth it if you want to keep your wood floors.
If you have to replace the flooring with new wood you will have to rip up a good section of your flooring and try to scatter the new flooring in with the old. Or put the new flooring in an area that is not seen as much, like a closet. Pull the old wood from the closet and use the old hardwood to patch any areas that are more noticeable.
Pro Tip: Any time you do a remodeling project and have to remove old trim or flooring, KEEP IT. You never know when you might need it for a repair in your home.
We used flooring that we had removed from our closet when we turned our closet into the shower in our master bathroom remodel. As a result, the floor took the stain the same as the rest of our room and it is hard to tell where we replaced our boards.
Step 4: Attach the Flooring
Once your boards are cut and placed, use a nail gun and trim nails to nail them into the sub floor. We used 15 gauge trim nails in our floors.
Now, normally, in new hardwood flooring installation, you would nail into the tongue on the side of the board so that the nail is hidden. When patching in old flooring, you may not have access to the tongue. In this case you will need to face nail the floor boards down. Face nailing is the term used to nail into the top of the board. Nail two nails on the ends of each board and use nails throughout the center of the board to secure the flooring down.
If you want to hide the nail holes, you can fill them with wood filler and a small amount of sawdust from the flooring you cut. Using sawdust from the flooring you installed helps blend the stain in if you plan to stain the floorling later. The sawdust should stain the same color as the rest of your floor and the wood filler keeps the sawdust in place.
Another option is to glue the flooring down, but nailing it does keep it more secure.
Completed Hardwood Floor Repairs
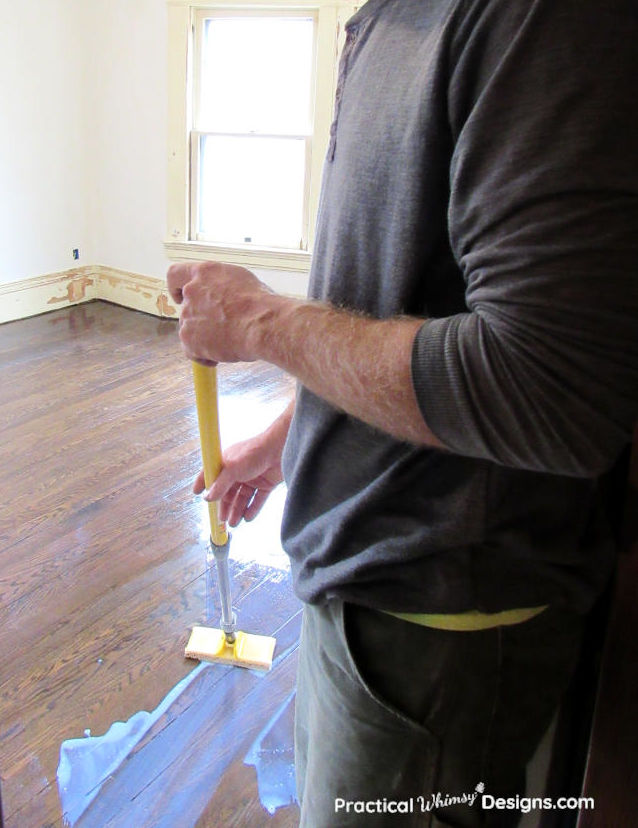
Now your flooring should be fixed and ready to be sanded and stained.
We used a floor drum sander to sand the old finish off the floor and then stained and finished it.
This is what the flooring looked like in the corner before we replaced it.
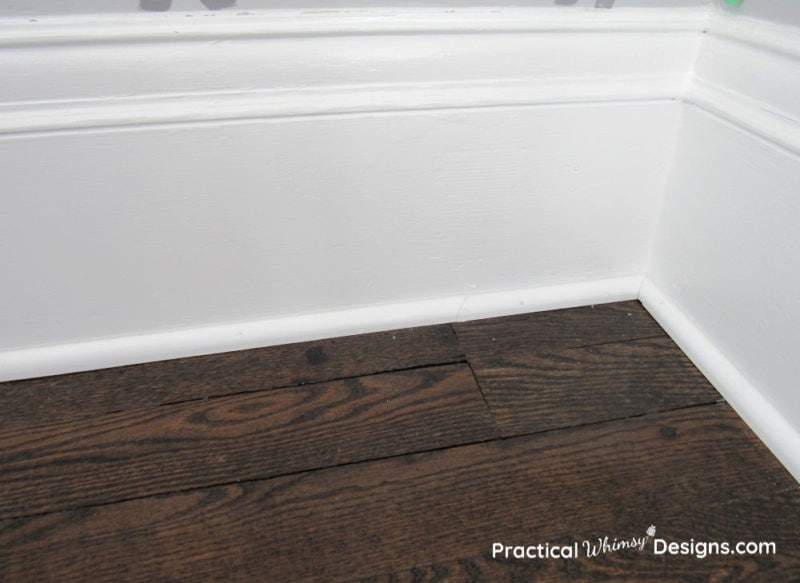
And here is the same section after we replaced the hardwood floor boards and sanded, stained and finished the floors. We also fixed the hole in our painted trim.
And here is the other area that we repaired.
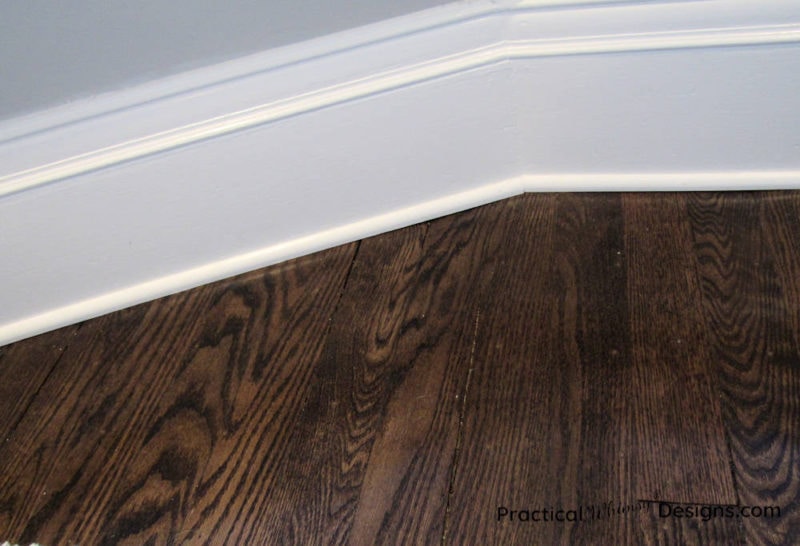
Both of these sections look much better without the holes in them and because we used the old flooring from the closet, the stain is the exact same color on the whole floor.
As you can see, it takes a little work and a few tools, but it is possible to replace sections of a tongue and groove floor. Replacing one or two planks in your hardwood floor is much cheaper than replacing the whole floor.
Looking for more flooring tutorials? Take a look at these other posts.
Want to remember this tutorial? Save it to your favorite home improvement board on Pinterest.
Want More Great Ideas? You Might Like These..


Are we friends on Instagram?
Follow @PracticalWhimsyDesigns to see more
behind the scenes projects